2026 Beartracks Issue 1 – Community News


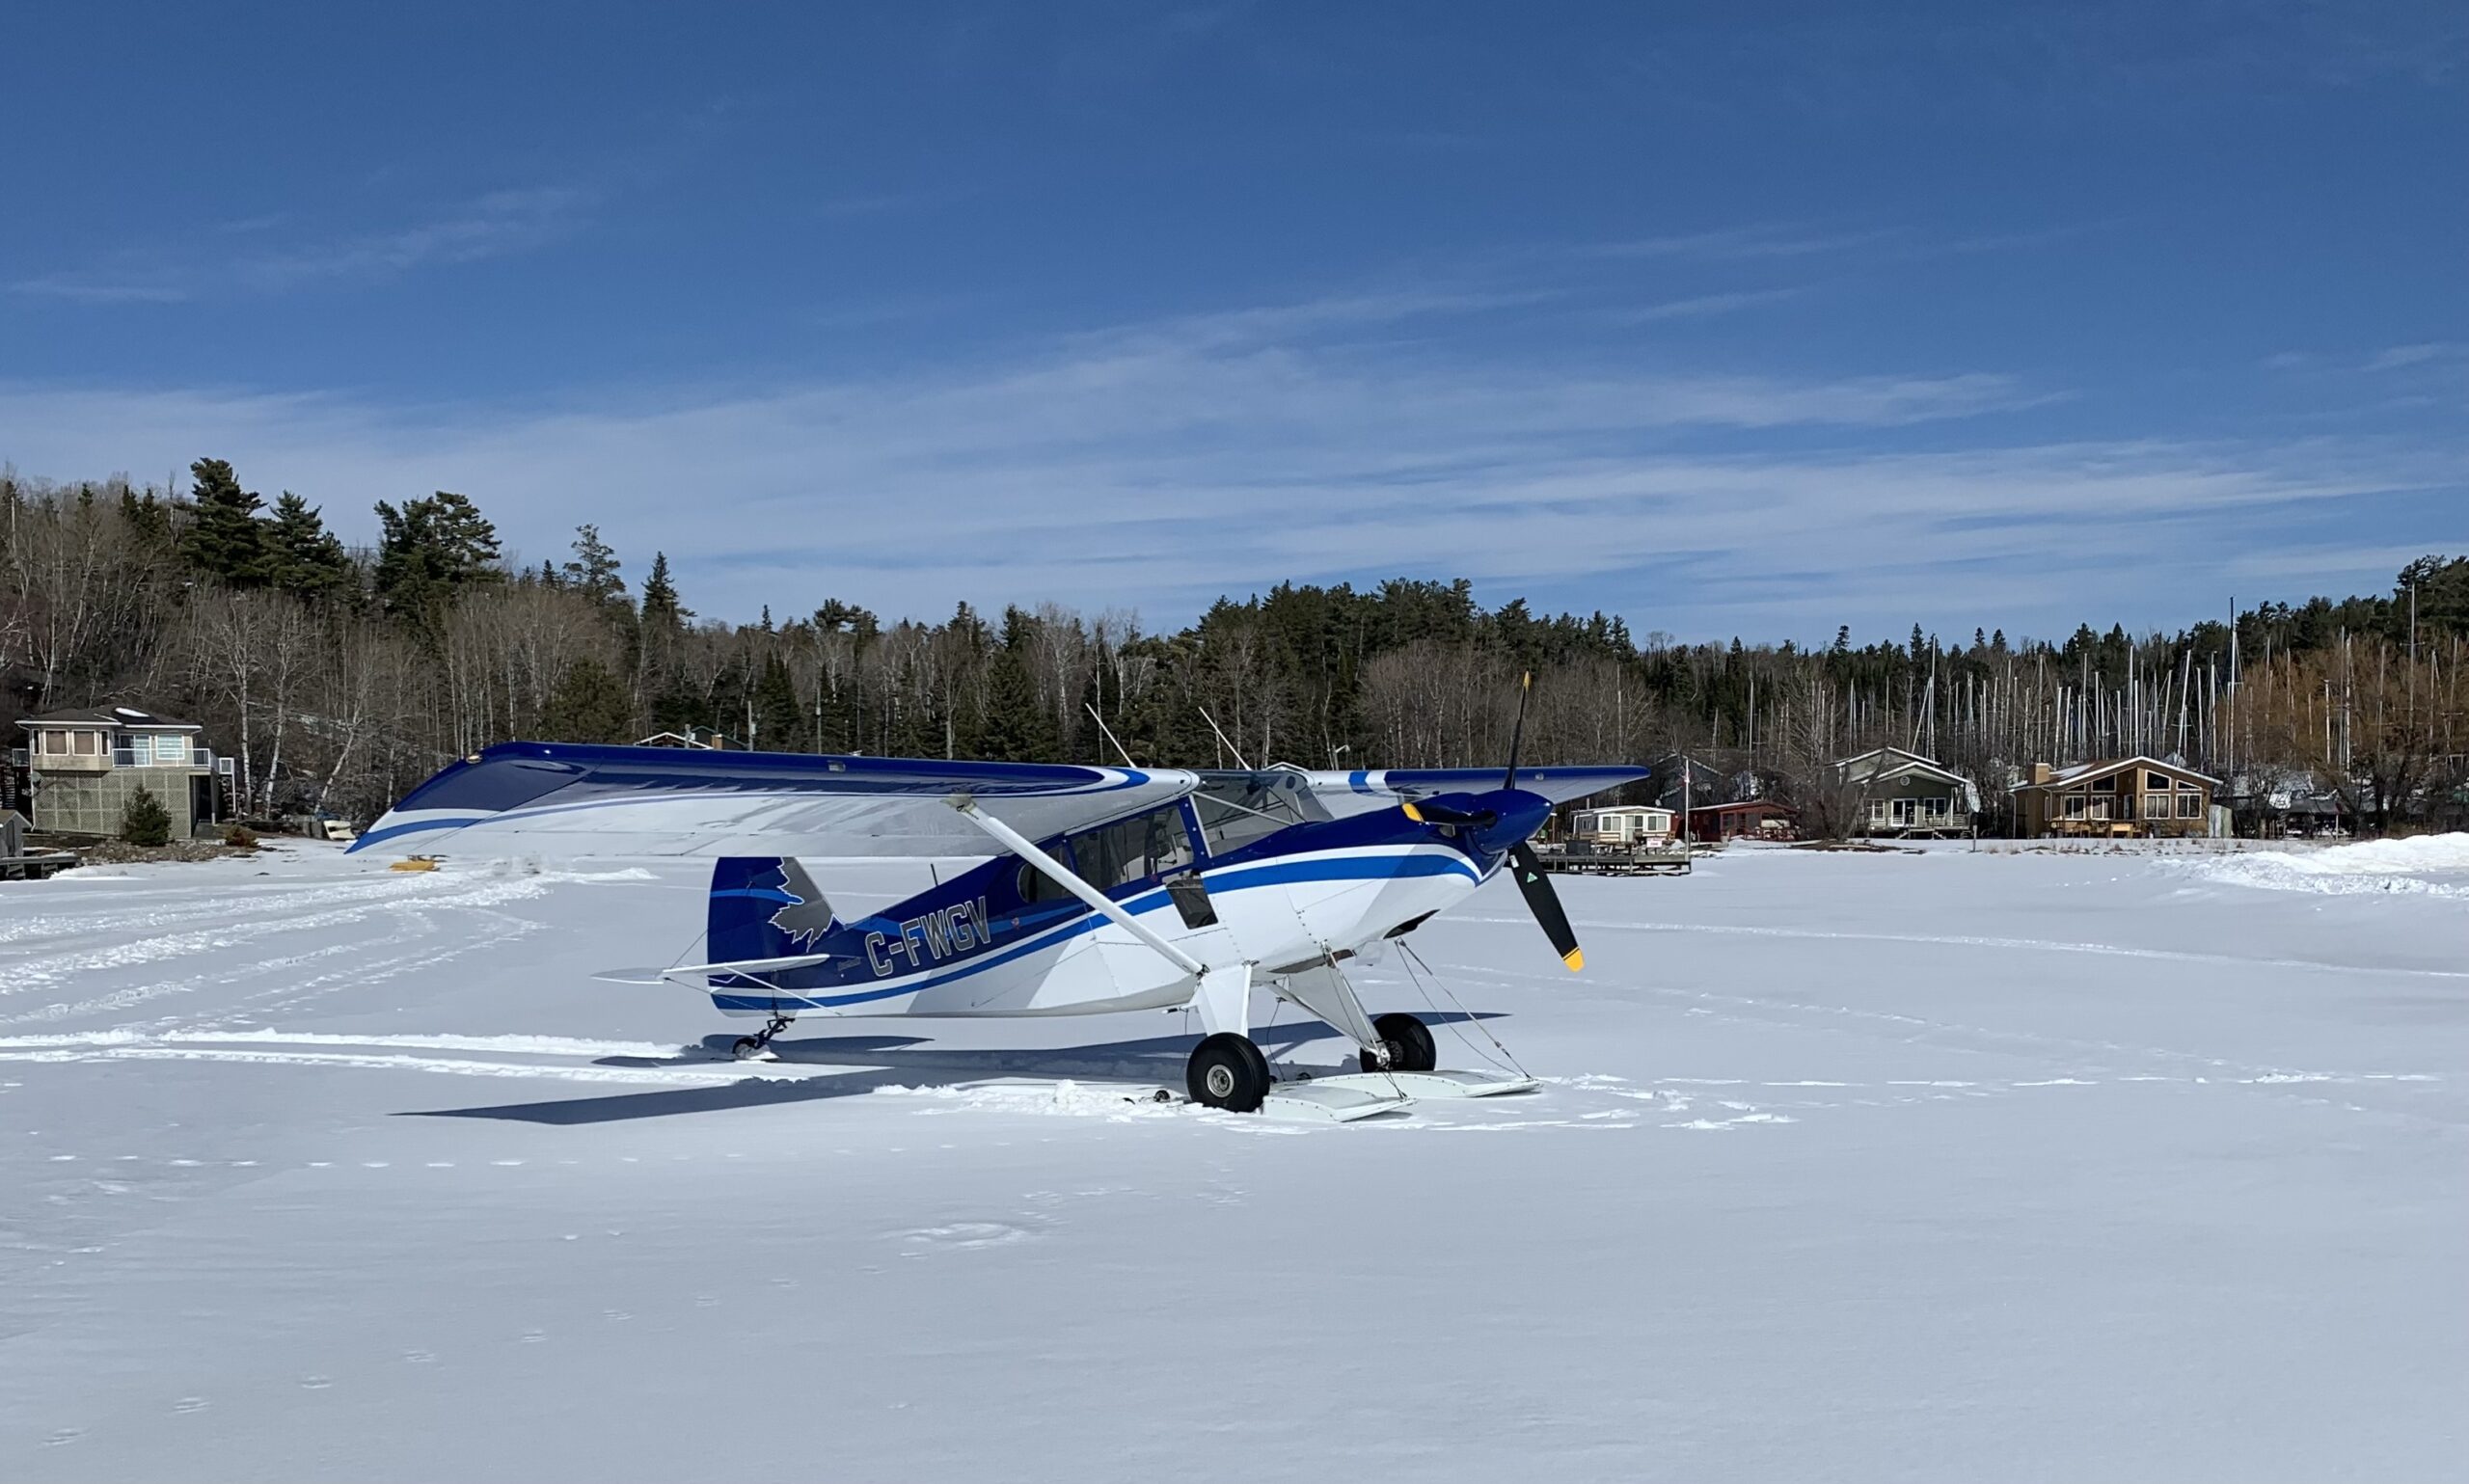
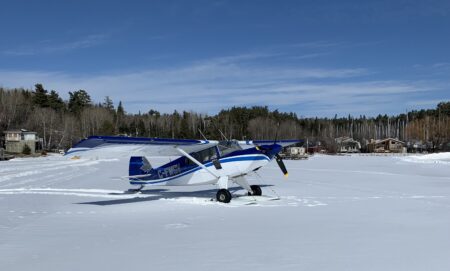
Cam Lawrence sends this photo of his Bearhawk 4-Place C-FWGV, which he operates out of his home strip, near Cooks Creek, MB, Canada. Cam is part of a group of builders including George Huntington who have completed three Bearhawks, with one more to go. Cam’s plane is built from plans number 815. He plans to have the plane at Oshkosh next year and I can’t wait to get a few dozen more pictures of it!

Mark Scott from Connecticut wrote in to say, “Just thought I would let you know I passed 1000 hours on my Bearhawk recently. I wonder how many Bearhawks have made it that far and who has the most hours on each model. Any idea?
I don’t have a very good idea unfortunately. Our plane N303AP has around 1400 hours. Write in if you know of any specific high-time Bearhawks. Mark started a discussion on this topic a couple of years ago but it could benefit from some updates! https://bearhawkforums.com/forum/bearhawk-general-discussion-news/90106-total-hours-summary

Rod Smith in Colorado started a forum thread about flight testing after he added vortex generators. Rod says, “Last winter I completed all the Phase 1 flight testing cards before I installed VGs. The only flight tests I redid after installation were the full stall series and landing and takeoff distances which all definitely improved. I have wondered how the VGs might impact other speeds such as Vx, Vy, and best glide. Needing to complete my Aircraft Operating Handbook, I decided it was time to redo the climb and glide speed tests. Early January provided a high pressure system with very still air for a few days. Winds aloft ranged from calm to 5kt. There was no detectable lift or sink flying early in the cold mornings. I spent three hours over two days testing at 5kt intervals. Testing was done at 2400#s 17.6″ CG. Interestingly Vy and Vg both decreased, Vg from 75 to 70. Vy from 65 to 62. Climb rate at 60 and 65kts was within 10 fpm so I tested at 62 and it was 25 fpm higher. Vx remained the same at 55k. I feel that these were accurate results, the air was very stable and I was able to hold the speed +/- 1kt. I feel like the results were quite a bit more reliable than my earlier testing which was done with less stable air and I had more trouble holding the exact speed. Did the VGs change Vy and Vg? Don’t have enough information to know, may have just been better testing. I found that flysto.net provided more accurate altitude numbers at 1 second intervals than I was able to record as the timer hit 60 seconds.”

Bearhawk builder and long-time operator Russ Erb has been writing some technical papers based on his Bearhawk experiences, which long-time Beartracks readers will remember. Russ has posted three papers on his website at http://erbman.org/technicalpapers/technical_papers_index.htm (scroll down to the bottom for the most recent three).
Russ says, “Two of the papers, ‘Takeoff Chart Development for a Homebuilt Airplane by Numerical Simulation’ and ‘Simplified Takeoff Model for a Homebuilt Airplane,’ were started as an article for the Trailing Edge (Russ’s newsletter), but grew to a technical level that made it suitable for submission as a technical paper. The one article was split into two papers due to AIAA’s presentation time limits. These papers cover the development of two takeoff ground roll distance models for my homebuilt Bearhawk, which as a homebuilt doesn’t come with performance data. I answer the question of if I think I could safely fly my airplane out of Lake County Airport (Leadville CO), the highest elevation public use airport in the lower 48 states. Will I actually try it? That would depend on having a strong reason to actually fly the long distance to Colorado.” We’ll have to ask the Blue Bell Ice Cream folks to open an outlet in Leadville so that Russ’s numbers can finally be validated. The third paper “Measuring In-Flight Deflection of Cable Actuated Flaps” started as an article previously published on the Trailing Edge, and was re-written as an AIAA technical paper.

Speaking of Bearhawks in the news, there have been some Bearhawk sightings in the EAA’s Sport Aviation magazine. We saw a blurb about Brooks Cone’s Bearhawk Patrol and in our last Beartracks issue we failed to mention Charles Albritton’s article in the October 2025 edition about a really-quick-build Bearhawk Five project in Brazil. Any time you see good Bearhawk coverage in a magazine or publication, take a moment to write the editor and thank them for it!

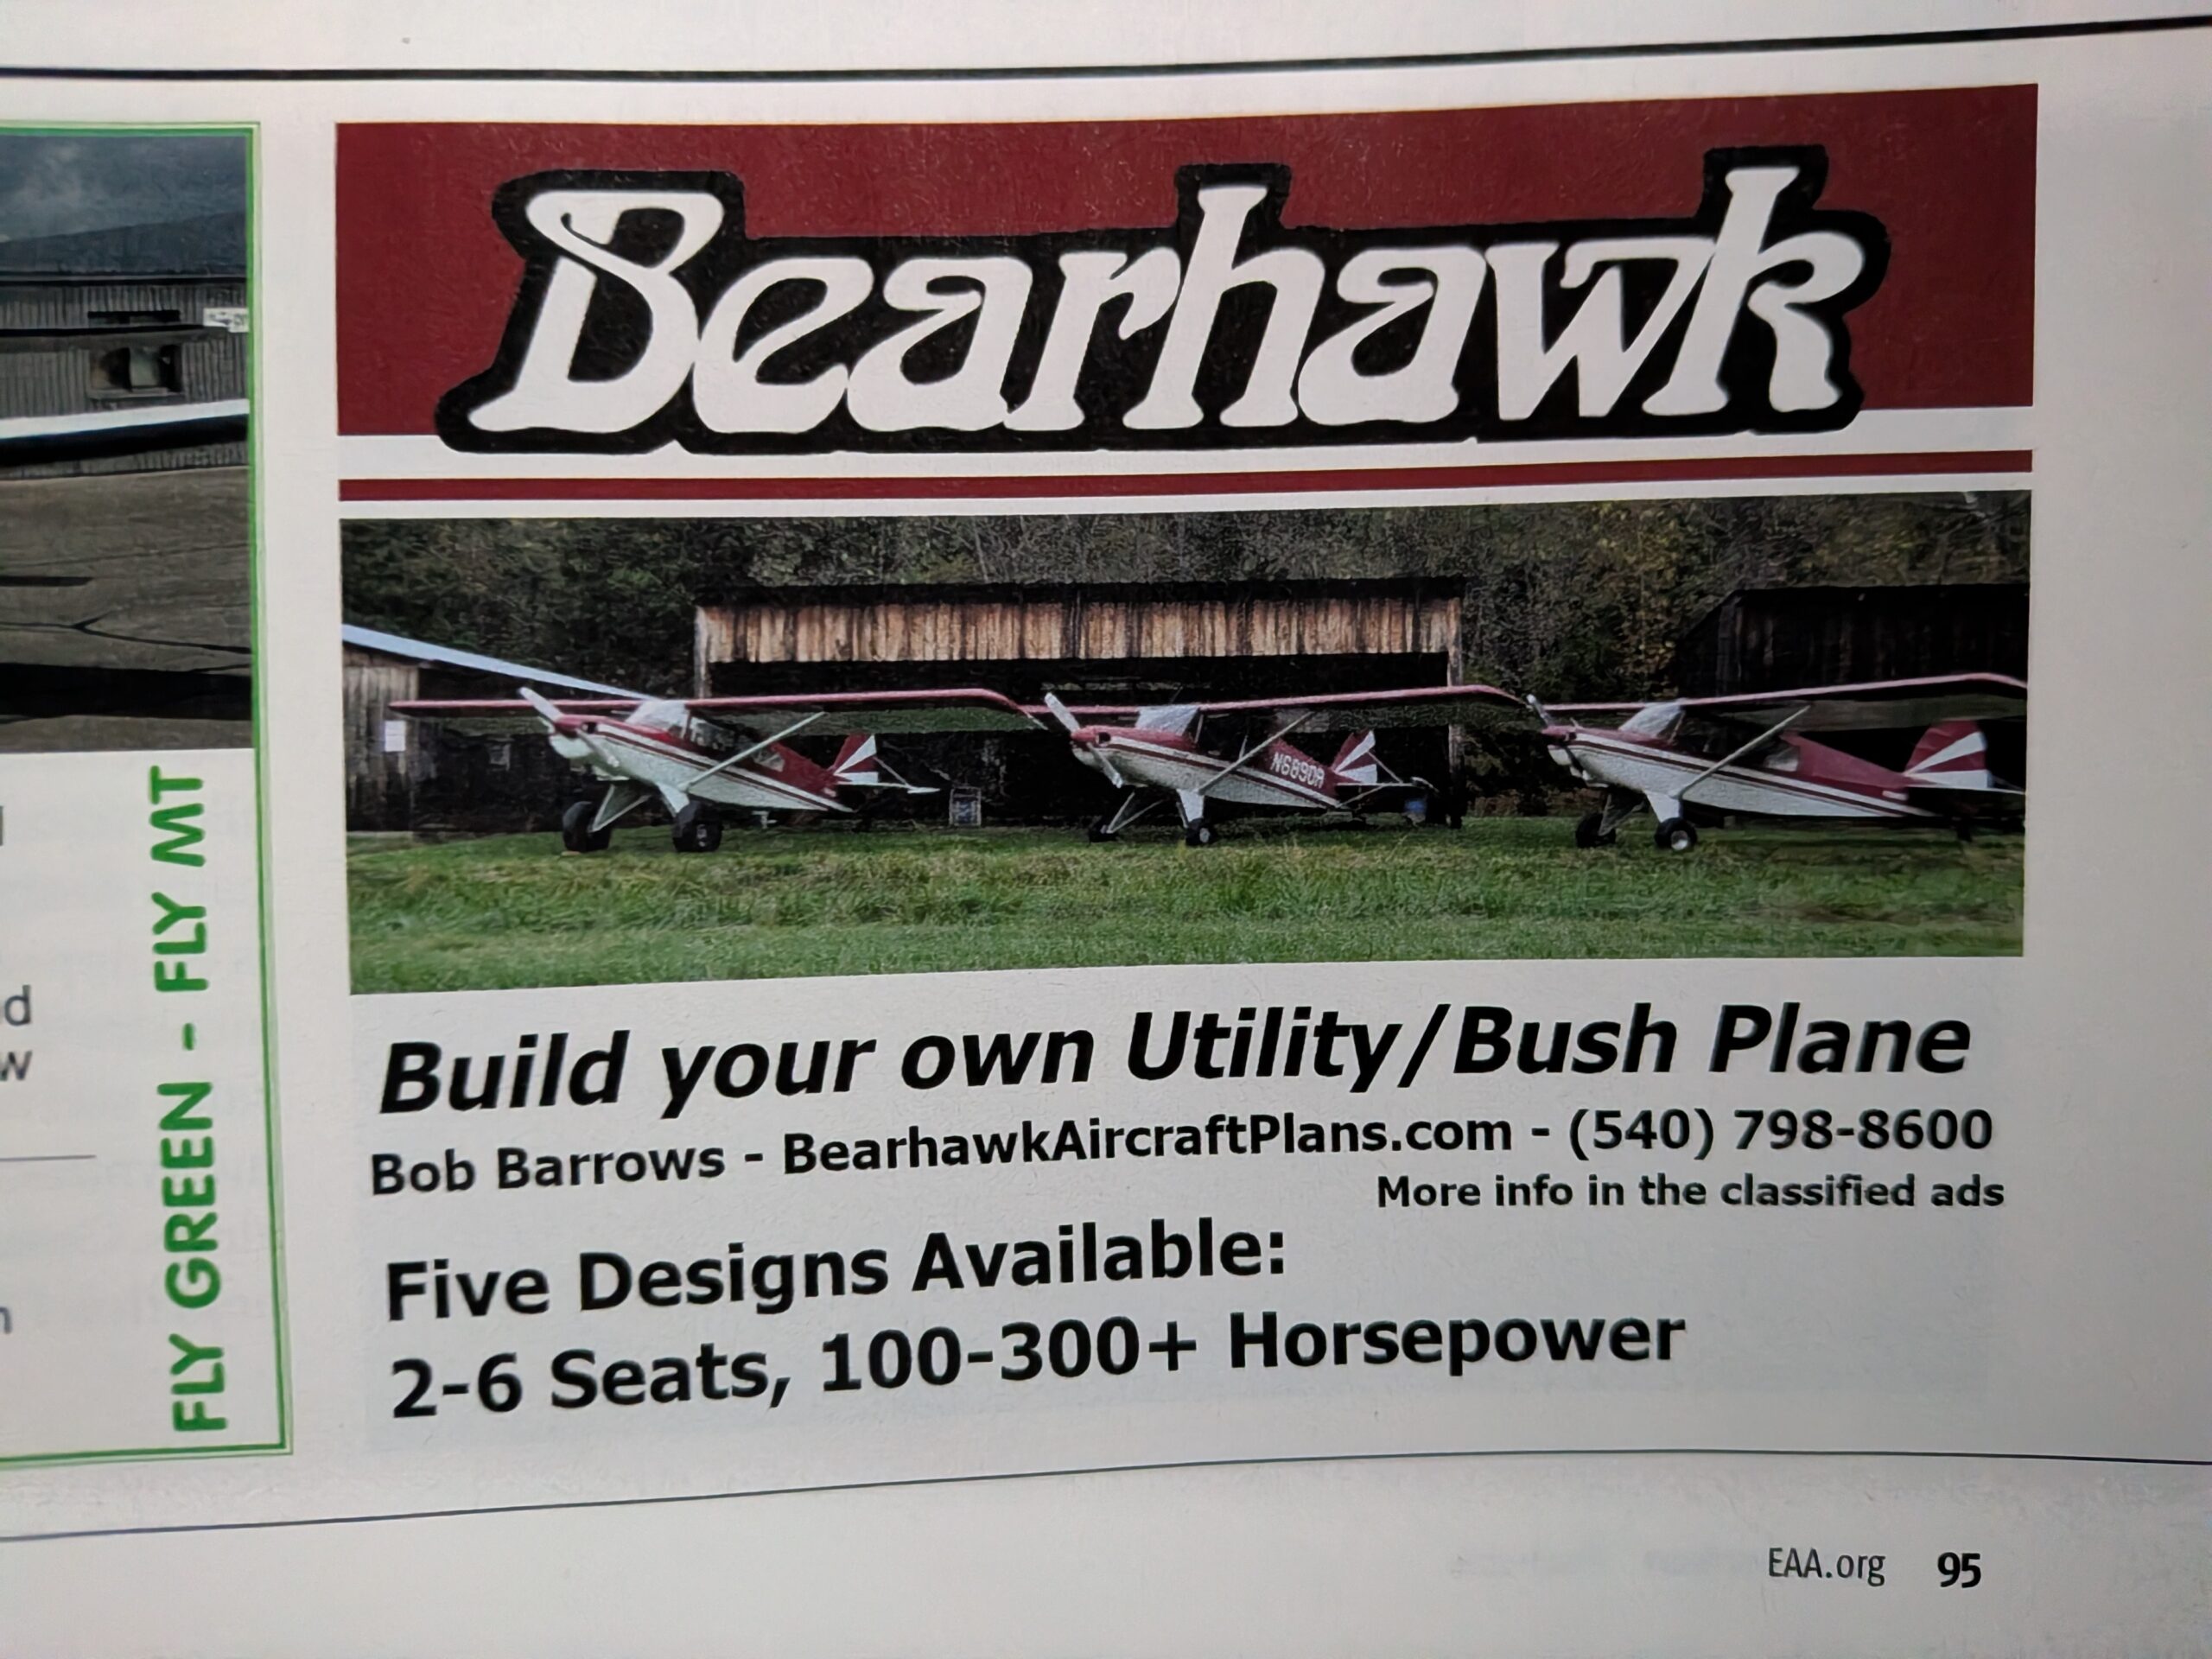
You might have also seen Bob’s advertisement in Sport Aviation:

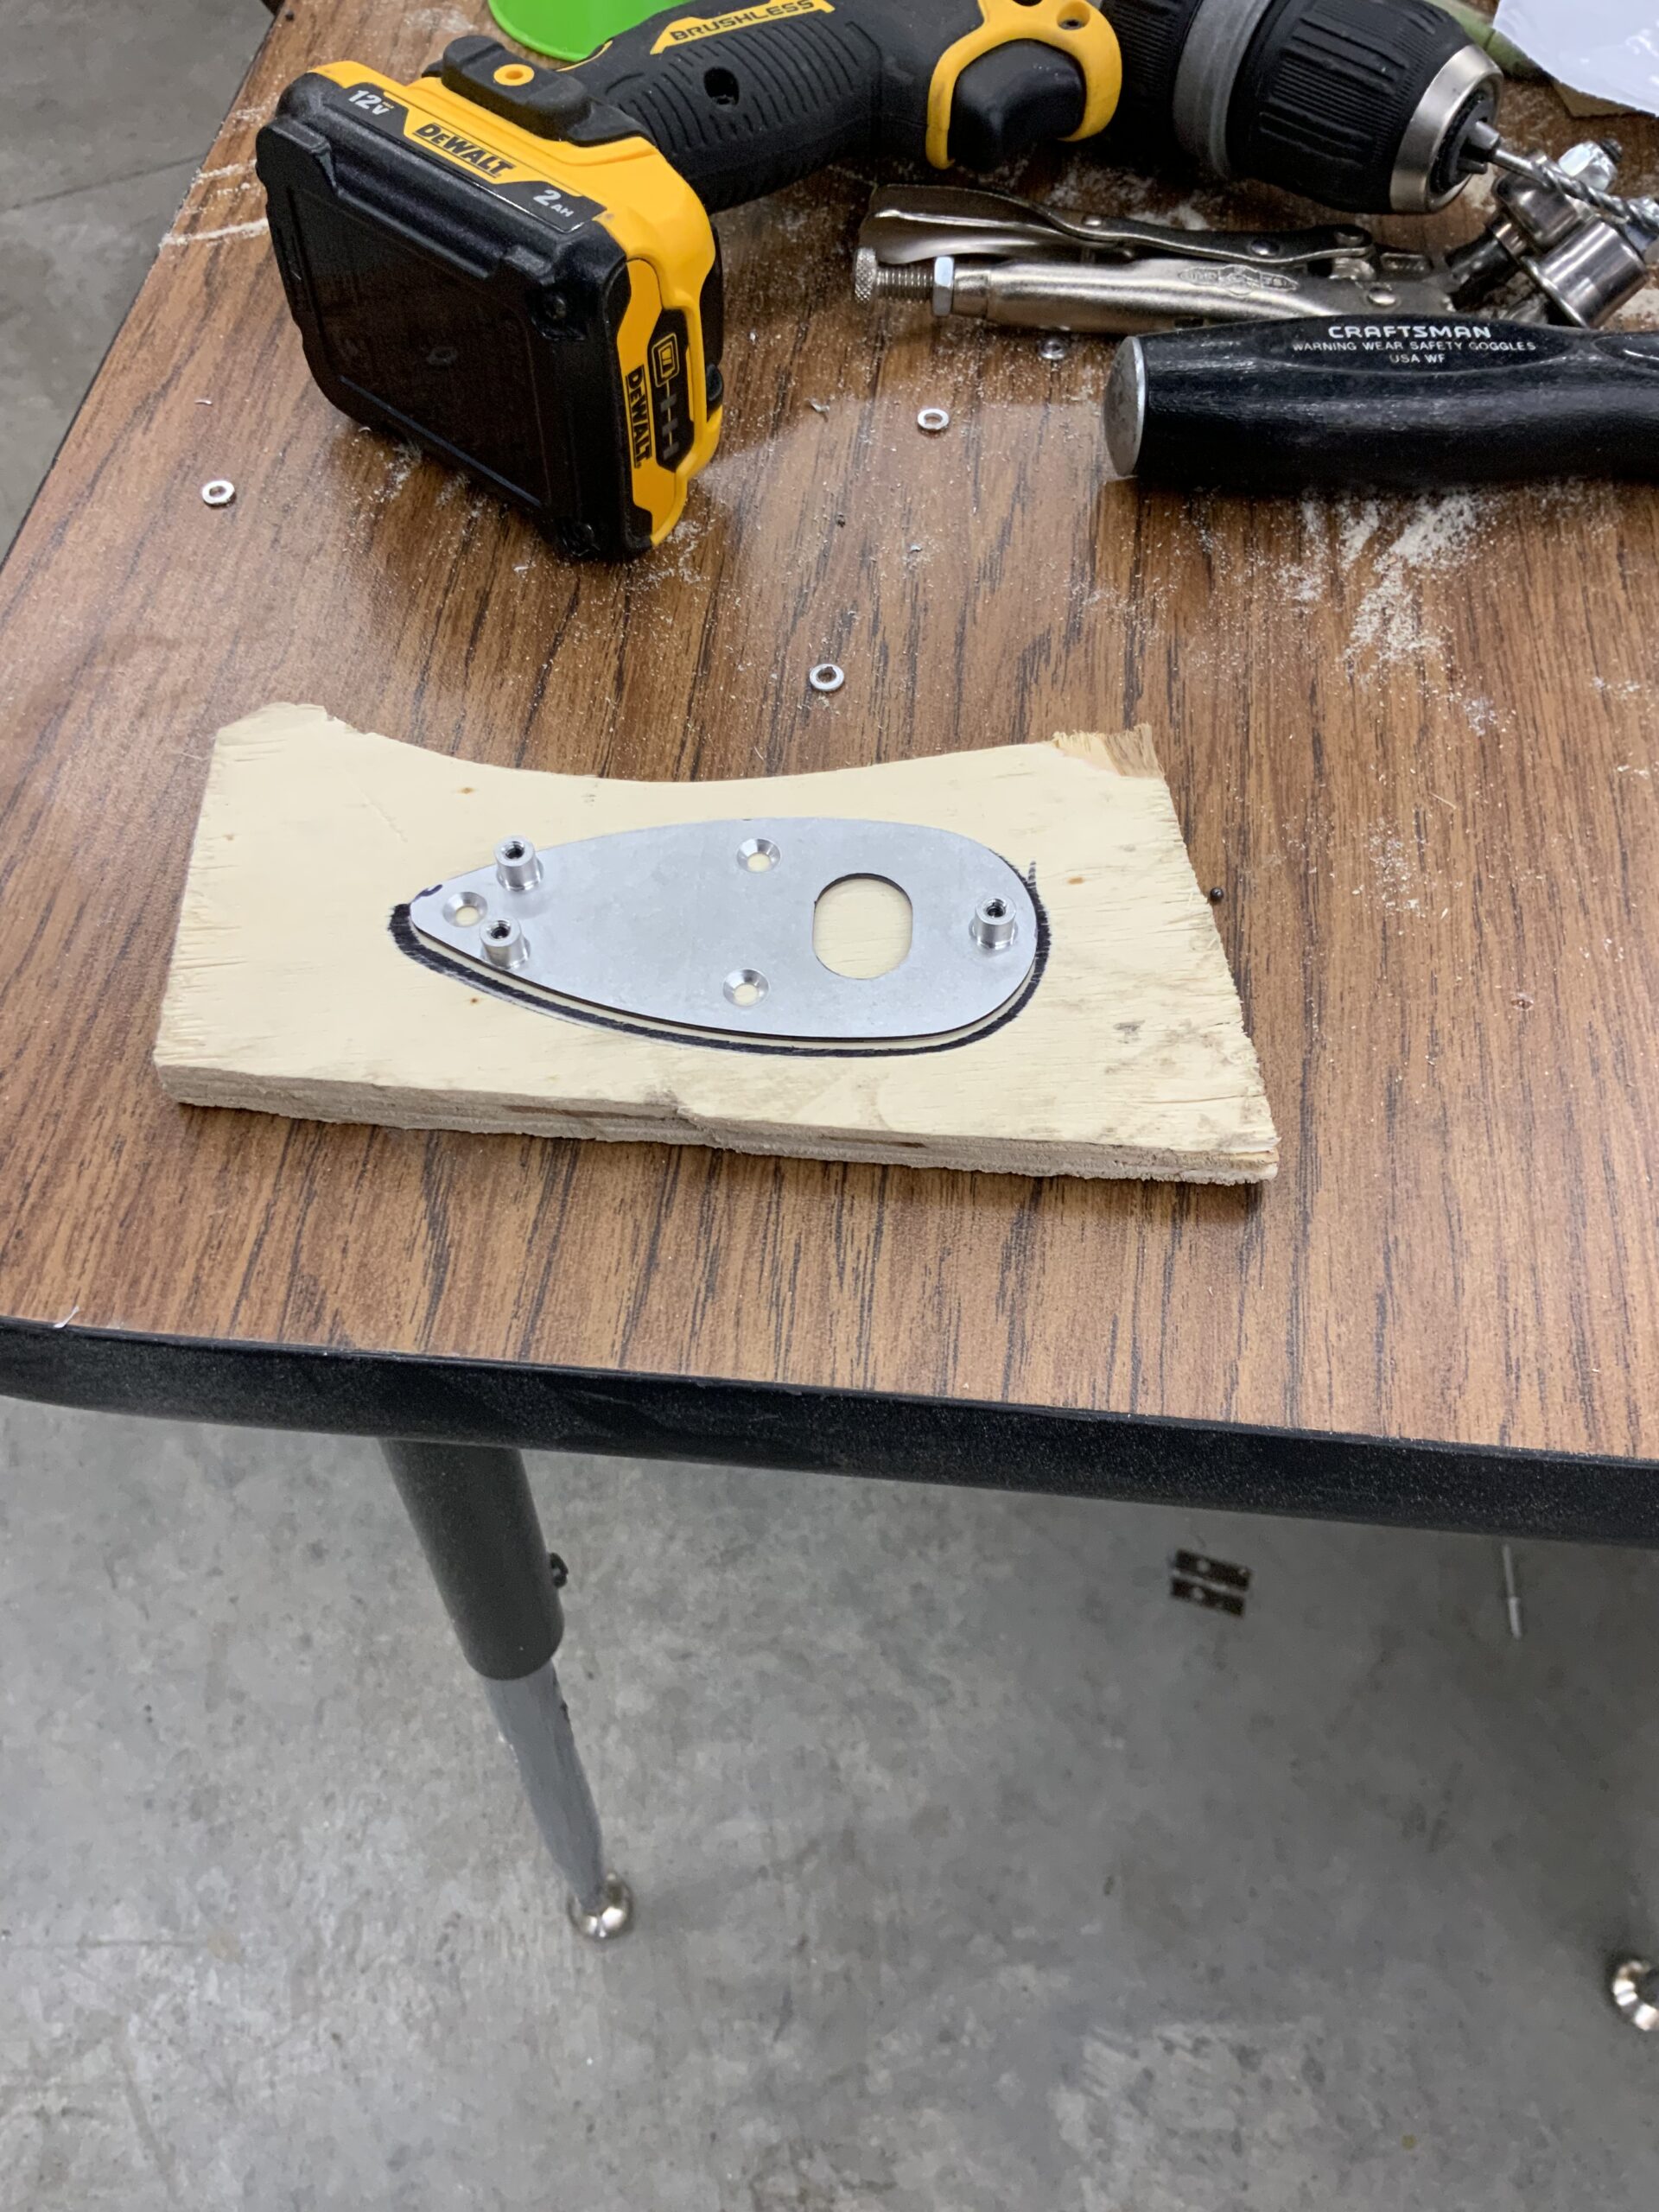
Have you ever found yourself wondering how to build a Bearhawk spar? If you have, there are some fantastic forum threads on the topic, including this recent discussion where Patrol builder Stan Timmerman does what he often does, replying to his fellow builders with very detailed technical answers, and color 8×10 glossy photographs with circles and arrows. Shout out to Stan for helping build such an amazing useful archive!


While you are on the forum, be sure to check out David Swartzendruber’s post about his custom folding rear seat for his Bearhawk LSA.


Are you interested in 3-D Printing? We’ve created a new category on the Bearhawk Forum website where builders can share files and ideas for tools and parts. Nev Bailey from New Zealand shared a clever printable cubby that turns the space under the front seats any of the side-by-side Bearhawks into a useful storage bin. Several builders have posted cool ideas.


Did you know Bob has a website again? Visit https://www.bearhawkaircraftplans.com/ to learn more about Bearhawk plans and parts available from Bob, including his newly updated brake master cylinders.


At the moment, there a few Bearhawks listed for sale on Barnstormers, including a Companion, three Patrols, and an LSA.

Light Sport Repairman Certificate – Inspect a Homebuilt You Didn’t Build

Source: Beartracks 2026 Issue 1, Jared Yates
As we know, our airplanes don’t get “Annuals”, they get yearly Condition Inspections. The way it has always been, if we build an airplane with an Experimental/Amateur-Built (E/AB) airworthiness certificate, the builder could apply for a Repairman’s Certificate under 65.104. The holder of a certificate of that type could complete the condition inspection for that specific airplane, listed by registration number, even if the repairman no longer owned the airplane. In my case, the repairman certificate for our first Bearhawk isn’t good for much at all, since the plane was destroyed in a fire. When we had the good fortune to purchase a completed and flying Bearhawk from our friend Mark to replace the first one, I was not eligible for a 65.104 Repairman certificate, complicating my yearly Condition Inspection needs. 
This year at Airventure when the new MOSAIC rules were announced, a very nice bonus regulatory change came along in the package. A person who owns an E/AB airplane could obtain a Light Sport Repairman’s Certificate with an Inspection rating under 65.107, and then that person could perform the Condition Inspection on any E/AB airplane that he owns. Notably, this isn’t just the newly-classified Light Sport airplanes, but any homebuilt, regardless of its performance capabilities. Also, while the Repairman must own the plane to do the inspection, any future planes that he purchases are also eligible for a Condition Inspection, without any additional classes. Before Oshkosh was over, I was in contact with Carol Carpenter at Rainbow Aviation to get myself into one of the 16-hour weekend classes so I could obtain the LSR-I certificate. I wasn’t alone, and Carol said her phone was ringing off the hook. In short order we secured the next open travelling slot and our local EAA Chapter 731 hosted the class in North Carolina in November 2025. 
The class itself was still mostly oriented towards the type of airplanes that we used to call LSAs, with Rotax engines and sail cloth covering. I did learn some things though, and most importantly, I got the completion certificate for the course and forwarded it to my local FAA FSDO. Unfortunately, the “big” FAA had not yet issued guidance to the local FAA guys about how to issue these certificates, so we entered a brief holding pattern. In early 2026 the guidance finally came along and I was able to obtain the certificate, but I wasn’t quite done yet.
As we know, our E/AB airplanes have “Operating Limitations” that are issued along with the Airworthiness Certificate. Back a few years ago, the FAA combined these two papers into a single document, with the certificate on the first page, and the Operating Limitations language starting right below that. I had gone through the process of updating these documents right after we acquired our second Bearhawk, mainly to update the Phase 1 testing area to its new home in North Carolina, instead of Texas, and to enable transition training. Those operating limitations specifically listed that the Condition Inspection could only be completed by a 65.104 Repairman or by an A&P Mechanic. Most folks will have this language in theirs too, and to be able to complete the Condition Inspection as an LSR-I, we need to have a new Airworthiness Certificate issued again, along with the corresponding new Operating Limitations language. 
As it was with the Repairman Certificate, when it came to the Airworthiness Certificate, the “big” FAA had not yet issued guidance to the local FSDO guys about how to execute the update, so I entered another brief holding pattern. Once the guidance was finally released, I had to log in to the FAA’s AWC portal and request a new Airworthiness Certificate, just as a builder of a new Bearhawk would today. This process is similarly tedious to applying for an Airman Certificate using IACRA. It requires some meticulous attention to detail to complete the fields and make sure everything is correct. Thankfully I was assigned a very accommodating and patient FSDO inspector, and together we made it through the process and got the new certificate with the new language. 
If you find yourself in a similar situation of owning a homebuilt that you didn’t build, I would highly recommend this process. The weekend course makes you eligible for the LSR-I which allows you to inspect planes, but only while you own them. If time and money are less limited, you can also opt for a longer two-week course, which gets you the LSR-M Maintenance rating. This Maintenance rating allows you to complete the Condition Inspection on planes belonging to others, even on a commercial basis. This is a big rule change compared to the previous requirement to have a full A&P certificate for this kind of work. A two week class is still nowhere near as long as an A&P program. I’m glad to see this regulatory relaxation, and I hope all the folks who get the certificate are able to operate responsibly and within their personal limits, so that maybe we can convince the FAA to give us more freedom and responsibility in the homebuilt world. 

Notes About Making the Fiberglass Windshield Fairing

Source: 2026 Issue 1 Beartracks, David Kragnes

Finally got to windshield install. Thought I might have some tips.
I have built 3 boats, don’t ask why I spent time on something that doesn’t fly, so when I got to the lay up of the windshield faring I thought I might have some worthwhile tips. The plans lay out good advice for prep of the windshield and cowling. 
I have used System Three so my thoughts focus on that type of epoxy. I believe West Systems behaves much the same. Once you have the windshield in place and the area taped and waxed, mix up about 1/5 cup of epoxy, the bottom 1/3 of an empty beverage can is the perfect mixing cup, plan ahead you don’t want to have to stop the process to empty more mixing cups, have the cut cloth strips and a 1 inch stiff bristle brush ready. Wear rubber disposable gloves. 
You don’t need to make a big mess. Lightly paint epoxy down the center of the area, press the first layer of dry cloth on the damp surface then use the stiff brush to stipple, dab a little at a time, epoxy into the cloth only wetting till it is clear. You want to see the weave. Remember the cloth is the strength so keep it as dry as you can and have the cloth turn clear. Now in a 70ish degree shop wait 2 hours. You can save the brush in a can soaking in MEK. 
Mix the next batch and repeat. Inside a day the epoxy will bond and letting it set a little will make the next layer easier. If you catch it just as it is firm but tacky, shop temperature will dictate the time. the next layer will stick nicely in place for you to stipple. Dry is good but cloth should go clear with no bubbles underneath, again being in the right time frame makes it easier as you can push down a bump if it is cottage cheese or so consistency. Start early in a day and this will all time out nicely. 
When you are happy with the number of layers again give it a couple hours. Now since you have been a good craftsman the last layer looks like you can see the weave, as you start sanding you don’t want the first thing cut to be the cloth (reducing strength), so mix a little epoxy with thickener, micro balloons or wood flour, till you have thin peanut butter, and paint a nice smooth finish on the surface. This will give a nice layer to do less sanding on. 

Creating a Wingtip Light Mount by Embedding a Plywood Piece

Builder David Kragnes has sent two useful topics. First, after reading about Mark Richardson’s process for making wingtip light mounts in the Fourth Quarter 2025 Beartracks, David sent in his process. He embedded a piece of plywood into the fiberglass permanently. David writes, “I traced around the light on plywood, 3/8 is thick enough, then cut with 3/16 inch extra around the shape. Next trace the shape to the fiberglass wing tip. Align with the center line, then use a die grinder to trim out the tip to the plywood shape. Be careful to make a tight fit. With the outside of the plywood flush, mix up some epoxy and thickening to make a filler around the inside and outside. Sand to smooth transition. Light, strong, way less work than making a form then a faring.


Alternative Wheels – Stolwheelz Adapters for Using UTV Wheels on the Main Landing Gear

Source: 2026 Issue 1 Beartracks

Ryan Spencer is the owner of the 4-Place Bearhawk originally built by Phil Johnson, N125PJ. Last month he made some videos and a Facebook post about using wheels intended for ground Utility Vehicle wheels. There is also a more detailed video of the installation here. Ryan sourced adapters from https://www.stolwheelz.com/ which bolt onto the typical Cleveland/Alaska Bushwheel style brake disk. That adapter then allows for bolting on a large variety of wheels that are manufactured for side-by-side utility vehicles. The machined aluminum adapter hub uses sealed ball bearings, unlike the tapered roller bearings that we see in more traditional aviation setups. There are several tire options, some of which represent a weight savings over similarly-sized Alaskan Bushwheels. Ryan is using a wheel that allows for a bead lock so that he can reduce the tire pressure. 

The Facebook post included some discussion about the structural loading of the wheels and the axle, and some questions about whether they would be as dampening as the ABWs, with their shorter sidewalls. These were good questions with good discussions, and while these wheels might not be universally better than the most expensive ABWs in every regard, they provide a significant cost savings and for many types of operation, might prove to be good enough and a good value. As a fellow Bearhawk operator I’m grateful to Ryan for sharing his experience. Compared to even traditional airplane tires and not ABWs, today’s price at Aircraft Spruce for just a single 850×6 inner tube is $227. One 8.50×6 tire is $377. I’m interested to keep an eye on Ryan’s experience with these adapters, and I hope they will serve as a viable alternative.

Beartracks 2026 Issue 1 – Technical Q&A with Bob

Technical Q&A With Bob
Builder Matthew Brennan asks about Bob’s use of aramid composite floorboards in his latest plane, instead of aluminum. Matthew says, “Curious if the Kevlar floorboards “sound” any different than aluminum when in flight.  Is “drumming” reduced?”
Bob says, “I wear ear plugs when I fly and it’s hard to tell for sure due to all of the rest of the noise, but the composite floorboards should help dampen some of the noise.”

Builder Collin McDonald noticed some ambiguity about the hardware to use when securing the round tailwheel spring to the fuselage, and made a post on the forum to seek clarity. Should those be AN5 or AN6 bolts? 
Bob says, “We’ve used 5/16 and we’ve used 3/8 bolts there, and we’ve never had any problems with those bolts. We’ve used 5/16 on the lighter planes and 3/8 on the heavier planes.” Bob has used 5/16 bolts there on his own planes, and adds, “That stinger is hardened steel. It’s a really big job to drill those out. You don’t want to have to do that.”

Beartracks 2026 Issue 1 – First Flight Updates

First Flights

Mark Richardson’s Bearhawk 4-Place in Canada, C-GPFG

Mark’s scratch-built airplane has a Lycoming 540 with Bendix fuel injection and a Garmin panel. His friend made a video about the first flight, which is here:

Here is a link to a thread on the forum in case you’d like to ask Mark any questions or follow along with more updates:
https://bearhawkforums.com/forum/bearhawk-general-discussion-news/100232-scratch-built-bearhawk-4a-c-gpfg-first-flight

Al Lux’s Bearhawk LSA N308AL
Al lives in two different places, but before he went to his winter home, he successfully flew his new Bearhawk LSA. We eagerly await his arrival back at his other home so that he can resume flight testing and tell us more about his plane!

Frank Johnson’s Bearhawk LSA N964BW
Frank writes:
My impressions of the Bearhawk LSA after 20 something hours of flight!
It’s been a long 5 years of building, even though that’s the fastest I’ve completed a build yet. Not sure if that’s a testament to the kit or my growth as an EAB builder, Ha ha.
Now, I’m a low time pilot and doing my best to describe the experience, so keep that in mind. My flight experience is limited mostly to Experimental aircraft, Van’s RV6(200hrs), some Cub and Champ time, with 600 plus total time. Most recently in a Rans S7s(300hrs), Baby Ace (55hrs),and Aeronca 65TC(45hrs).
First flight was uneventful even though the plan was to do a few crow hops, it was off the ground quickly and I left power in too long for just a hop. So, around the pattern we went. There were no bad tendencies, no heavy wing, tracking was straight. Touchdown was a bit fast as planned since I hadn’t done any stall work. Approach was around 50 mph, once over the threshold and low I let the speed bleed off and mains touched, the tail settled down shortly after that. 
From the beginning my plan was to do the task based in phase one using the EAA test cards. With the LSA several of the test are not applicable, no flaps, fixed pitch prop, no EGT, CHT. Its pretty simple plane.
Sometimes working on several test in a day, as many as three flights a day. Almost like a job, yikes.
Stalls are very subtle, power off around 30mph indicated it kinda mushes down as long as the ball is centered. With some yaw a wing drops, but nothing drastic, and recovery is instant when dropping the nose ever slightly with a touch of power. With this, approach speed is comfortable around 45mph. 
Slips! Now they are impressive! Its like an elevator ride when doing an aggressive slip. Then soon as you straighten out the sink stops. What an awesome tool for short field landing. I’ve even come in fast on approach and slipped in ground effect to bleed speed. 
Departures are short! Loaded, full fuel, off the ground in no wind is around 250ft. Remember, I’m pretty much at sea level 380ft field elevation. I’m certain this can be much shorter but being over pitched, 44″, in the prop and only make 2250rpm static and 2550 at full throttle. Current rate of climb is 900-1000fpm depending on load and density altitude. Current WOT airspeed is 125mph+- at 2550rpm. I’ve seen 135mph plus, but it was rough air and not sure how accurate.
I’ll be changing the prop to a pitch of 38-40″ later. Target rpm range is 2600 static and 3000wot. My personal goal is sub 100ft roll departure and 1500-1800ft roc with economy cruise100mph and WOT of 125mph.
My LSA is basic, O200 with a Performance Propeller. Empty Weight 785lbs. No Alternator, so I have what’s called a Total Loss Electrical System powered by an EarthX etx680c. With an AV30e, Trig-TY91 com radio and Starter. (With no engine driven Charging system the plane is not required to have ADS-B out for operation under Class B veil.)
Mechanical oil temp, oil pressure gauge, tach, and back up airspeed indicator.
The biggest challenge has been finding accurate oil temp and pressure gauges. I’ve gone thru a few. So much that I called GRT avionics and purchased another EIS4000. 
The calculated hourly draw on the battery is now 600 milliamps (approximately 7.2 watts), this isn’t counting transmitting on the Trig or what the starter uses. The AV30E and EIS4000 monitor system voltage and is displayed continuously. This allows many hours of operation without recharging the battery, estimate is 8 plus hours. 
In preparation for long cross country trips I’ve acquired and 30watt solar panel that has a controller, there are settings for different battery types on said controller. This will keep the battery topped off and allow charging my phone and iPad. It will be mounted in the left rear corner of the skylight, dimensions are 14″ x 14″ and weight is 1.6lbs. 
I’m looking forward to flying adventures in the LSA, its going to be a great Day VFR traveling machine.
https://bearhawkforums.com/forum/completed-flying-bearhawks/100002-n964bw-flight