Source: 2026 Issue 1 Beartracks, David Kragnes
Finally got to windshield install. Thought I might have some tips.
I have built 3 boats, don’t ask why I spent time on something that doesn’t fly, so when I got to the lay up of the windshield faring I thought I might have some worthwhile tips. The plans lay out good advice for prep of the windshield and cowling.
I have used System Three so my thoughts focus on that type of epoxy. I believe West Systems behaves much the same. Once you have the windshield in place and the area taped and waxed, mix up about 1/5 cup of epoxy, the bottom 1/3 of an empty beverage can is the perfect mixing cup, plan ahead you don’t want to have to stop the process to empty more mixing cups, have the cut cloth strips and a 1 inch stiff bristle brush ready. Wear rubber disposable gloves.
You don’t need to make a big mess. Lightly paint epoxy down the center of the area, press the first layer of dry cloth on the damp surface then use the stiff brush to stipple, dab a little at a time, epoxy into the cloth only wetting till it is clear. You want to see the weave. Remember the cloth is the strength so keep it as dry as you can and have the cloth turn clear. Now in a 70ish degree shop wait 2 hours. You can save the brush in a can soaking in MEK.
Mix the next batch and repeat. Inside a day the epoxy will bond and letting it set a little will make the next layer easier. If you catch it just as it is firm but tacky, shop temperature will dictate the time. the next layer will stick nicely in place for you to stipple. Dry is good but cloth should go clear with no bubbles underneath, again being in the right time frame makes it easier as you can push down a bump if it is cottage cheese or so consistency. Start early in a day and this will all time out nicely.
When you are happy with the number of layers again give it a couple hours. Now since you have been a good craftsman the last layer looks like you can see the weave, as you start sanding you don’t want the first thing cut to be the cloth (reducing strength), so mix a little epoxy with thickener, micro balloons or wood flour, till you have thin peanut butter, and paint a nice smooth finish on the surface. This will give a nice layer to do less sanding on.
 The windshield is fitted in place after the boot cowl is made and installed.
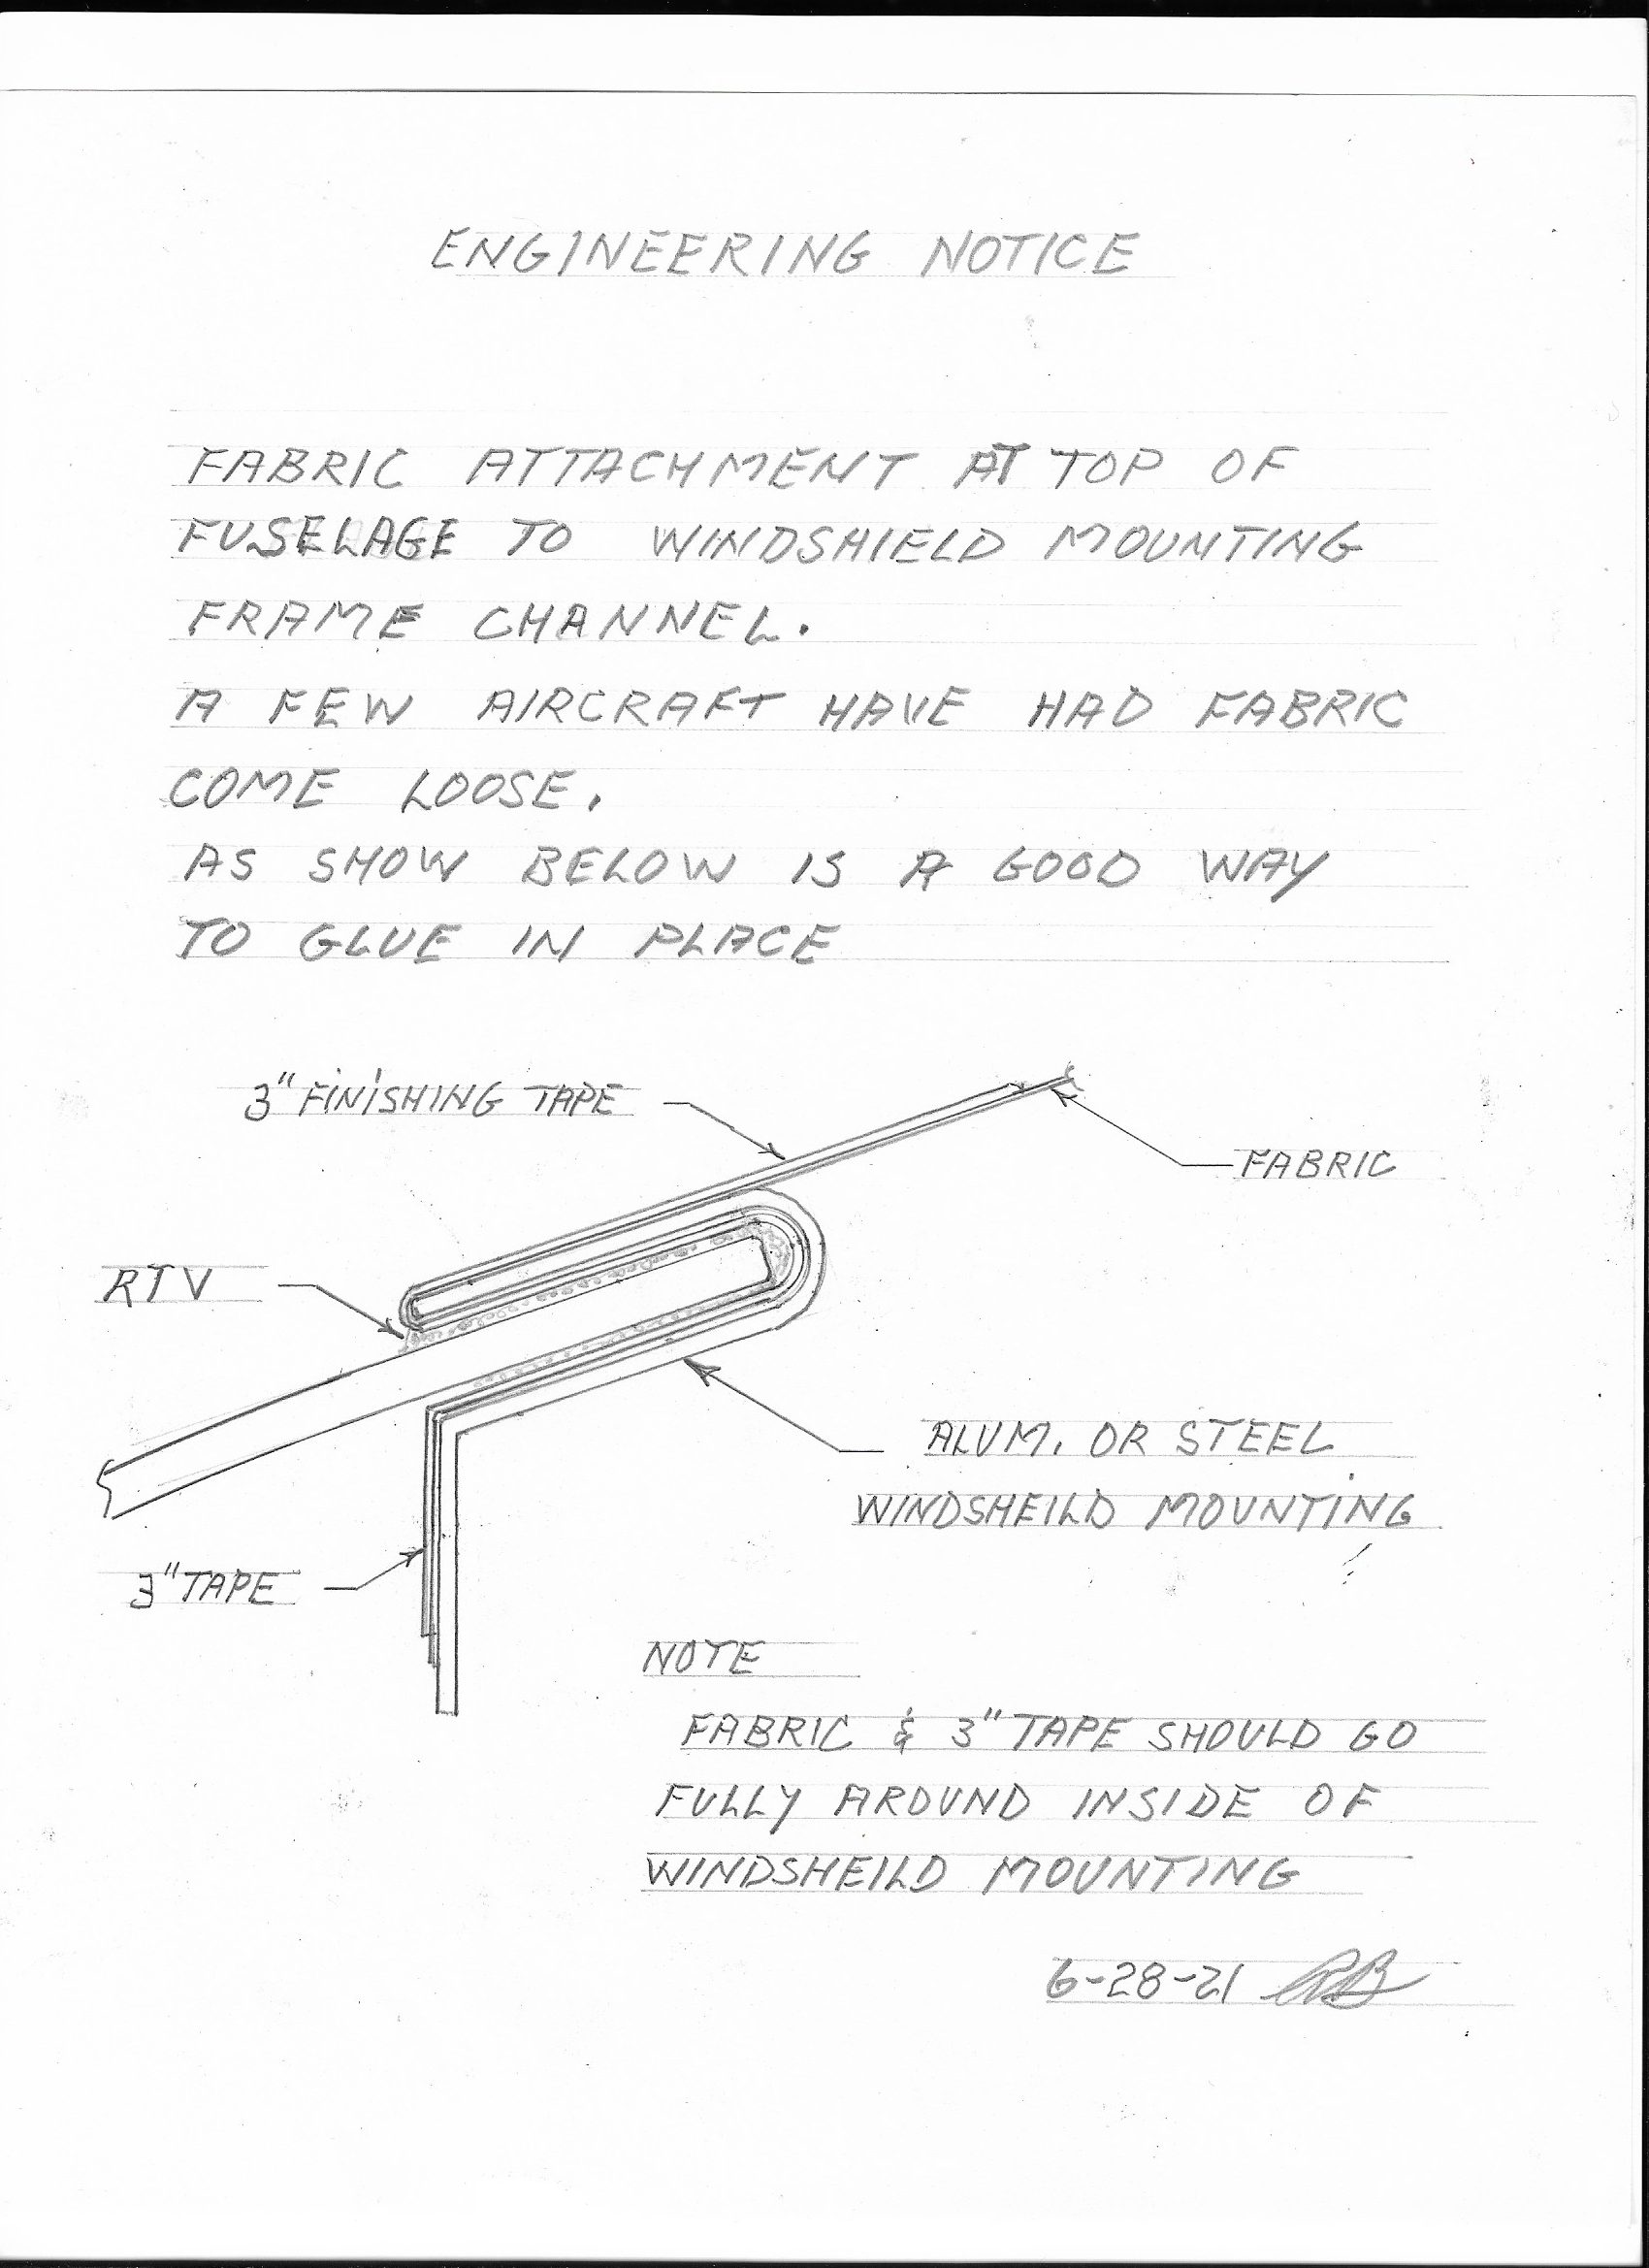
 The windshield is held in place at the top by sliding into the windshield mounting (section T-T dwg. 16), by tabs which are welded to vertical T14 tubes at section B-P, and by a fairing and backup strip at the intersection of the windshield and the boot cowling.

 As shown in the photo the fairing goes from the T14 tube around the front of the windshield and back to the T14 tube on the other side of the fuselage.
 The back up strip of .032 5052 H32 aluminum is first bent about 110° on a brake, then stretched and shrunk as needed to match up with the windshield and boot cowl. Both the back up strip and the fairing are attached to the boot cowl using #6 screws about 3″ apart with nut plates on the boot cowl.