Safety Update 2015-1: Flap and Aileron Hinge Pocket Cover Plates

ENGINEERING CHANGE NOTICE
Subject: Flap and Aileron Hinge Pocket Cover Plates
Applies to any of the Bearhawk types that have the covers installed.
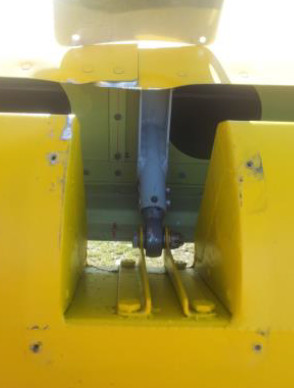
Recently a Bearhawk 4-place had a flap retraction problem on one flap because the pocket cover plate jammed into the top wing skin, and would not allow the flap to retract. The plane was still flyable, but this problem needs to be addressed.
FLAPS: On the top of the flaps the cover plate should only be deep enough to cover the gap from the flap spar to the back of the wing skin, about 1 ¼ inches, with the flap up.
AILERONS: On the aileron the cover needs to be much deeper, so that with full down aileron, the front of the cover is still under the wing skin.
15q3zbAdditional information:
Bearhawk builder Jonathan Battson experienced a case where his flap hinge pocket cover got stuck under the upper wing skin when he attempted to retract the flaps after takeoff, causing one flap to stay extended at the third notch. He writes “The jam did considerable cosmetic damage to the top skin of the wing. It was the pocket where the skins join which jammed, to the combined thickness of the two sheets of 0.025″ Aluminum, plus stiffener section.”
Jonathan also adds:
“The Bearhawk can easily be controlled with 1 flap fully deployed and the other fully retracted, even as fast as 75 KIAS. The control inputs necessary to remain straight and level (or climbing at full power), are only marginally out of balance – just enough that you would certainly notice something is wrong. You most definitely are not fighting for aileron authority, as many would have you believe, all that is required is just a little rudder and a little opposite aileron to continue in balanced flight.”
Horizontal Strut Fittings Safety Update

Source: 2014 Beartracks, Mark Goldberg
14q2nApplies to Four Place Bearhawk, Kits Only.
May 8, 2014
A few days ago, a customer had a failure of one horizontal stabilizer support struts in the air. Fortunately, the Bearhawk can fly without the strut on the front and he was able to land safely. Bob Barrows flew his Prototype I Bearhawk at first without the struts, but later decided that the additional safety of the struts merited installing them.
Several years back there was a change in the design of the struts at the top where they bolt to the bottom of the leading edge tube of the horizontal stabilizers. The issue was fatigue from vibration caused cracking at the place where the streamline tubing was bent at an angle to mate up to the bottom of the horizontal stabs. At that time, a change was made to run fillet weld across the area where the bend was thereby adding material and strength to the area where there had been a problem. Also, a doubler washer was welded to the bottom of the bent part to reinforce the area where the attach bolt is.
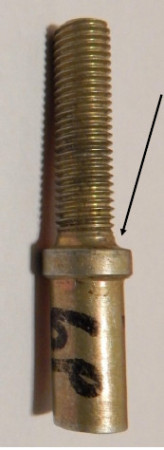
So since that time we have been aware of what vibration can do to the tail of the plane in general and theses struts in particular. The failure of this strut was in a different area. The “bolt” failed that is welded to the bottom of the strut to thread on the AN665 clevis end. The AN490 “bolt” failed where the threads ended.
Two factors contributed to make this problem occur. First, the owner reports that the welding extended past the “shoulder” of the AN490 onto the threads thereby weakening them. In addition, this strut was a little short so the owner made a longer piece to use instead of the AN665 clevis end. This positioned the end of the threads further away from the attach point at the lower longeron making vibration worse. This was a one time occurrence that no one else has seen. It is possible that the AN490 had a manufacturing or material defect despite being a certified AN fitting. We are issuing this Service Notice as a precautionary measure.
I have inspected five of the support struts – three I have on hand and the two on my Bearhawk. None have weld bead beyond the shoulder of the AN490. So it would appear that this might not be too prevalent on the parts out in the field. Please look at the picture included that shows the AN490 before welding. Where the threads transition to the shoulder is a little curved radius – it is not a sharp corner. Don't confuse this with weld bead.
We ask you to do two things: inspect that lower part of the support struts to see if the weld bead extends onto the threads. If it does, the strut will need to be fixed. Also, Bob asks that at least 1/2” of threads be engaged into the AN665. Having the threads closer to the attach tab on the lower longeron diminishes vibration and potential fatigue. The crack on the strut that eventually failed started as a small crack and grew over time. So please give a thorough inspection to this part before next flight and during your preflight inspections.
If you find that the weld bead extends onto the threads – or your struts are too short to get 1/2” thread engagement, please contact me to make arrangements to get your strut fixed. Bob has designed a fix that we will do for you if your struts are short.

This article is available for purchasers of 2014 Beartracks access. Click here to purchase access or validate your prior 2014 subscription. Multi-year bundles are available here.