Source: 2024 Q4 Beartracks, Brooks Cone
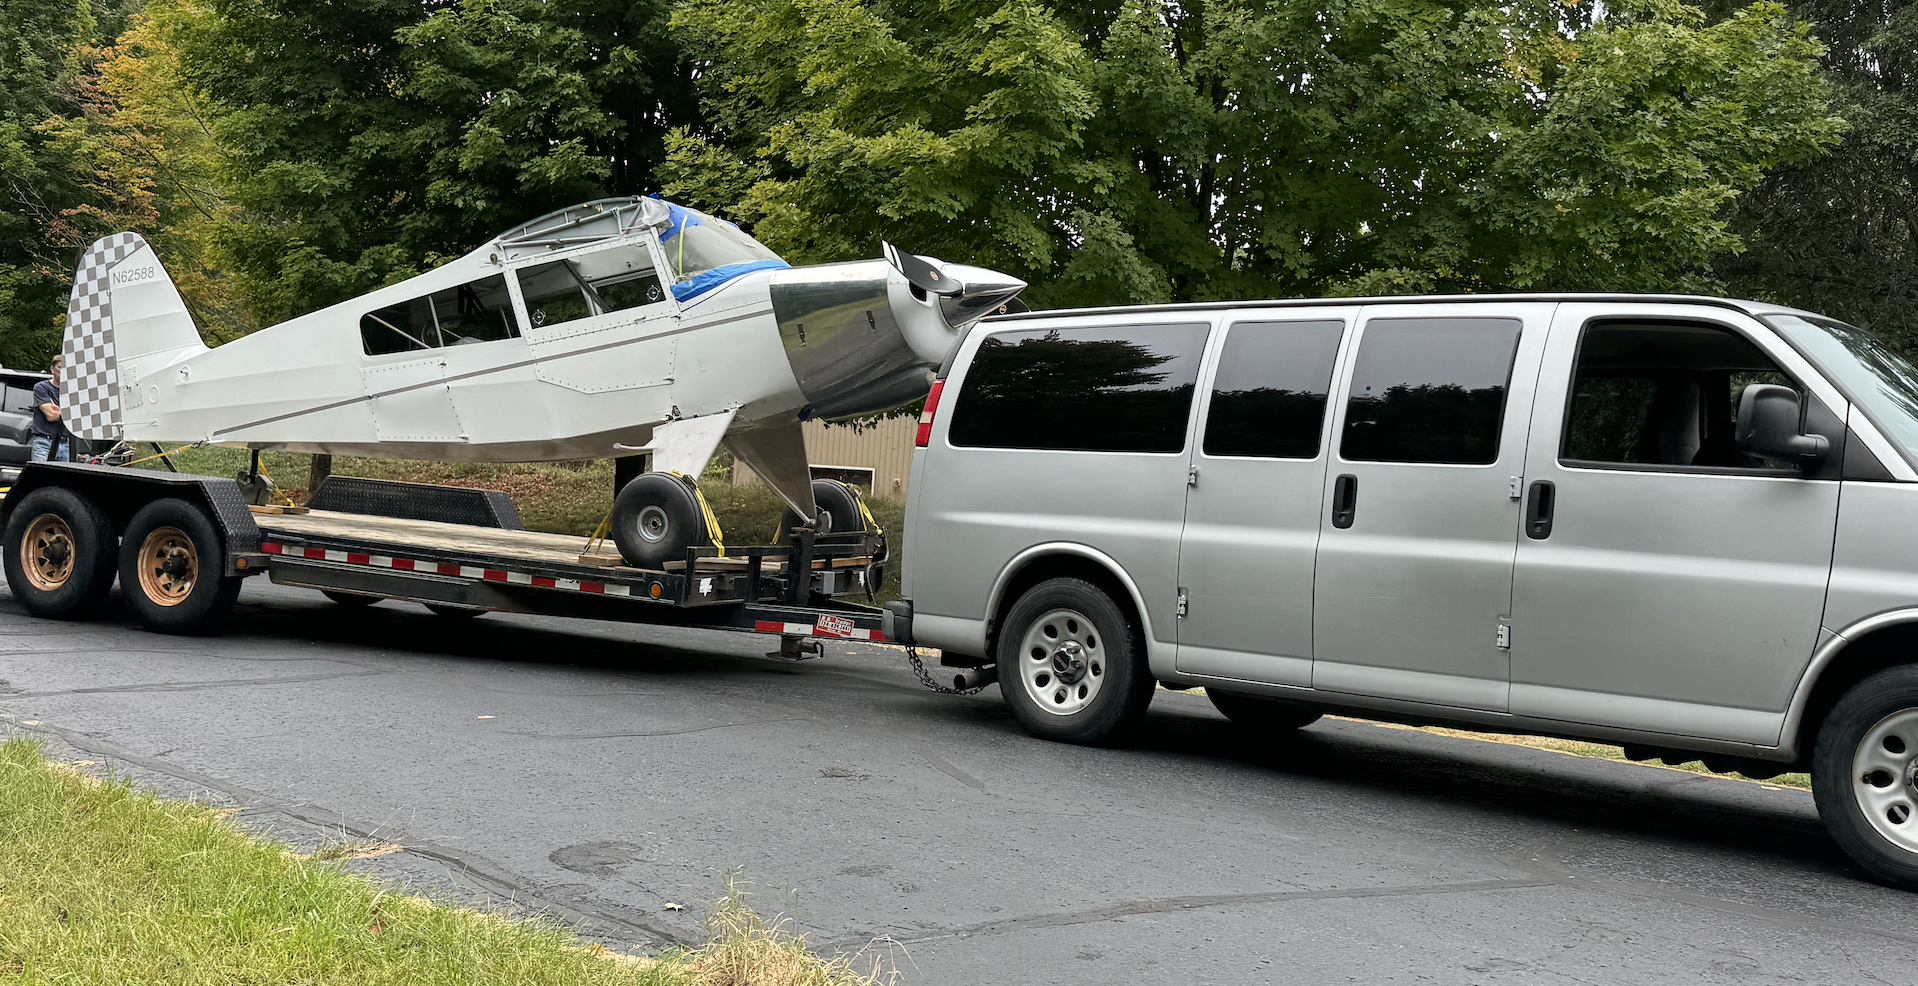
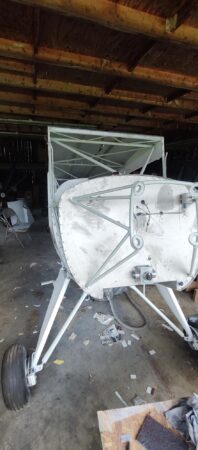
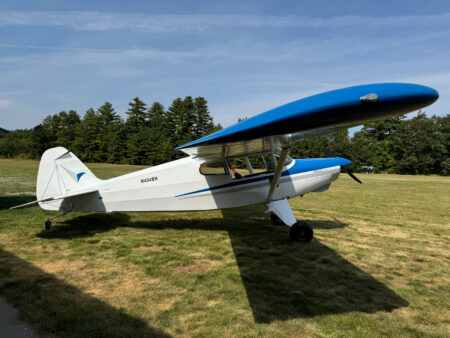
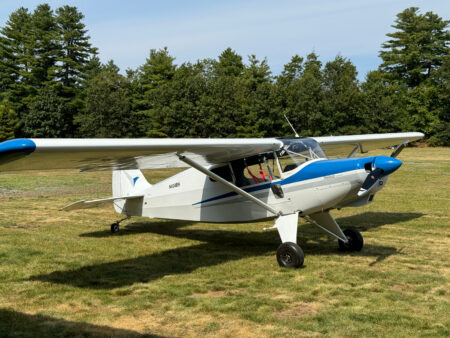
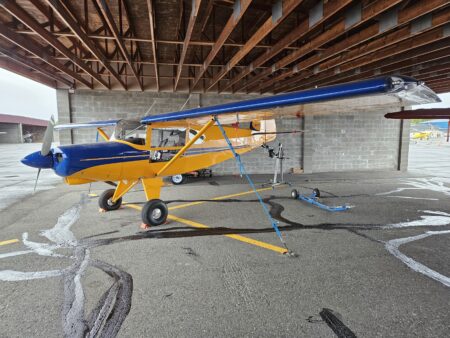
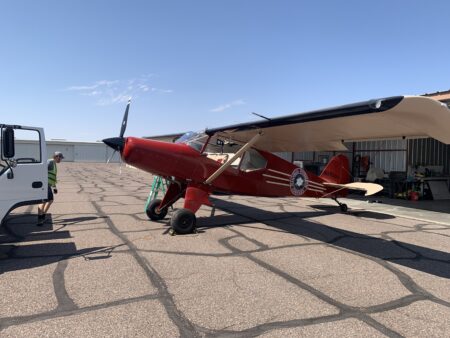
I started building a Bearhawk Patrol in 2017. I named her “Miss Goulet” to give tribute to my my wife. She was a math teacher once upon a time. The students loved her because she is welcoming, always smiling, hard working, very smart, and can make any subject fun. I think the Patrol will reflect her attributes beautifully.
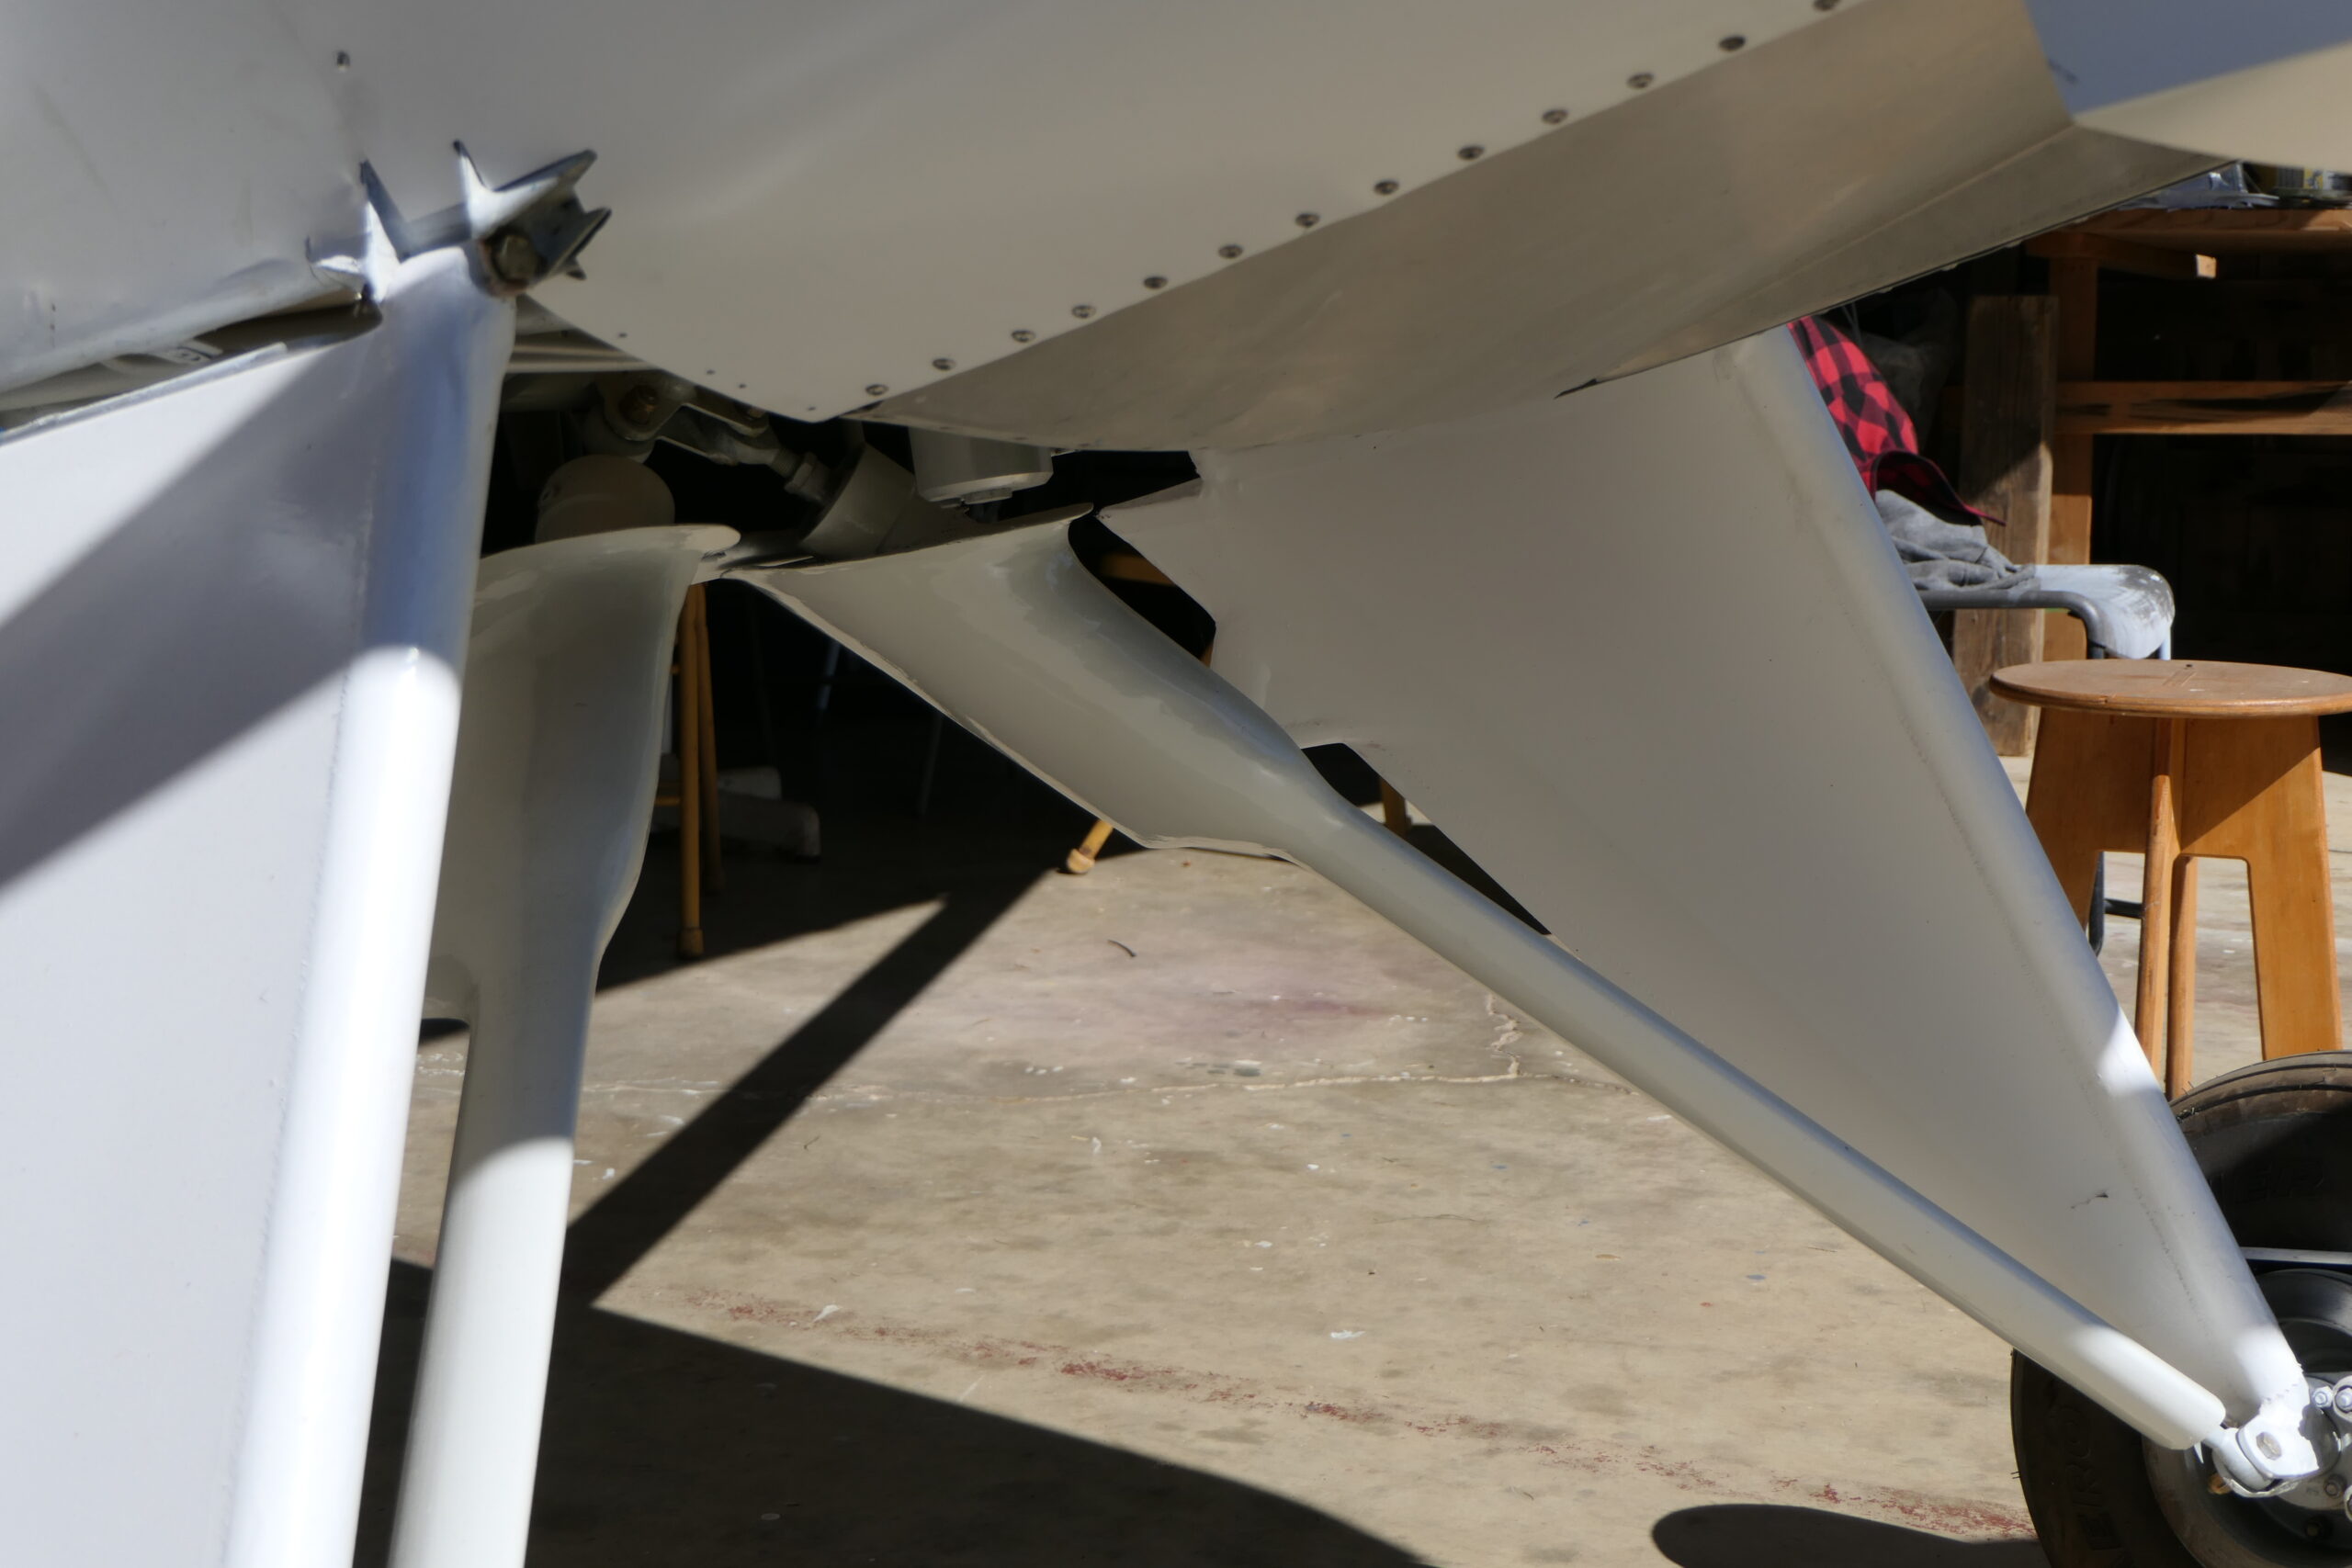
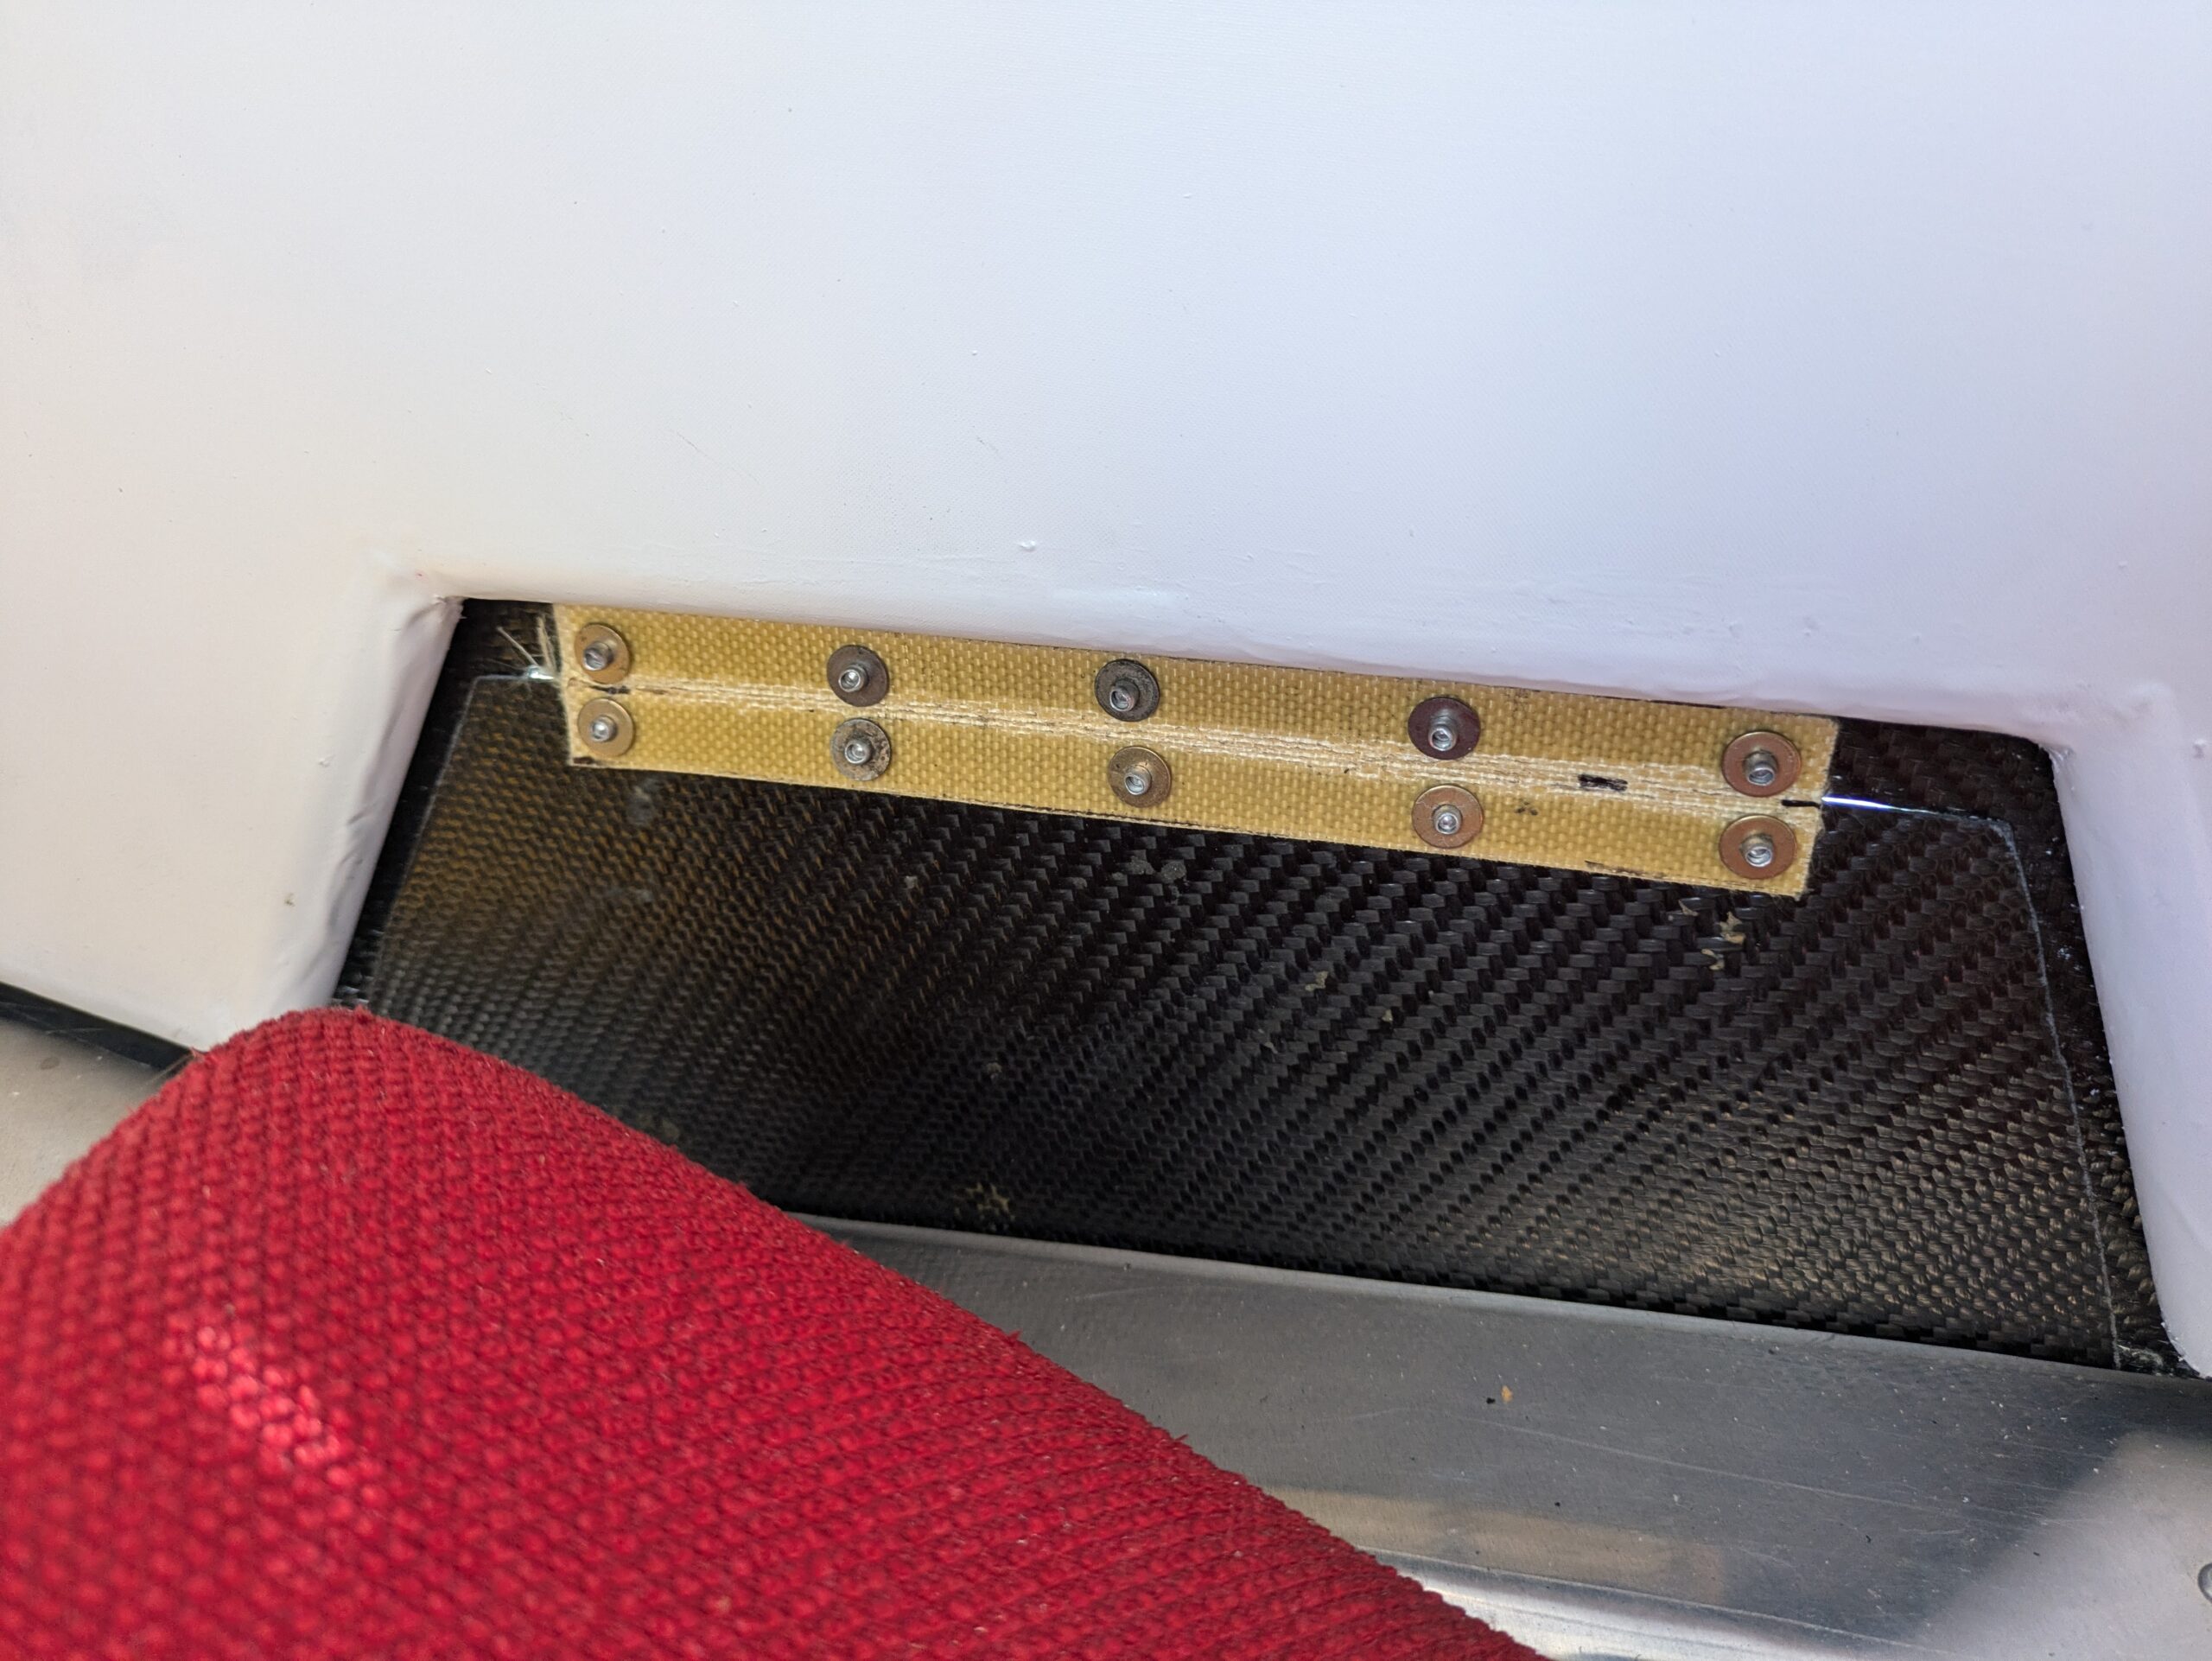
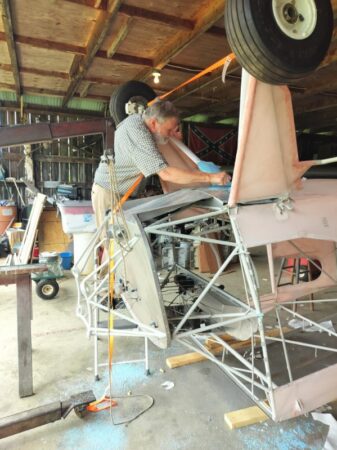
The project started with a quick-build kit from Mark Goldberg and she is almost done. A theme that gave me peace about the build can be summarized with a few key words: Efficiency, Utility, Reliability and Maintainability. These goals drove the build decisions and added weight to achieve them. I wanted my boot cowl easy to remove, and working upside down under the panel when I’m 75 years old (15 years to go) seems not far off. I can remove the entire boot cowl and windshield in forty minutes I call that “No Pain to Maintain.”
I want low fuel flow at a fair cruise speed, no issues and easy repairs.
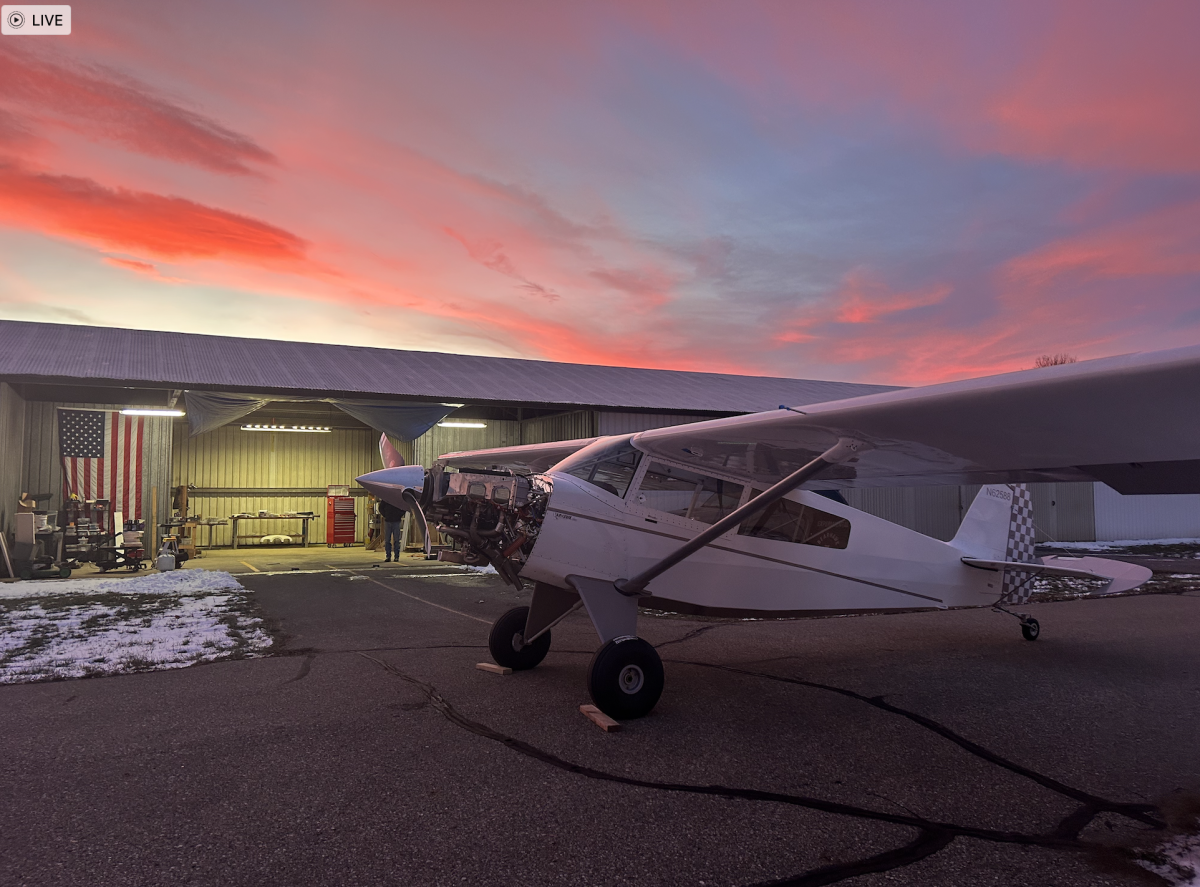
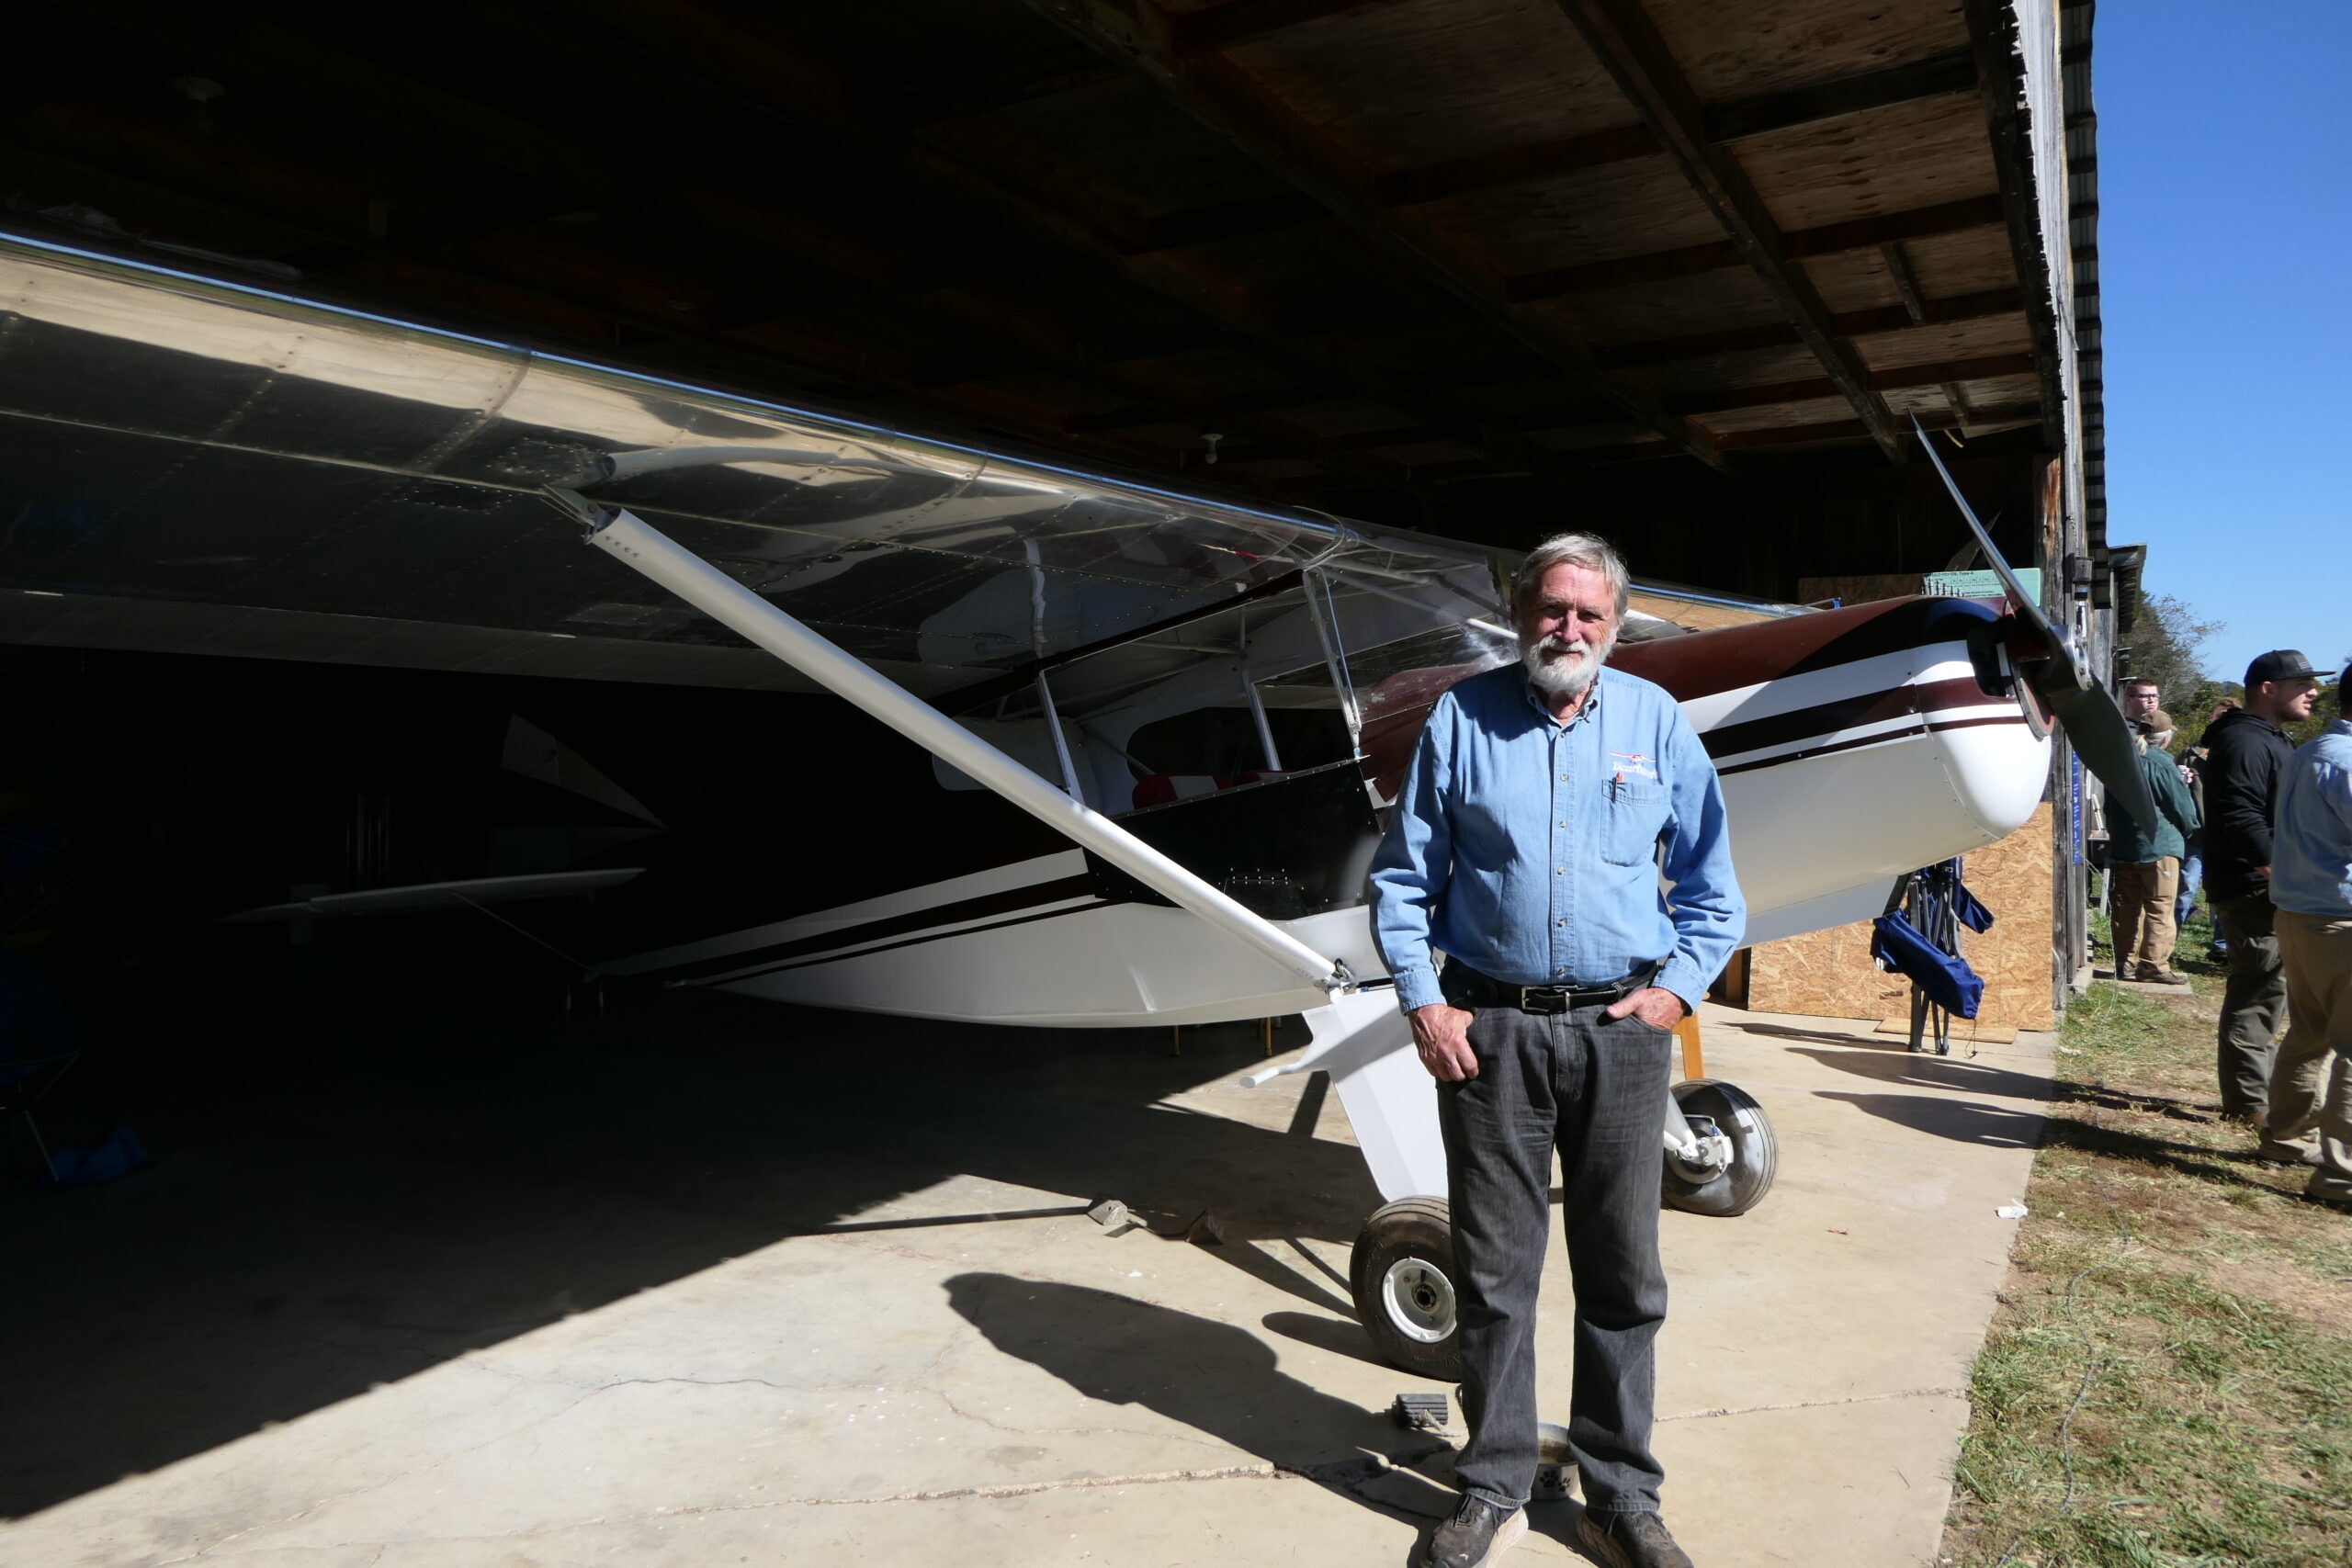
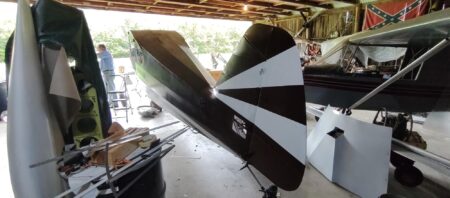
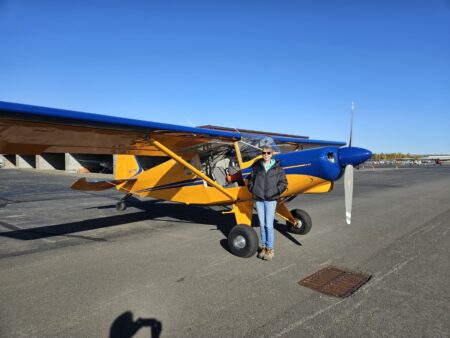
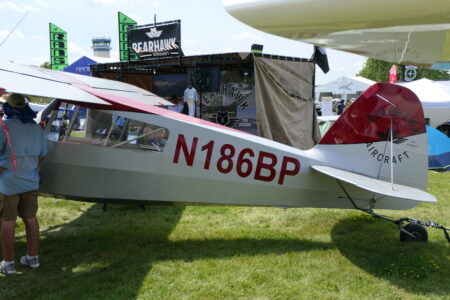
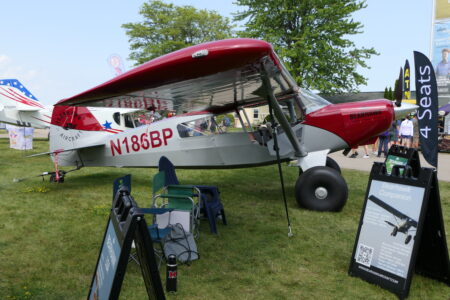
Paint: I painted Miss Goulet myself (except the cowl is still bare Aluminum). It was the first time I ever used a paint gun or designed a scheme. Paint Scheme: My fourth son is a college-educated artist. When I asked him to help me design the scheme he had me fabricate a coloring book of the three view drawing on Plans P.1 minus the inner tubes. I used colored pencils and made 35 drawings. I decided against swoop lines to keep the job simple. I know I need simple if it’s not going to look like crap. I tried various things and the simpler prevailed. I thought about a gray base like I see on some SUV’s, but My Wife said the color was not a “happy color”. I ended up with a white fuselage, using Bob’s “Thrust Line” on the plans to locate a gray strip. Every control surface is gray. Why not Red? Blue? Yellow? To be honest, an interior decorator chose our GRAY kitchen floor matching it to the existing wood cabinets and it looks great. The best match on the Stewarts color chart to match the Smoked Plexiglas side windows was Boulder Gray. Honest!
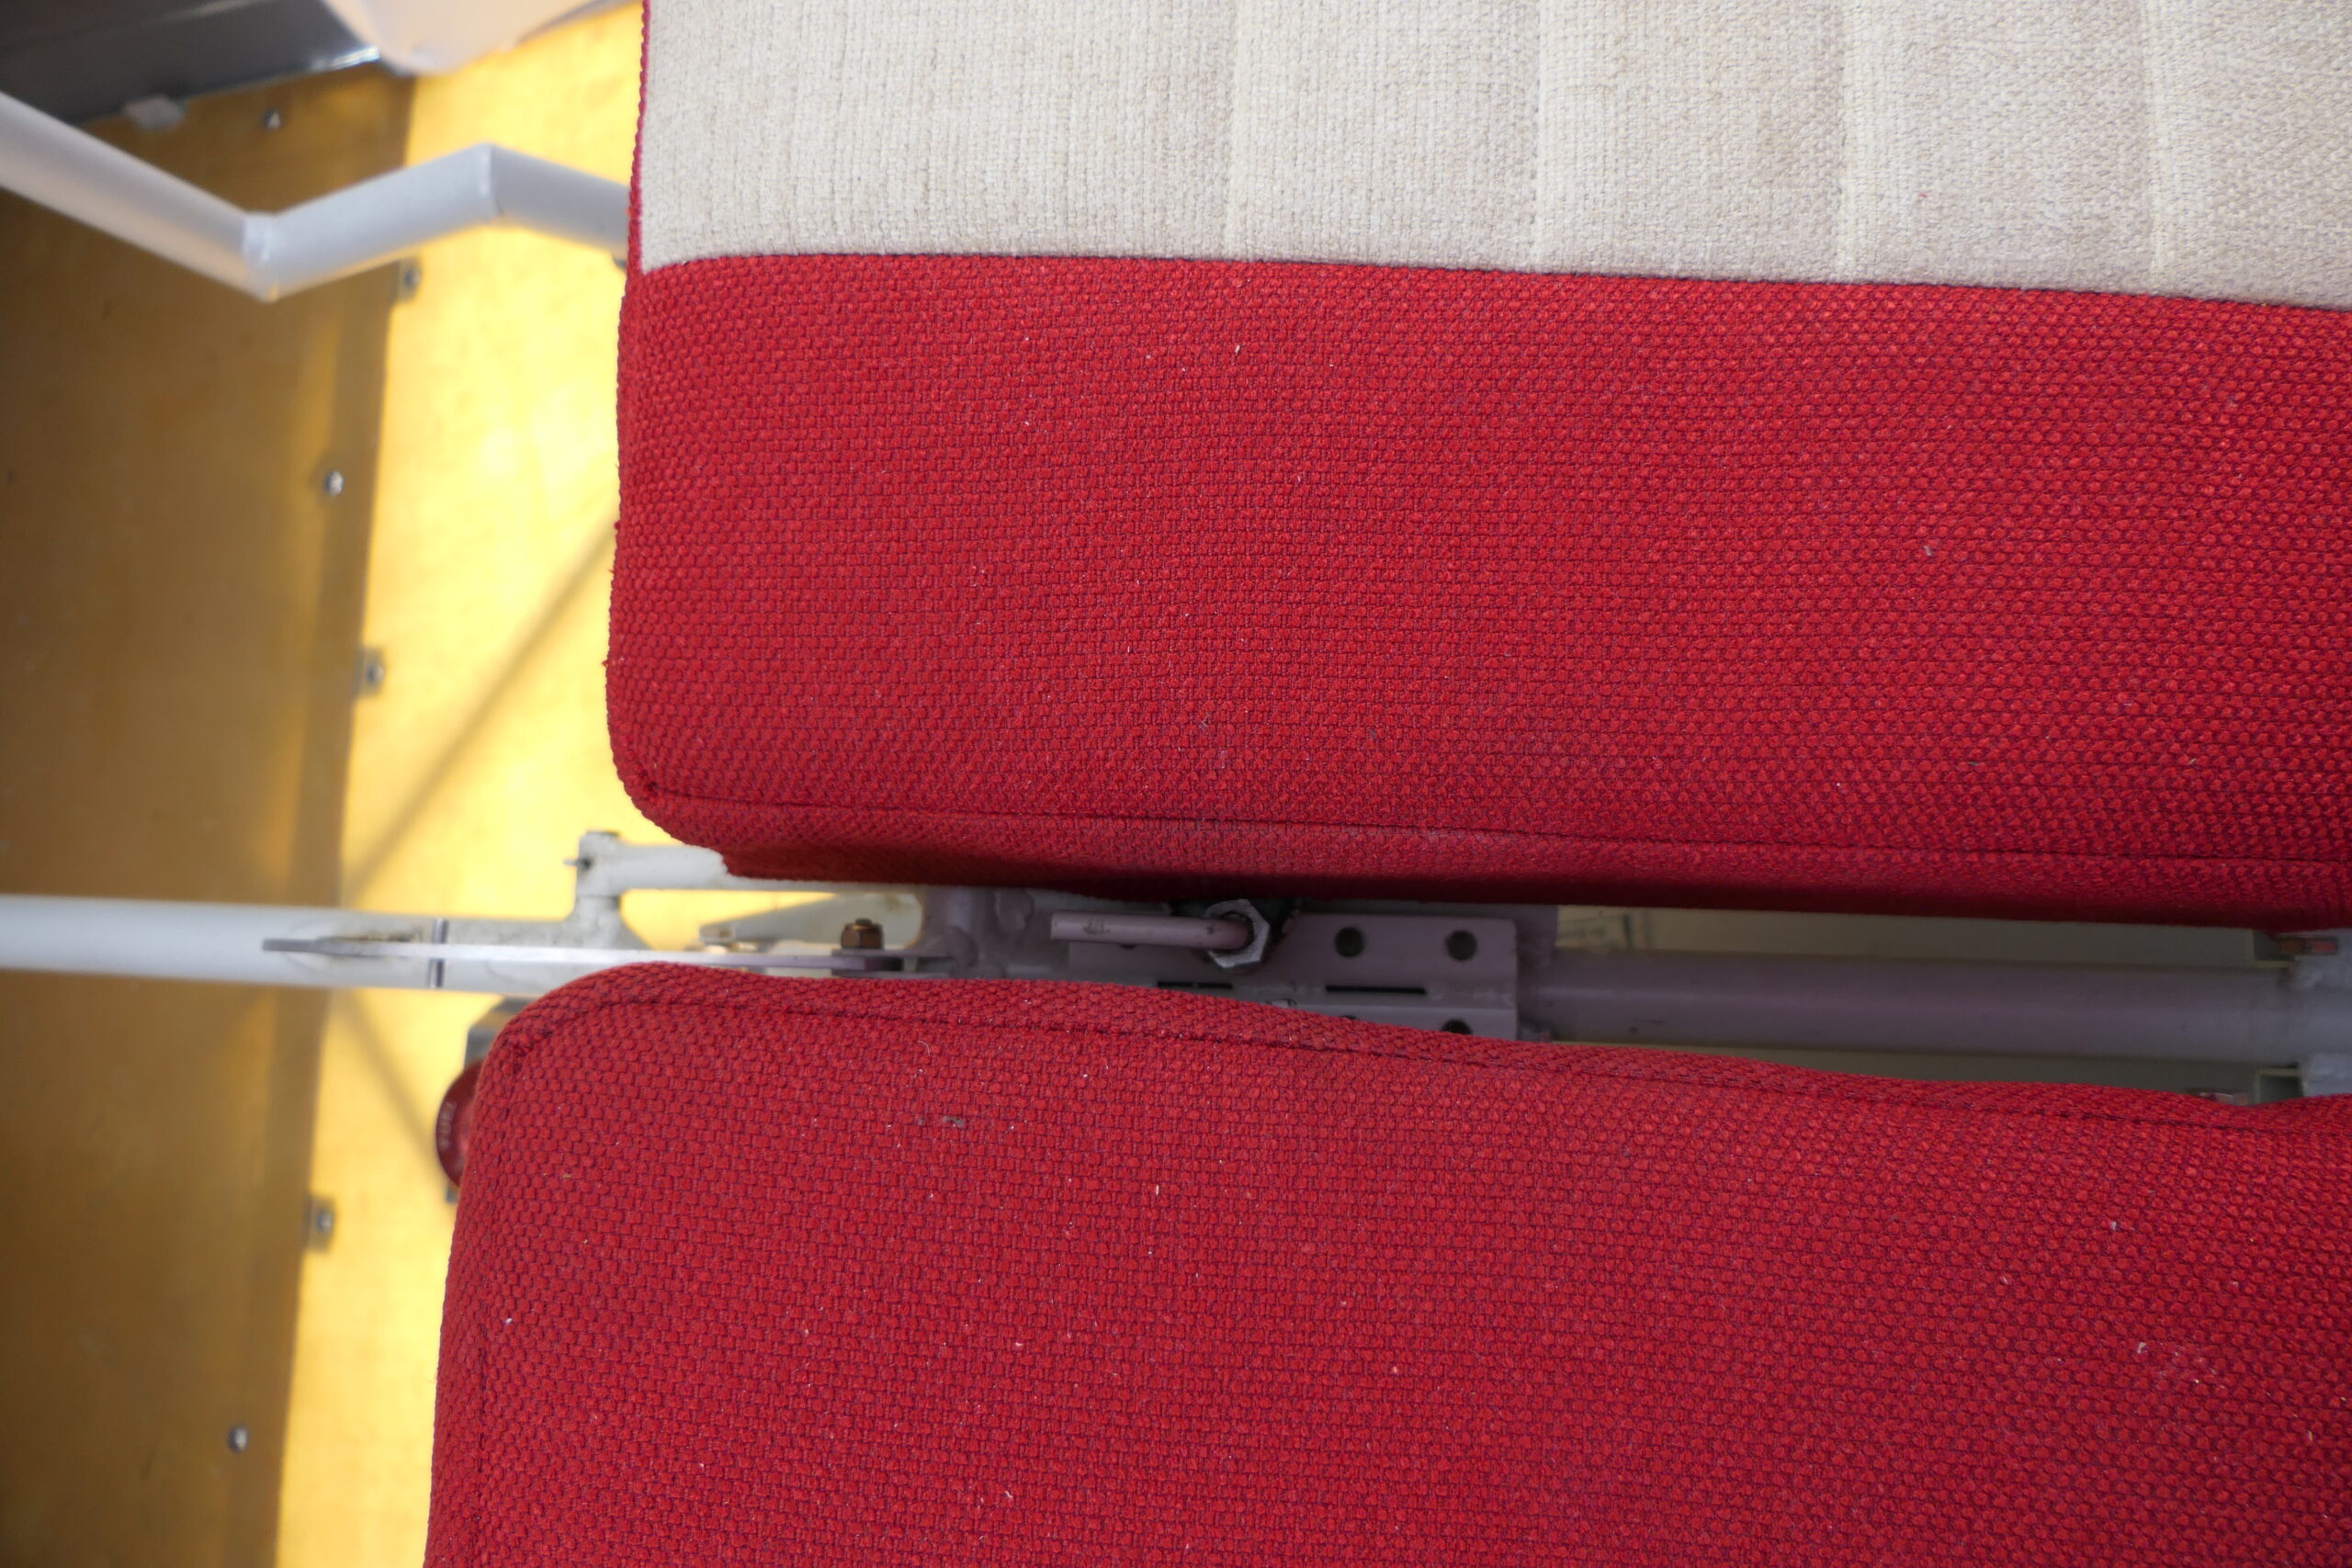
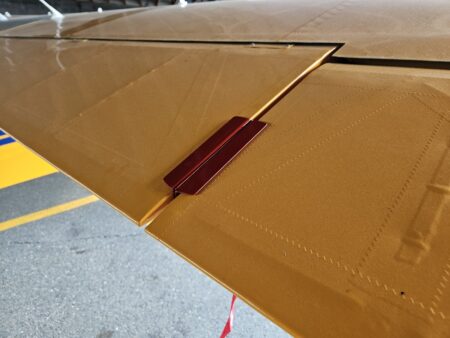
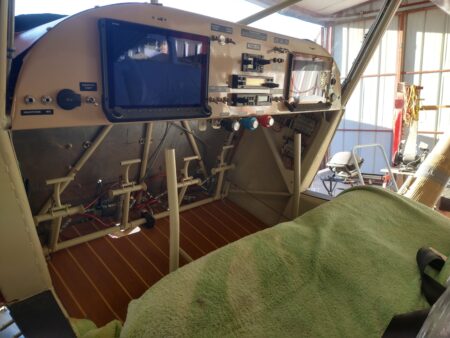
The Instrument panel is basic VFR. I didn’t have a budget limit for it, but as I felt peace (like my paint scheme) about simple and less peace about the very elegant capable big screen offerings to EAB builds. I also liked separation of various instrument/avionics elements for trouble shooting and service life. So I installed a compass, a Garmin G5, an analog airspeed, a CGR-30P engine monitor, a Trig Comm Radio and Transponder. For navigation I followed Bob’s advice and went with portable, choosing the Garmin Aero 660 docked on the instrument panel. All antennas are internal except for the transponder. The COM is a long 1/2 wave antenna in the vertical stabilizer; the 3 GPS antennae are mounted just under the skylight in the spar compression tubing support area.
I designed, fabricated and installed the electrical system but contracted out most of the avionics wiring harnesses. I submit to Bob Knuckolls teachings in a book titled “The Aeroelectric Connection”. (a modified Z101 architecture. http://www.aeroelectric.com/PPS/ Adobe_Architecture_Pdfs/Z101B.pdf)
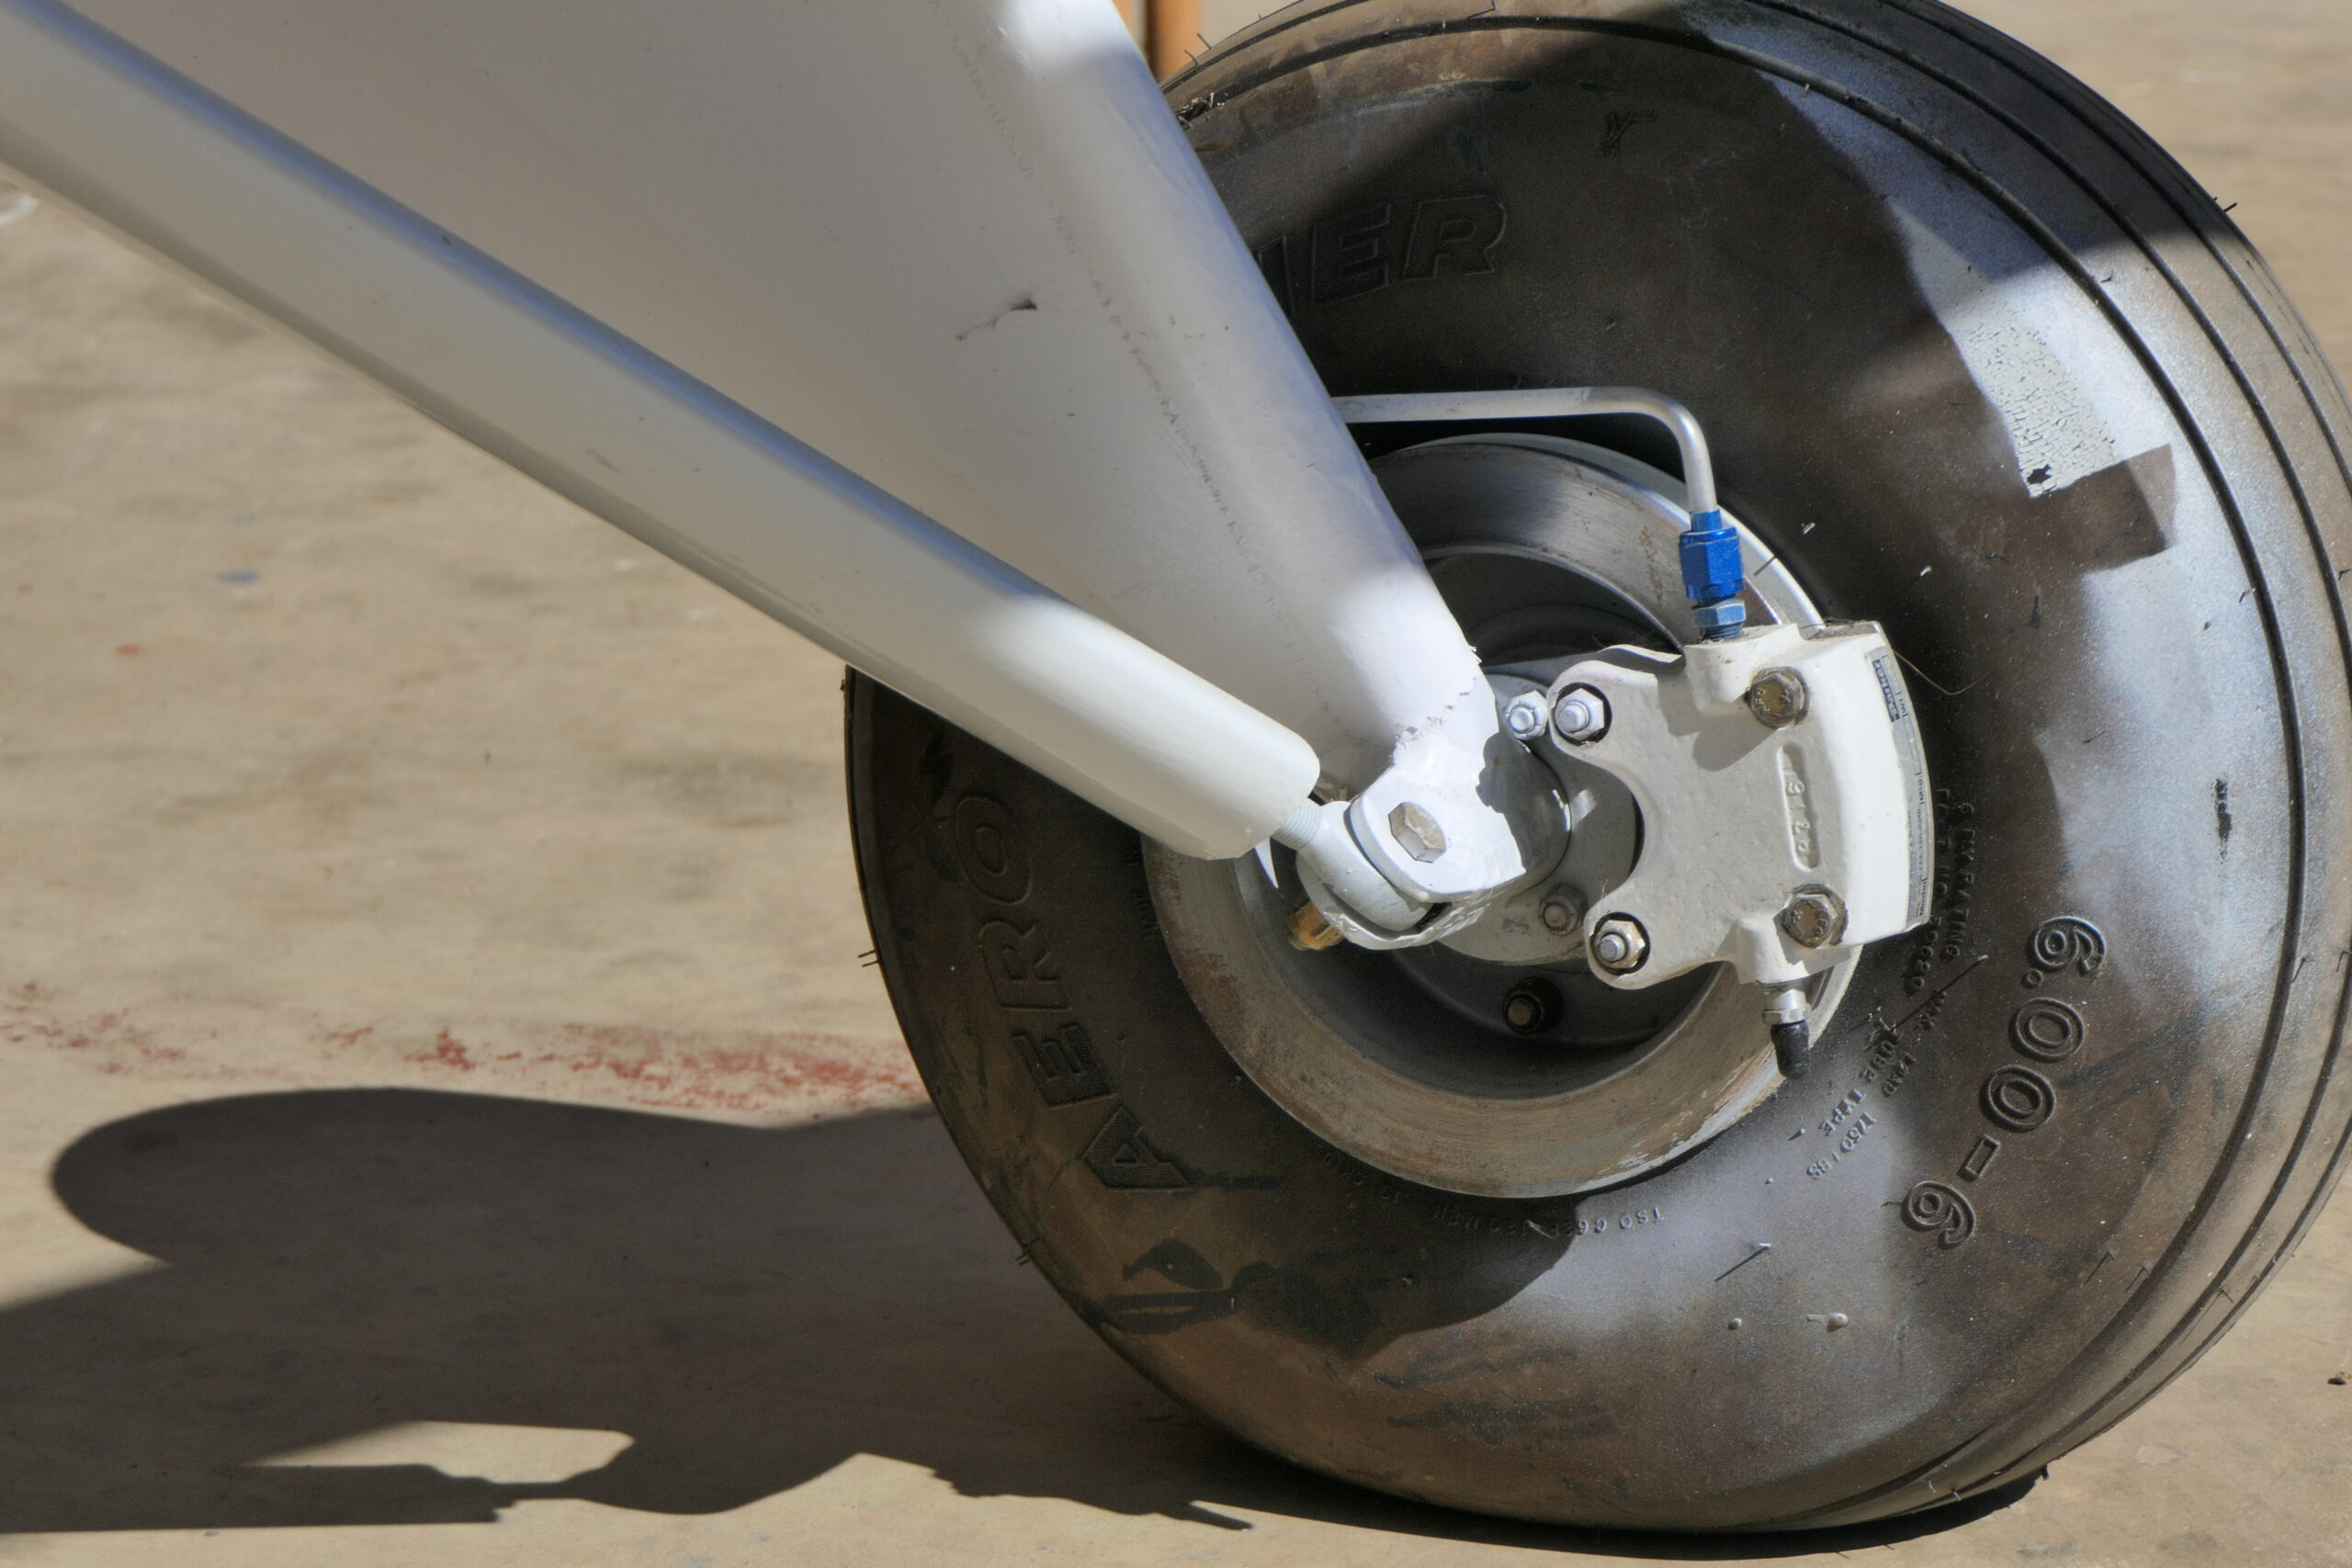
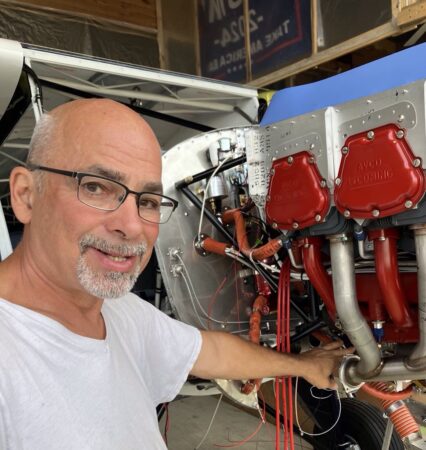
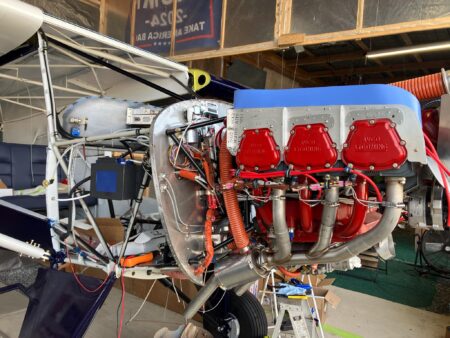
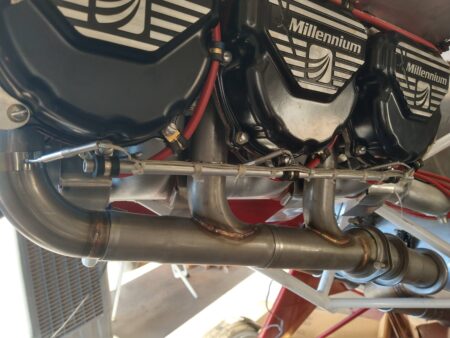
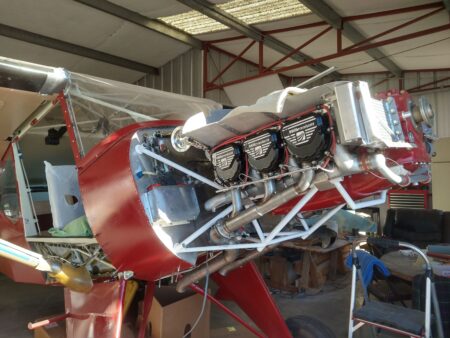
The engine is a Bob Barrows/Lycoming IO-360, call it 180 hp. It’s a narrow deck case, has parallel valve cylinders, new cam and a balanced crank. Alone it weighed 270lbs; 304lbs with alternators, exhaust, fuel Injection, engine mount, and oil screen. (missing oil cooler, hoses, and I forget about baffling.)
My four goals led me to Bendix Fuel Injection, Surefly Ignition, and a Hartzell Trailblazer prop controlled with a Jihostroj governor. The fuel and spark are not anything special or exotic, middle ground and I’d say efficient. The ignition system has dual power feeds from from three sources (two alternators, one battery) and the engine keeps running with the master off until she runs out of gas.
She hasn’t flown yet, but we started it. Warning: Don’t sneeze if the mags are hot. The OAT was in the low 20’s (it was preheated) and we think fired on the first blade of the first attempt without priming. We duplicated it every time. (point of education: gravity feed primes nicely. The engine pump takes over when she’s alive.) The second benefit will be reliably tunable deep lean of peak operations.
When I look at my firewall forward, I see a lot of hoses. Fuel Injection is not the best choice for everyone. A carburetor is so simple….I knew that but now I see it and built it. I also wonder about my Mag choice…Just one self powered Emag would have given me peace about a single alternator. Consider that stuff. But like I say, she starts if you look at her cross eyed.
The FAA paperwork for the airworthiness inspection will be submitted before this goes to press. She weighs 1190lbs, CG 10.3”, and she flow tested beautifully. Her CG can’t be thrown out of limits no matter how she is loaded down and it’s tough to get her overweight.

Winter 2024 Update from Bob Barrows – Companion Progress
Source: 2024Q4 Beartracks
Bob’s Bearhawk Companion is looking more and more like an airplane. During our October visit, the weight was 1010 pounds, as pictured. In November, Bob broke some bones in his foot, and that has limited his shop hours. Thankfully the cast was removed a few days ago and in the coming weeks he can rebuild strength and spend more time in the shop. He is currently working on the exhaust and baffling. I asked whether he used a kit for baffling, and he said no. He enjoys the challenge of making a custom baffling set for each installation, and is also somewhat particular about how he wants it to turn out. He says, “When you already have an airplane to fly, it doesn’t matter that it takes a little longer.” He enjoys building things and likes the rewarding feedback that comes from consistent input to a project. There is fun and a sense of accomplishment in seeing it come together. The new Companion has several interesting features including Kevlar composite floorboards. Their translucence is displayed with the belly pan removed. The door skins are carbon fiber, and the mouse door hinge is a strip of Kevlar layup.
A Few Walk-Around Details of Jay Townsend’s Bearhawk Companion, Nearing its First Flight
Source: 2024 Q4 Beartracks
On the boot cowl Jay used a nifty carbon fiber NACA scoop made by Bonehead Composites. The paint is flattened to more closely match the texture of the Oratex covering. The covering is translucent, so poking my head into the tail cone felt like being under the sea. The black box on the left side of the photo (right side of the fuselage) is a tube for longer cargo items like fishing poles. The engine sump includes a heater plug sold by Anti-Splat Aero.
Jay has installed Hall Brothers vortex generators, based on testing from Patrol builder Chris Spira. They are 7.25 inches forward of the main spar rivet line, spaced laterally as the skin overlaps allowed.
Bearhawk 4-Place N3XH First Flight in Colorado
Source: 2024 Q4 Beartracks, Rod Smith
After a very long time coming, December 17th, 2024, was the day my Bearhawk finally took to the air. As a very rusty tailwheel pilot with just 6 hours of tailwheel time in the past few weeks, I wondered how it was going to handle and how I would react to any problems that might pop up. Fortunately, the flight went very well. The EAA flight test card #1 says to make your first flight without flaps, I chose to takeoff with 2 notches and land with 3 notches. That’s how Virgil Irwin had me taking off and landing in his beautiful Bearhawk 5 during a 2 hour checkout.
The flight went very well, and I was in awe of the performance. I found my plane to be light on the elevators, a little heavier on the ailerons. As a bonus it flies level with hands off the sticks. The only issue I had was way too much angle on my rudder tab and I was having to use an awful lot of pressure on the left rudder pedal to stay coordinated. So much so that after about 20 minutes my left leg went numb and I thought I better land while I could still move my leg. My first landing wasn’t pretty, didn’t get fully stalled and bounced it. I now have made 3 flights for a total of 2.7 hours. It gets better every flight.
My plane is the original 4-seater with the modified 4412 airfoil. It is scratch built, except I did buy the quick build wing kit from Avipro in 2004 for $9900. I have a modified parallel valve 300HP IO-540 and a 3 blade 83” MT prop. My panel is Garmin G3X with 2 10” screens and set up for GPS IFR. Some modifications I made are carbon fiber gull wing doors and Hoerner wingtips. I moved the trim wheel to the floor, just left of the flap handle and have a console covering the flap and trim wheel mechanisms.
I think I may have the unfortunate record for the longest build time of a completed Bearhawk. Life does get in the way at times. My first build log entry was June 1, 1999, a quarter century ago. That first flight made it all worth it. God willing, I will see many of you at Oshkosh this coming July.

Bob’s Companion Project Update – Fall 2024
At press time the fuselage fabric is painted. A few pieces of front-end aluminum parts still need paint. The engine is finished, and is ready to be back on the airframe. Hopefully he’ll have an assembled airplane that looks like an airplane in time for the fly-in. The instrument panel, floorboards, and door sills are all in. He has taken a few antique car tours that have kept him away from the project but he’s still making steady progress.
There have been two completed Companions so far that we have weight and balance numbers for. In both cases, the empty CG was around 14-15 inches, as compared to a more typical 10-12 inches for a 4-Place. Bob says the CG on the companion is intentionally further aft, because it doesn’t need to be prepared to carry such a big load in the cabin. At a full-forward CG, the front seat occupants are aft of the CG, but approaching the aft limit, the front seat occupants become forward of the CG. Bob encountered this when carrying engines by himself. At the heaviest loads, the airplane can carry more if there is someone in the front seat than if the front seat is empty.
Bob says, if Companion builders want to carry a lot of cargo, use the constant speed prop and angle valve engine. For more reasonable/typical loads the parallel valve engine works very well. For both the 4-Place and the Companion, having the CG in the 14” range for day-to-day operations makes for an airplane that handles better, can land shorter, and feels lighter on the controls. It’s just with the 4-Place, we concede ideal solo-load handling by having the empty CG farther forward, to enable more cabin loading. Aircraft design is all about compromise!


Texas Flag Bearhawk Five Nears Completion in Pennsylvania
Source: 2024 Q3 Beartracks, Tim Weaver
Having built a Bearhawk 4-Place and a Bearhawk LSA, my latest project is this Bearhawk Five. The engine, a Lycoming IO-540, was built by Mike Meador, coupled with a three blade composite Hartzell propeller.
The Dynon instrument panel with autopilot was completed by Advanced Flight Systems of Canby, Oregon.
The floor boards and other beginning processes were started. After I completed many interior details like window frames, heat ducts, and autopilot mounting plates, (time consuming for sure), I made and fit all fuselage access hole frames etc., fit cowl, door, and window skins. I began covering it with the Stewart System in the winter of 2023. While Lancaster Aero Refinishers painted it, I continued work on the wings, adding the control mechanism and wiring. In late spring and summer of 2024, I installed the engine and propeller and tested the instrument panel. The engine break in happened exactly two years from the start of the project, following the Lycoming break in procedures. I expect to have finished the plane around the time of this publication.


In the photo below, Sean Geist, who custom makes composite parts, is making windscreen trim piece.

Bearhawk Companion N404BH First Flight – Massachusetts
Source: 2024 Q3 Beartracks, Greg Charest
The project started in 2020. Since I had ordered one of, if not the first, Companion models and there were no flying examples, the original plan was to build it as quickly with the help of another experienced Bearhawk builder. Unfortunately, the COVID pandemic resulted in that being impossible and the build transitioned to a slower pace. Nevertheless, after 3 and ½ years and a couple thousand hours of work, N404BH received a special airworthiness certificate on 8/21/2024.
The goal was to build a fairly simple aircraft at a reasonable cost. To that end, the engine is a Lycoming angle valve O-360 overhauled by Bob Barrows with a fixed pitch Catto 78×56 propeller. Following the ‘keep it simple’ approach the magnetos are Bendix, the exhaust is from Vetterman and the electrical system uses an automotive style fuse panel. The covering is Stewart’s System and the avionics and engine monitoring system is a Garmin experimental G3X system with a GTR-200 radio, GTX-335 transponder and GDL50 ADSB-in receiver. The interior is a combination of fabric and Kydex plastic panels. One of the few luxuries is a set of leather seats built by Sport Aircraft Seats. I kept weight in mind but was not obsessive about it and with the somewhat heavier O-360 model the empty weight ended up at 1257 with a CG of 14.62.
I modified with a Vans Aircraft baffle kit and paid close attention to sealing up the cowl which has appears to have worked well. During ground testing and the first flight the cylinder head temperatures have not exceeded 350 degrees and the oil temp has been generally under 200.
The first flight was happily uneventful and other than a slightly heavy right wing, the airplane flies very nicely. The next step is to put on 2 or 3 hours at a high power setting for the initial engine break-in and then work through the EAA designed flight test program.
Greg’s plane is at Crow Island Airpark, 8MA4, in the photo below. It’s worth noting that he didn’t have electrical service during his build, so he did it all with a generator and a gas-powered air compressor!


Flight Testing Progress Report N907PM, plus Control Locks for the Flaps and Ailerons, Tail Lift
Source: 2024 Q3 Beartracks, Paul Minelga
Here’s an update of N907PM’s flights, up to 28.2 hours on the Hobbs. Well, there isn’t much to update! This may be shocking to some, but completely logical to me, so let me walk through the hours from first flight to present.
I already went over my first flight in the previous Beartracks article and YouTube video, so no surprises there. So what happened next? Extensive testing of the flight envelope? Figuring out the handling characteristics of my Bearhawk? Multiple stalls, turns, simulated engine failure, full-flap landings? Nope. None of that…well, almost none, but I will explain why and you can critique as you wish.
The first flight was certainly an exhilarating experience. It was the first date with a new machine, flying at the upper range of its engine and airframe performance envelope. The excitement of not knowing which sounds were normal and which sounds could be the beginnings of a catastrophic event was to be experienced, as only one can on a first flight! Well, 1.3 hours later proved the airframe and engine were up to the task of at least one safe takeoff, flight and landing. But the question remained: What’s next? I have a considerable amount of time and money invested in the engine and I want to break it in as best as possible. The EAA test flight checklist doesn’t allow for this scenario. Since the aircraft didn’t offer up any surprises and it is a proven design, my focus on the subsequent hours were focused on engine operating parameters and a proper break-in. In other words, I ran the engine hard. Running hard meant no air work, no slow flight, no series of stop and go landings, no shock cooling, all in the name of engine break-in.
At 5 hours I did my first oil change, and it was necessary! The oil looked like metallic graphite paint! I cut apart the oil filter and thankfully it didn’t yield any unwelcome surprises. Along with the oil, the oil filter just showed minute evidence of a LOT of new moving parts in a powerful internal combustion engine getting to know one another. I even pulled the oil screen in the sump. Fortunately, there weren’t any pieces with part numbers trapped in its mesh. Oil was still being consumed, or blown overboard, but I still don’t know where this engine’s “happy spot” is on the dipstick…every engine has one. So more flying is in order….a lot of flying…within gliding distance of my home airport, until about 10 hours. After that, I did a flight with the last 30ish minutes using a modified EAA test flight checklist by doing stalls and exploring trim changes with different flap settings. I also did a full-power go-around at altitude with three notches of flaps to check if I could overcome the sudden initial trim change. I did.
After that 10ish hours without an engine failure I figured it was time to spread my wings a bit and do a little cross country, at full power of course. I was flying in familiar territory. In my beautiful part of Alaska there are a BUNCH of airstrips available in case of an unfortunate event. Almost all are private, but I have yet to meet anyone that would not welcome a pilot in immediate need of a short, semi-flat surface. So my next 15 hours were spent doing cross country flights, at altitude, at close to full power. At 25.4 hours it was time for a another oil change and a good look over of the airframe. In addition to the oil change, I did a mini condition inspection as most of the important parts on the airframe and controls are hidden behind panels and can’t be seen on a preflight. I built a tail stand and calibrated my oil dipstick in the 3pt attitude and verified the factory stamped level attitude markings.
So what are my takeaways and what did I learn? First and foremost I always did a good preflight and a very thorough post-flight after every flight. On one post-flight I discovered the inlet fitting of the oil cooler started leaking. Everything stopped until it was fixed. I also maintained a meticulous log of the engine parameters. Even at the top end of the performance envelope, flying in circles can get pretty boring. Every flight I recorded the OAT, engine oil temperature, oil pressure, each cylinders EGT and CHT (Number 2 has always been my hottest), fuel flow, volts and amps. During my cross country flights I experimented with how minor trim settings affected level flight and always tried to keep my altitude within 50 feet of my target altitude. BTW, my BH can be trimmed to fly hands-off in smooth air, no heavy right wing as some have experienced. I feel very fortunate in that area. I also have a real-time CO detector in the cockpit and I recorded those readings as well. I never saw more than 1 PPM in level flight and 8 PPM maneuvering. I also took note of the differential between the level of the fuel tanks after refueling. I always flew with both tanks selected and never had more than 1 ½ gallons differential between the two at refueling.
One thing that took me off-guard a bit was making the transition from fabrication mode to maintenance mode. I built this thing, now I have to maintain it. It’s a completely different set of skills! I started a list of deferred maintenance items to “fix” during my next condition inspection. They are all minor, but should be resolved.
Now that I am satisfied that the engine is broken in and the aircraft doesn’t exhibit any control anomalies, I will start and complete the EAA flight test checklist. I feel it is very important to do the methodical testing and documentation of the aircraft. But, like I said before, this is a tried and true design and the first few hours didn’t exhibit any builder-induced surprises, so I was comfortable in getting the engine properly broken in before going any further. As an aside, I legally took up my first passenger the other day…my wife! The day was stunning. It was completely clear, light wind and the fall colors of the birch and aspen against the turquois blue of the Kenai River were amazing. Even Denali (formerly Mt. McKinley) was in full view in spite of it being over 150 miles away. “Don’t give in, don’t give up.” – Iwai Makoto


Control Locks:
I want to share what I made for the 4-place BH. Yes, they look almost identical to the Atlee Dodge gust locks because that’s where I got the idea from. I would have bought them from Atlee, but I wasn’t sure if the profile angle of the Piper aileron/flap matched the angle of the BH control surfaces. Also, the bungees holding the Atlee locks in place wrap around the lift strut of the Piper. That isn’t an option for the BH as the lift strut is way out of alignment with the aileron/flap intersection. I looked at ways to attach a bungee and almost settled on drilling a hole in the bottom of the wing somewhere close to the edge and installing a small eye bolt. I spent a lot of time just thinking about options when saw a little hole in the wing that is created by a stiffener that is riveted to the trailing edge of the flap pocket. I tried out different diameters and lengths of rods and found one that slid in and out without any trouble.
I made the pins and the eyes welded to the end of the pins out of stainless steel so they wouldn’t rust. I made the locks themselves out of some scrap .060 5052 that I had in my now vacant shop and glued some neoprene strips on the surfaces that contact the fabric. A couple of red bungees, flagging and some zip ties later I have a set of gust locks!
I have a set of Air Gizmos gust locks that I was using for the flaps, but I had to still tie the stick back. Also, there were a couple of times I found the gust lock on the ground when it had worked itself loose. The Air Gizmo lock works great as long as the surfaces are close to parallel. So instead of buying another set for the elevator, I made these and am now using the ones I had for the flaps on the elevator. Now everything is tight and I don’t have to use the seat belt to tie the stick back.


Tail Lift:


Kevin Deutscher’s “Ursa Buteo” N272DG First Flight in Chandler, AZ
Source: 2024 Q3 Beartracks, Jared Yates
This is the newsletter of the Bob Barrows airplanes, but this quarter we’re going to include a very Bearhawk-proximate project because its builder has been a long-time friend and contributor to the community and many folks know him and the project. Kevin calls it an “Ursa Buteo”. “Ursa” is the Latin root for “Bear” and “Buteo” is the name of the genus that includes hawks.
23 years ago, Kevin started work on what would become a stretched, widened, and long-gear version of the Bearhawk. Back then, the Bearhawk Five was not an option, and these days it would be interesting to park the two planes side-by-side to compare measurements. Whenever anyone starts talking about “just making a few changes” to the design of a plane, red flags and alarm bells should go off if those changes include anything like stretching, widening, or lengthening the gear! This is a “probably shouldn’t try this at home” case, but Kevin has the engineering chops to do it right. He designed the new fuselage with the same techniques that Bob would have for a new design, analyzing the strength requirements and capabilities of each tube and cluster in the structure. The landing gear is tall enough that it needs two steps! The wings are not substantially changed from those on an original Bearhawk, though Kevin did create his own composite wingtips. A project of this scope required fabrication of several custom parts. The design became known informally as the “Desert Bearhawk” and a few renderings floated around with an M14 radial engine. In this plane, Kevin used a Continental IO-470 which he assembled himself. He had experience with Continental assembly in a previous job. The prop is a big composite 3-blade Hartzell. The panel is built around the Dynon HDX system and the paint and fabric are Stewarts System. The airframe is full of small features that show a high attention to detail; I hope you are able to see it one day!


Bearhawks at Airventure 2024
Source: 2024 Q3 Beartracks, Jared Yates
As you can tell from George’s story, this year was not an easy year to get to Oshkosh. We elected to drive, based on low clouds and rain over the mountains just north of us. There were a few folks who made it to the show to display their planes! Donna and Dennis flew their Patrols over from Oregon, and parked in Homebuilt Camping. Brooks Cone hosted another Bearhawk walk, which started at the newly-branded Bearhawk Aircraft booth Kudos to Brooks for taking the initiative to host the walk and also to get it onto the official Airventure schedule! As the words began to sprinkle forth, so did the rain, and within a few minutes we were all huddled under wings and tents waiting out a classic summer downpour. A little setback never stifles the kind of enthusiasm it takes to build an airplane, so after a few minutes we were on our way to HBC to visit Donna and Dennis.
As usual they were excellent hosts. They have around 800 hours on their airplanes, though the rate of accrual has been slower than they would like due to weather, health, and the rest of life being in the way. This year we had two special guests from New Zealand, Nev Bailey and Murray Patterson. Murray flies the white Bearhawk 4-Place originally built by the late Lars Fellman. They didn’t bring their airplanes, which we will excuse due to the unavailability of fule by-the-liter in the USA, but it was great to meet them both in person. Later that night Virgil and his team hosted a fantastic chicken dinner at the park just north of the airport. There were several Bearhawk faces, both familiar and new. On the topic of long-distance travellers, Paul O’Donnell was on hand from Ireland with updates about his Bearhawk 4-Place build and his tour of the UL Engines factory in Poland.
Our family had to leave to get back home before the weather allowed George to arrive with his airplane, but as far as we know, his Plans Champion Bronze Lindy is the most prestigious Airventure award received by a Bearhawk to date.
During the dinner Virgil shared a few words about what he’s been up to with the Bearhawk Kit business and it is all exciting and good news. He has expanded OEM relationships to include a more broad range of airframe and powerplant components, and also plans to expand offerings like cabin interior parts and upholstery.


