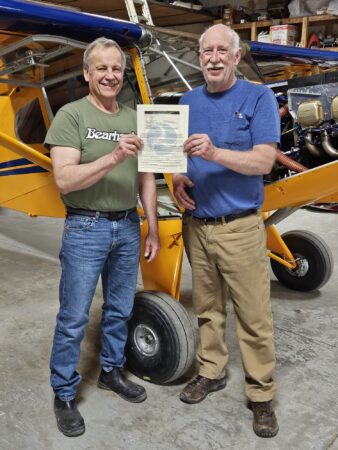
Bearhawk LSA N456YA First Flight Report from Andy Bell
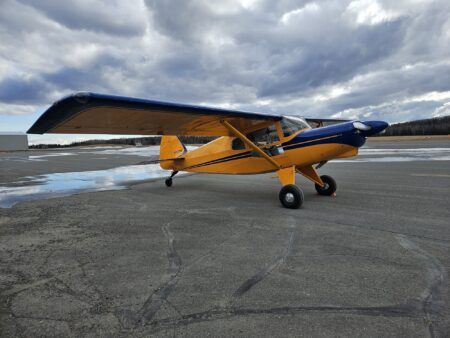
Bearhawk Patrol N62588 First Flight
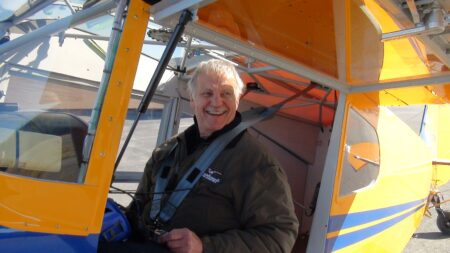
Winter 2025 Update from Bob – Companion is Ready
Phase 1 Testing Tips
Source: 2024 Q4 Beartracks, Greg Charest
After investing a lot of time and money, your shiny new Bearhawk is complete and has a special airworthiness certificate. You have taken transition training, made decisions about insurance and your first flight was a success. Fantastic! You are officially in Phase 1 Testing. But what now?
As you probably know, the FAA allows two different approaches to Phase 1 testing:
1) You can operate the aircraft within a designated area for some number of hours (usually 25 or 40) with some number of takeoffs and landings (generally 10 or 20) to complete Phase 1. These limits are specified in the Operating Limitations that accompany your Airworthiness Certificate.
2) Alternatively, you can use the Task-Based Approach to testing outlined in Advisory Circular (AC) 90-89C. This program was developed in cooperation between the FAA and EAA. It outlines 21 different test areas and associated test cards that can be used to document the process and results.
There are compelling reasons to use the Task-Based approach, not the least of which is that you would likely do something similar even if you chose to simply fly the 40 hours. After all, you want to know best glide, Vx, Vy, stall speeds, effects of various flaps settings and so on. Why not take advantage of the structured approach and do it in a methodical manner? As a side benefit, it may be possible to complete Phase 1 in a shorter period as the requirement is to develop and carry out a plan, not meet an arbitrary time goal.
It’s important to keep in mind that the Task Based Approach is FAA guidance, not a set of regulatory requirements. It is intended to help you develop an individualized plan. The related EAA Flight Test Manual is a concrete example of a task-based plan. You can and should feel free to create a plan that meets your needs. While the EAA documents are quite good you may want to include other tools in your plan. For example, The Bootstrap Approach to Aircraft Performance by John T Lowry is an excellent alternative to help calculating V speeds and rates and angles of climb/decent. See Jared Yates’ article in KITPLANES magazine for a review and explanation.
While the task-based approach is superior, there are some practical difficulties in completing the tests. The most significant issue is that there is often a lot to do at the same time. Precise flying, monitoring engine data, watching for traffic and collecting the required performance data can be a lot to manage by yourself. This is especially true if, like the typical builder, you have spent a lot more time building than flying in the last couple of years and are a little rusty.
There are a couple of ways to make the testing process a little easier and to generate better test data. One is human-related and the other technological. The human solution is to use the Additional Pilot Program for Phase I Flight Test Program described in Advisory Circular 90-116. Note that this only applies to aircraft built from commercially produced kits. Operating limitations issued for Phase I operations restrict the number on board an aircraft to the minimum flight crew. In general, the minimum crew for a typical E-AB aircraft is one (you). AC 90-116 provides a mechanism that allows you to have a second pilot on board to assist in the testing process. It defines two categories of pilots approved to assist: Qualified Pilots (QP) and Observer Pilots (OP). Qualified pilots can participate immediately but the QP experience qualifications are quite high (see 90-116 for the specifics). Observer pilot qualifications are lower, but you must complete the first 8 hours of testing, including a specific set of tests and maneuvers, before you can use an observer pilot. If you want to have another pilot assist you, it makes sense to modify your test plan to meet these requirements early on.
The technological solution works if your airplane has an EFIS. Most if not all EFIS systems are able to write data to a log file. The Garmin G3X for example logs 81 data elements every second, some are direct measurements, and some are calculated values. These are written in a standard comma separated format. This relieves you from the need to write down key altitudes, airspeeds, times etc. and allows you to focus more on flying the maneuvers, watching for traffic and staying inside your designated testing zone.
There is an amazing amount of useful data in the log file, but it can be overwhelming. A typical test flight will result in a >3000 row spreadsheet. Finding and selecting the relevant records and values can be a challenge. It’s helpful to use the tools provided by whatever spreadsheet program you prefer to reduce the data set. Spending a little time to hide the columns you don’t need and freeze the field name rows is worth the time. More advanced techniques to average some of the measurements may also help to reduce short term variability in the recorded data.
Even after cleaning up the data it can still can be tedious to find the records that correspond to precise start/stop times in such a large data set. This is where the web application at https://www.flysto.net is especially useful. This tool can analyze the log file, separate the flight into parts, map your flight path and plot altitude, speed, pitch, bank etc. Placing your mouse pointer over a specific point on the flight track will display the related time field. This lets you pick a portion of the test flight graphically and directly match it to the corresponding rows in the data. You can see in the example below how straightforward it is to select the exact time elements for the climb/descent portions of the test I was flying. The flysto.net tool is free and has many other useful capabilities.
Flight testing is not easy and can be a little frustrating. Real world data rarely looks as nice as the textbook examples. Hopefully some of these tips can help you get better results and focus on the fun and educational aspects of the Phase 1 process.

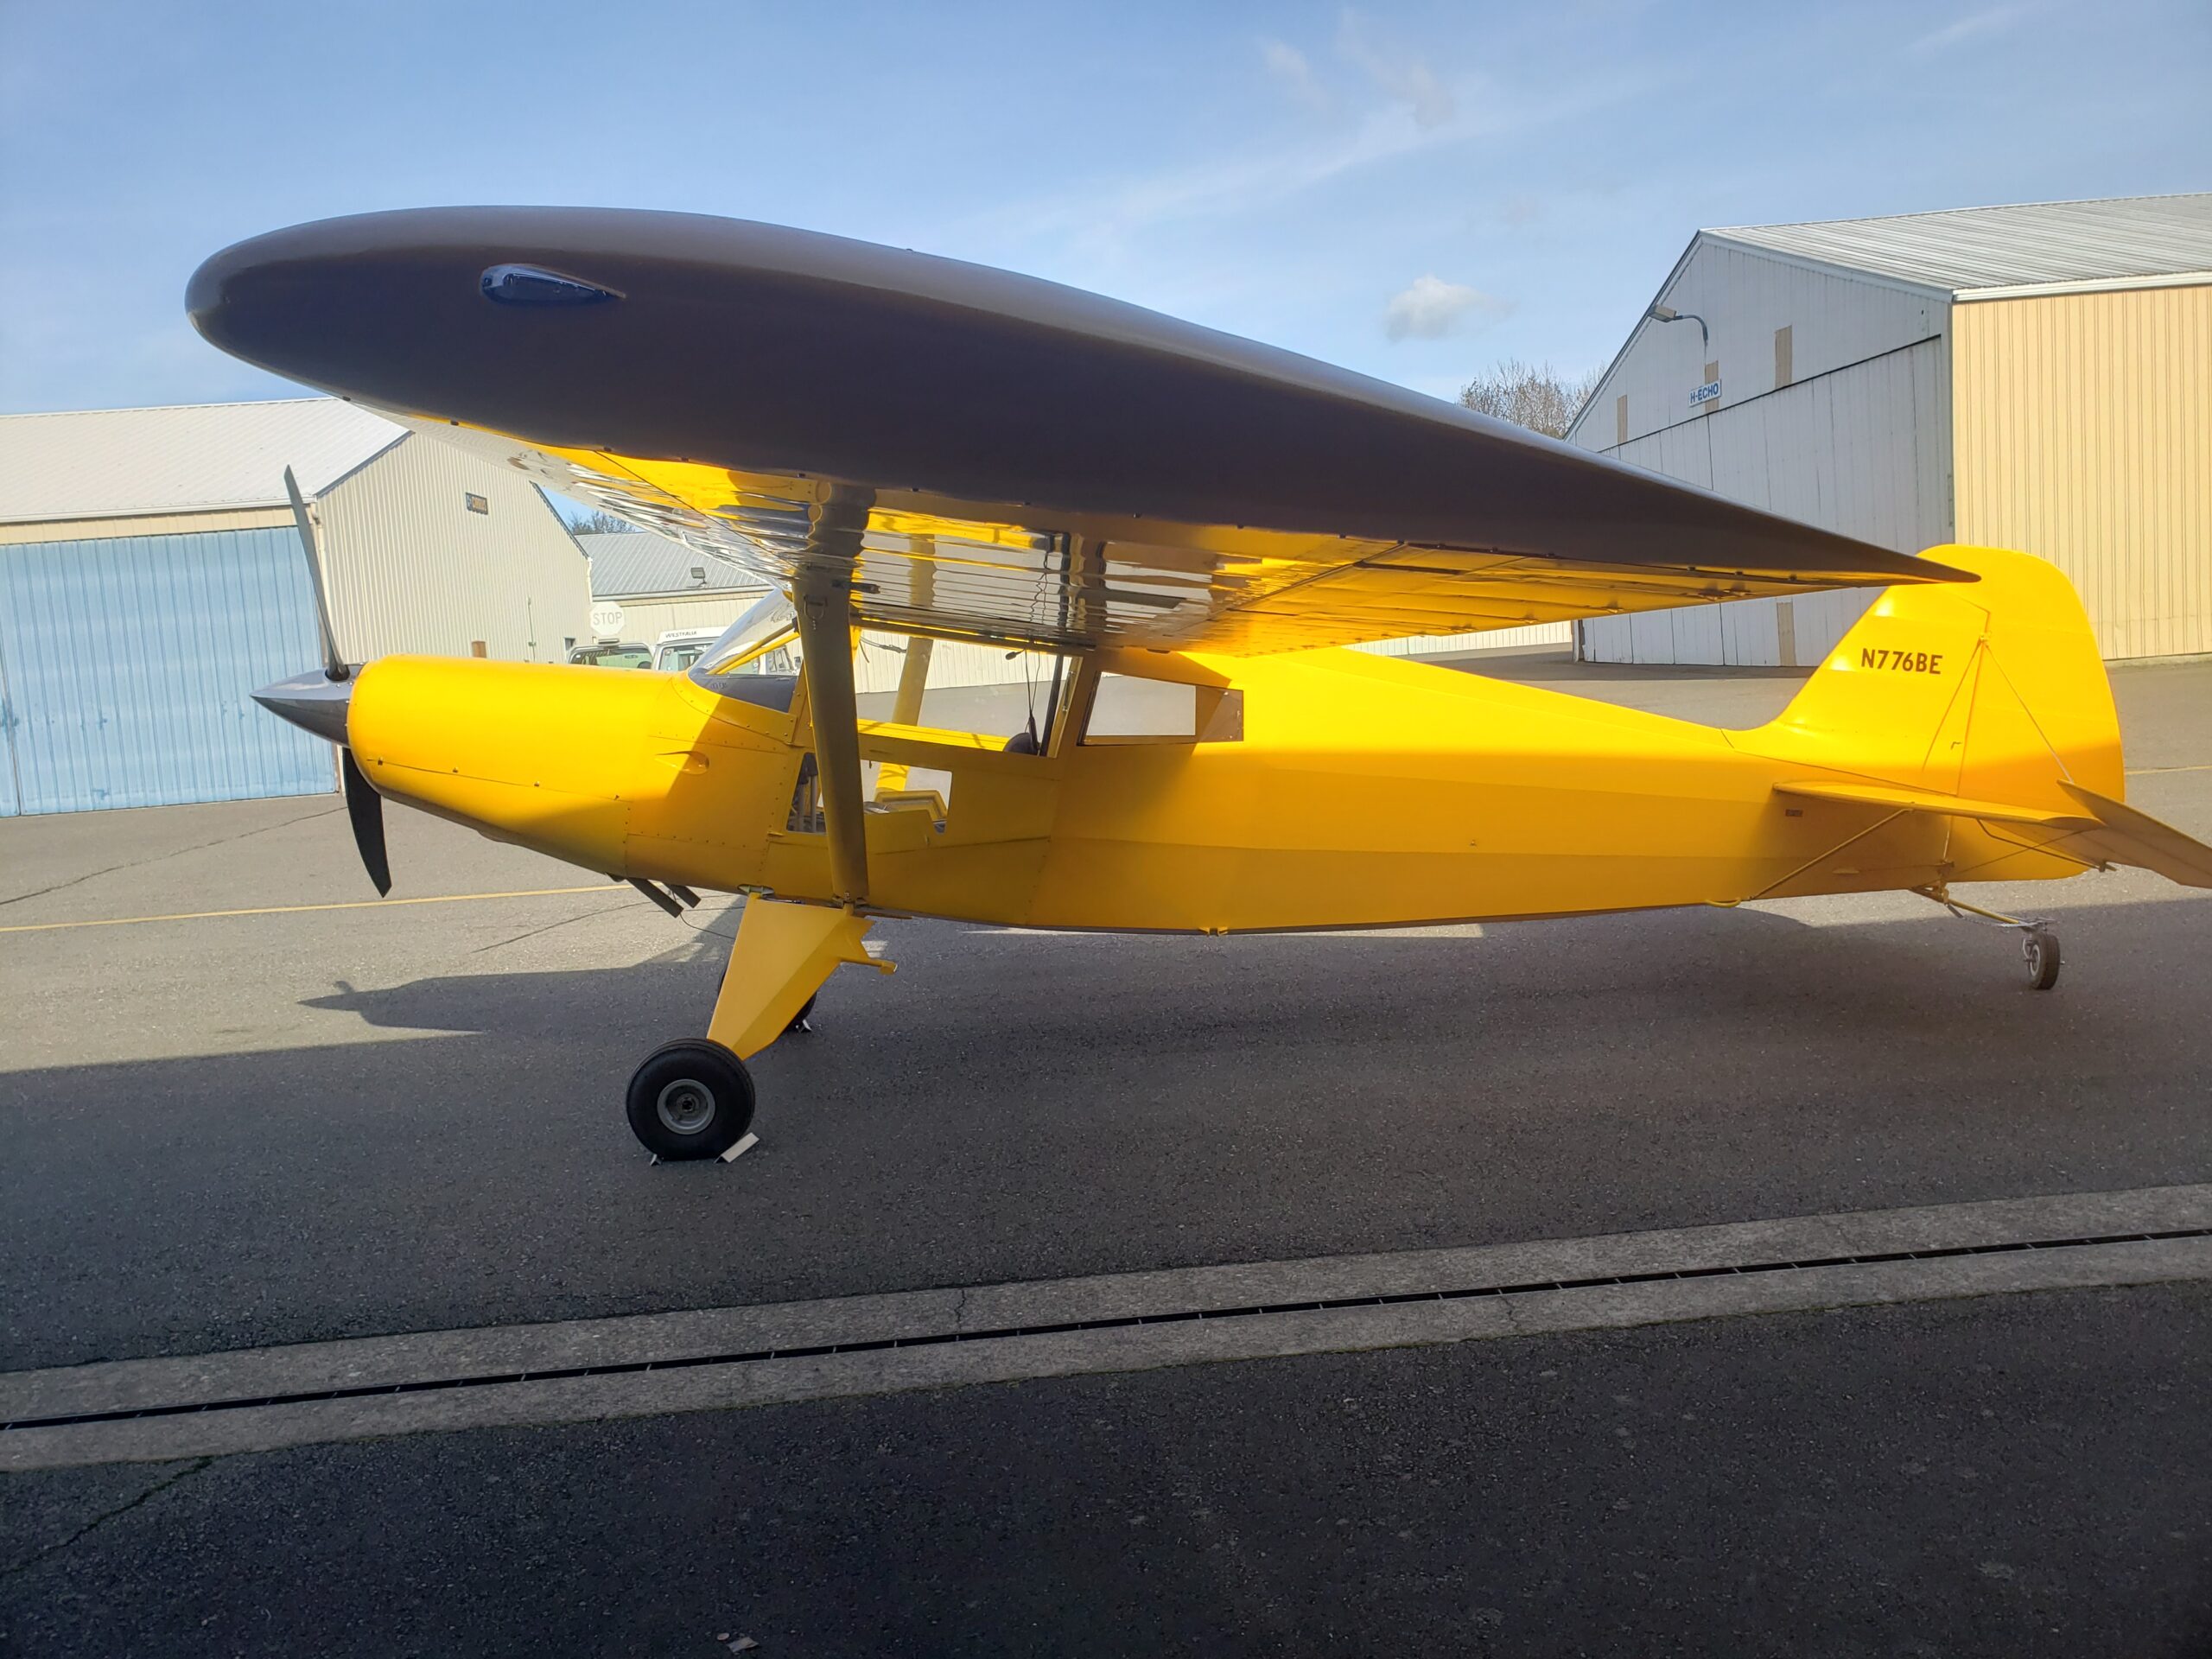
Bearhawk 4-Place N776BE First Flight in Washington
Source: 2024 Q4 Beartracks, John Reddick
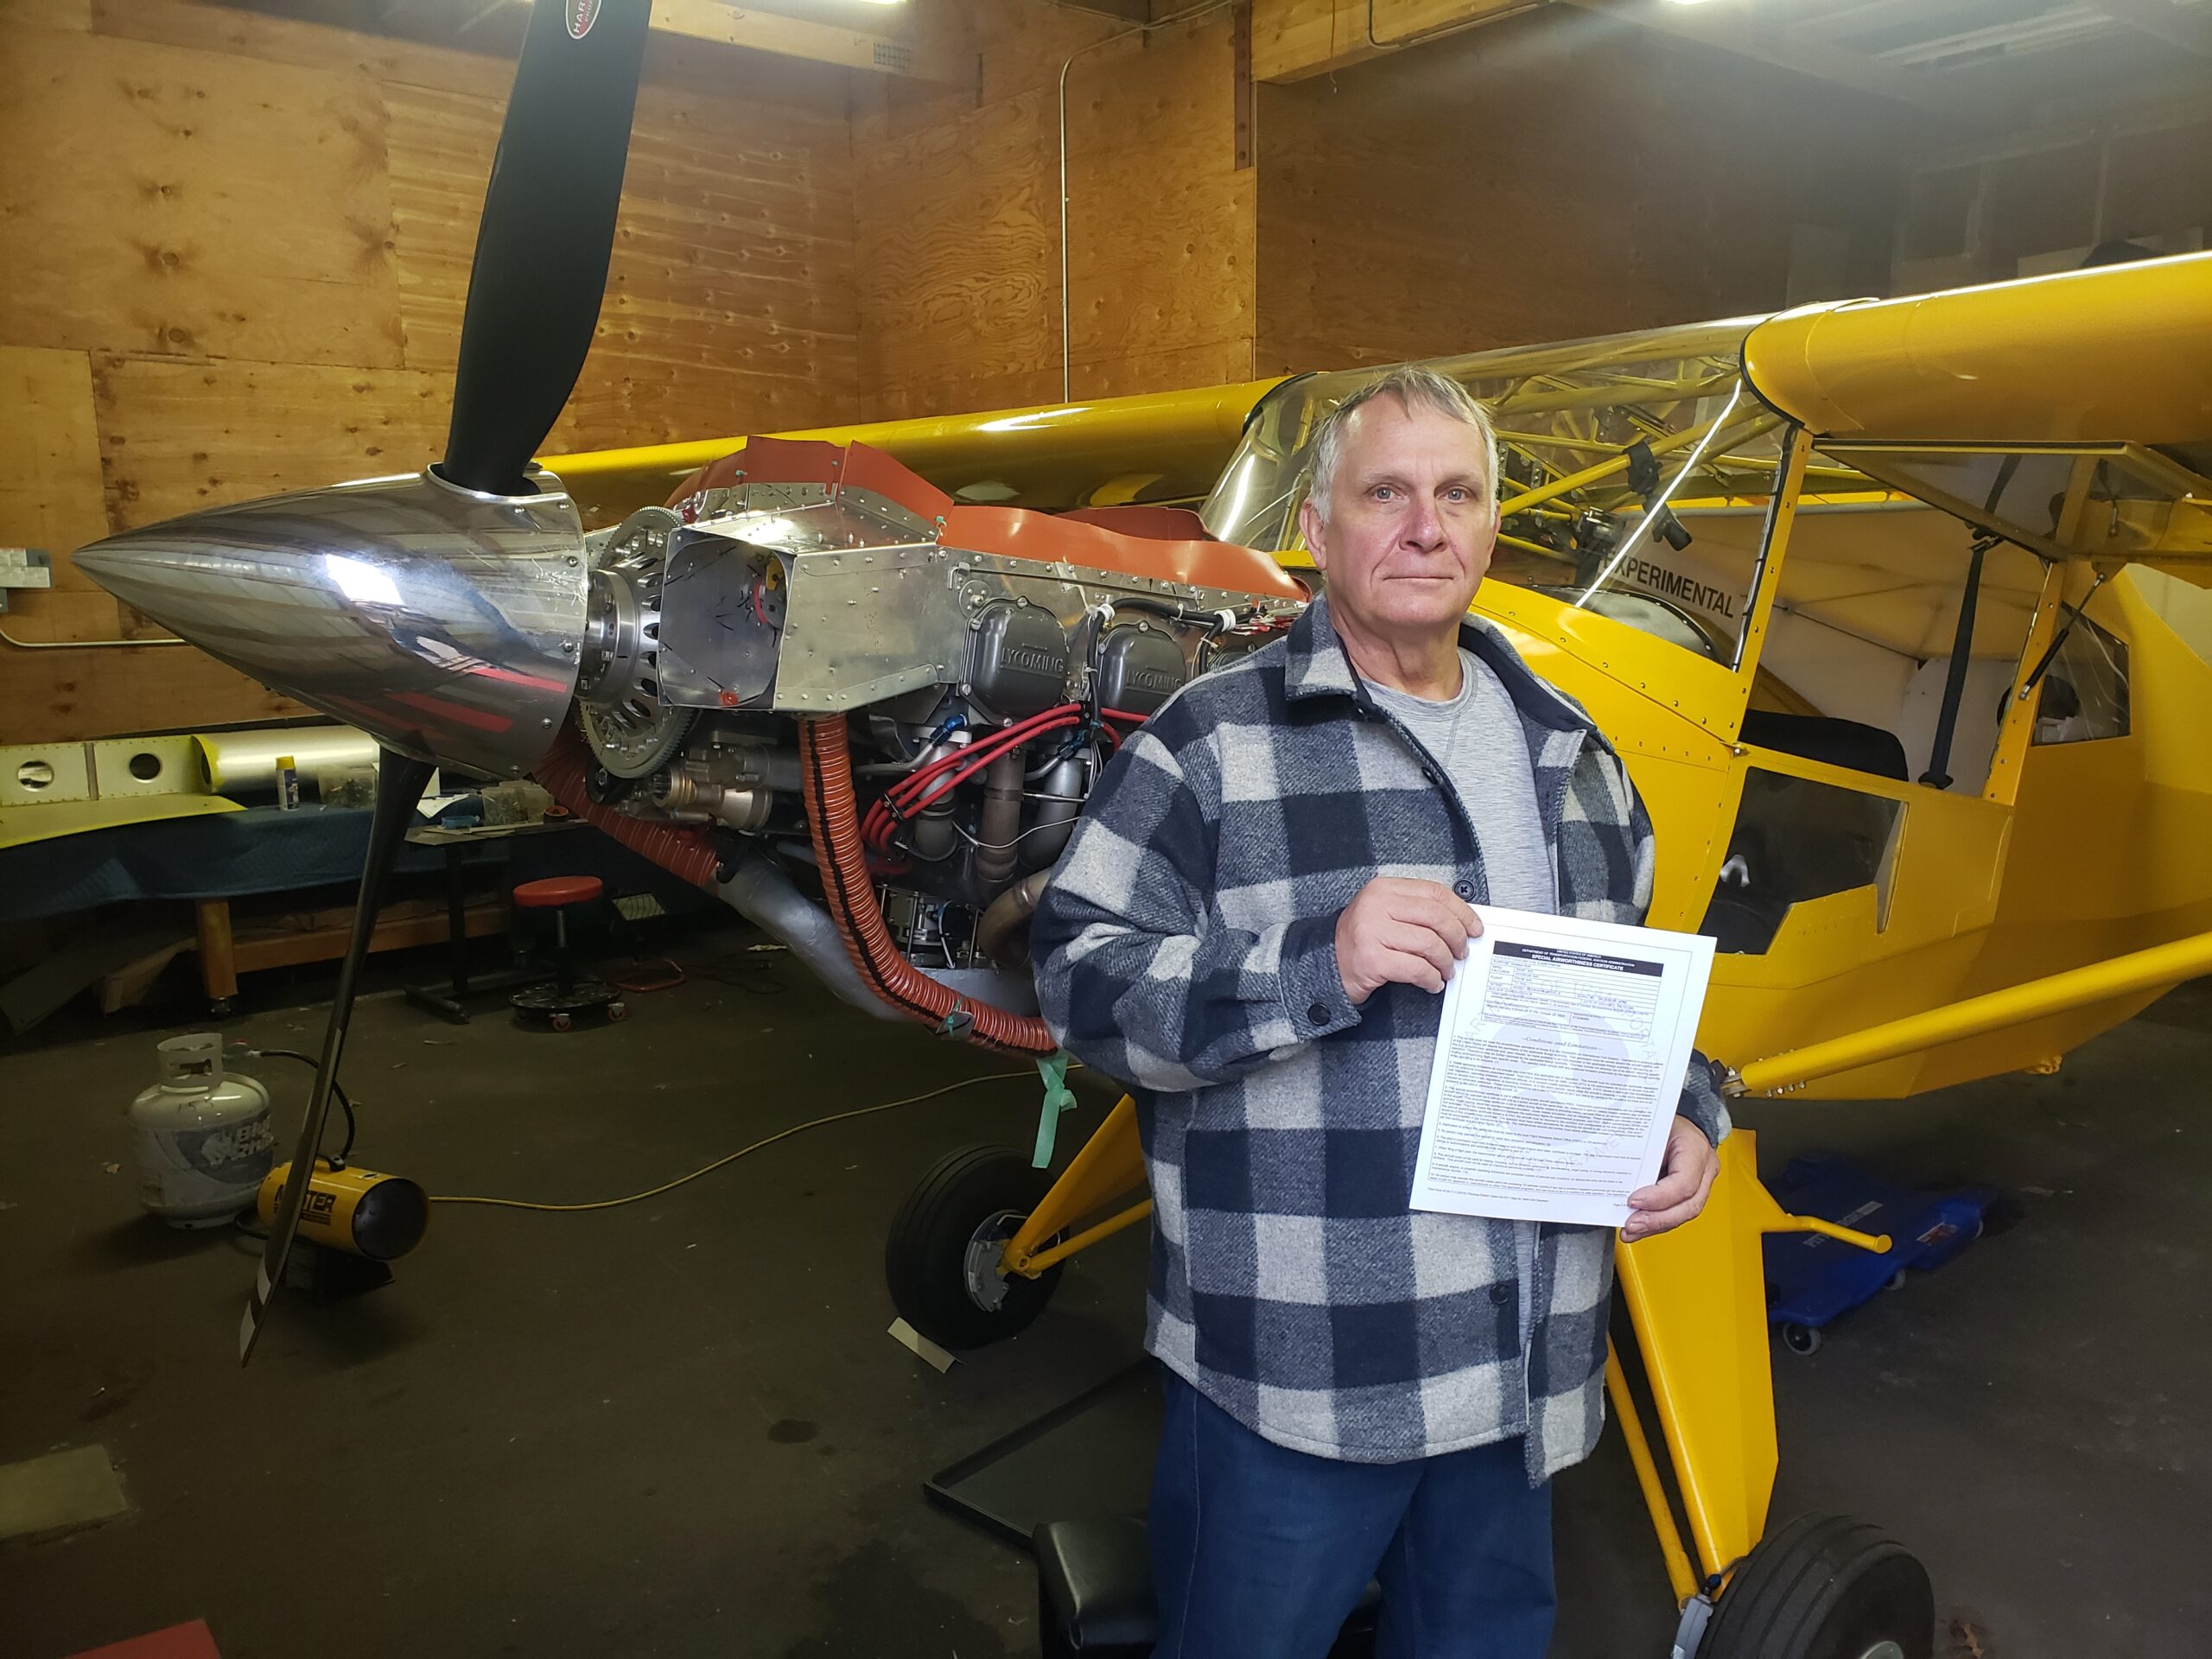
N776BE flew for the first time on Dec 6, 2024 after 6 1/2 years of on-and-off building. I actually only worked on it for 2 years and 4 months. I did numerous “off the ranch” things to the QB “B” model kit. All of that contributed to the extended build time. It was inspected by a DAR on October 30th, 2024.
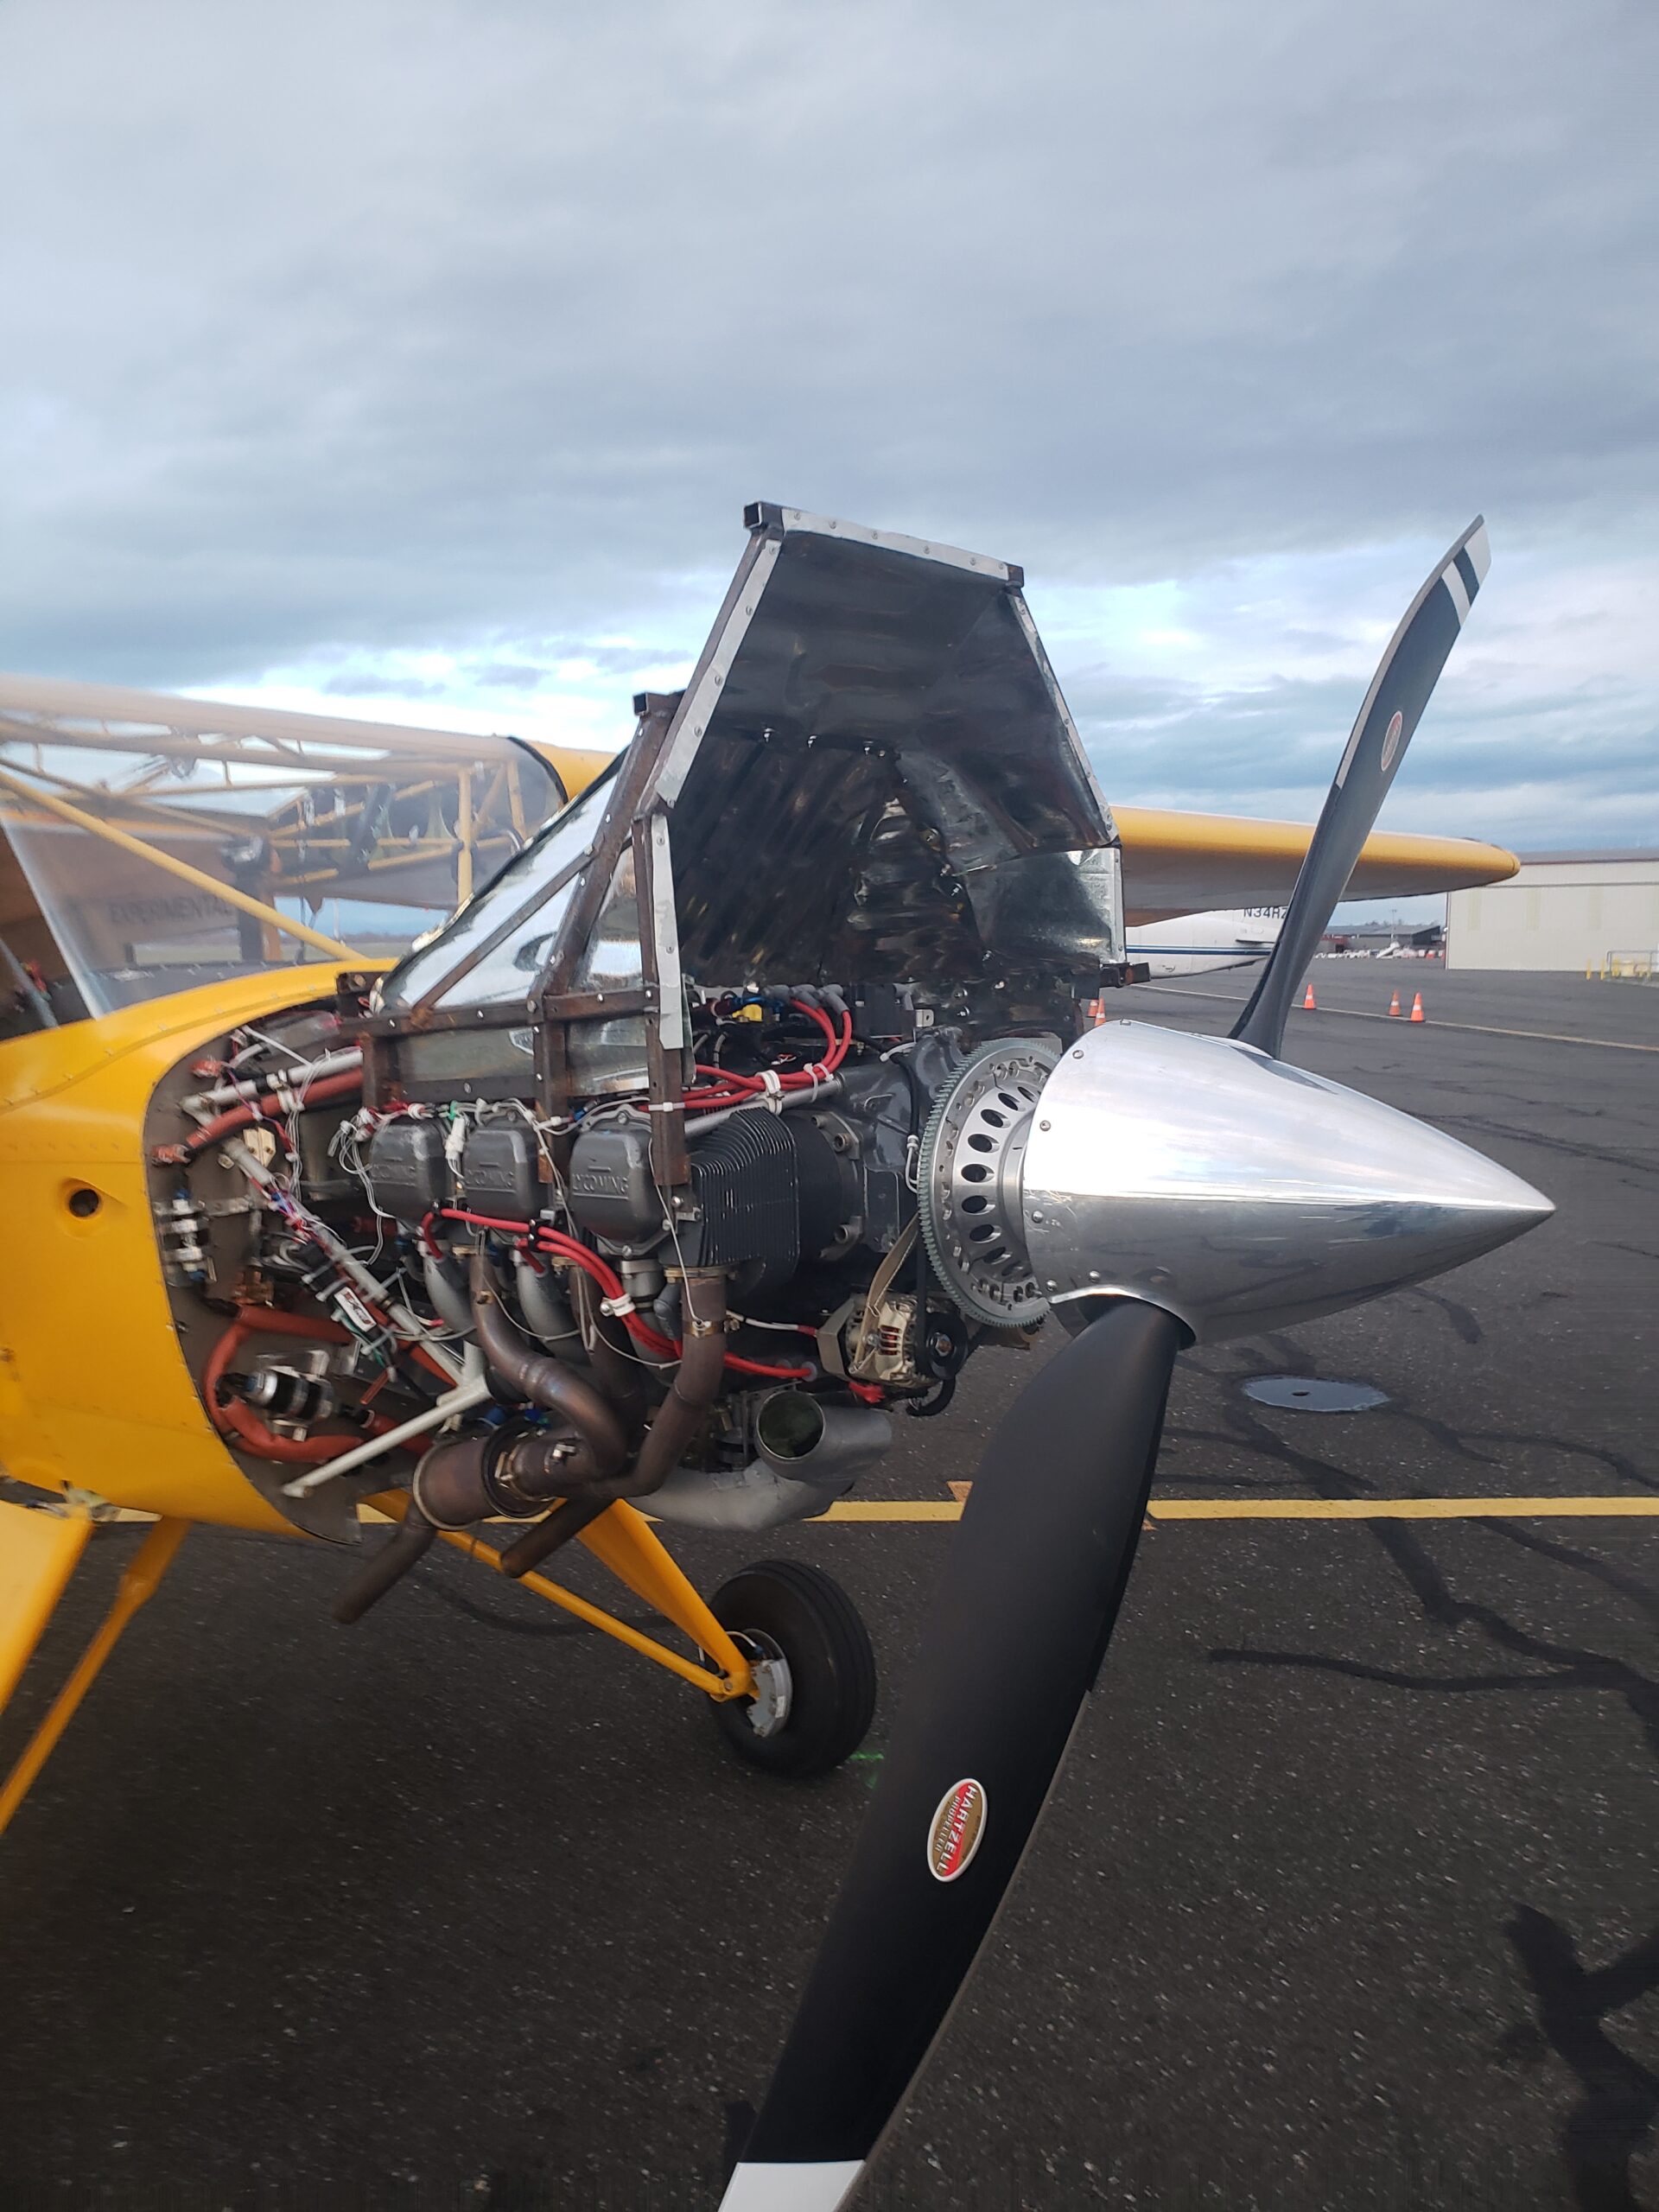
I have about 5 hours flight time in 4 flights, most things working well. Sorting out a heavy left wing, and noise on the VHF com. The #6 cylinder gets hot pretty quick on climb out, despite it being 40-45 F outside. Other cylinders are fine in climb, and all are fine in cruise. Probably mislocated oil cooler flange (installer error). Other than that, going smoothly.
I think the two things that made the first flights much less stressful were 3.2 hours of transition training with Jared, and running the engine in on the ground for 2 hours (picture below). Both gave me a lot more confidence on the first flight.
My “off the ranch” mods were:
-Custom fold down instrument panel
-Composite tail fairing
-Electrical system
-SDS EFI/EI
-“Almost” 2 alternators
-“Almost” 2 batteries
The panel is a simple, single EFIS with a tablet, single com, and remote transponder. The EFI/EI turned a simple plane into a bit of a high school science project, wiring-wise. But I am most comfortable with EFI, and have done a huge amount of 12V wiring, including a business I had for 3 years. This may not be the best choice for someone who hates wiring.
I also used Oratex (which caused the composite tail fairing). If it lasts a long time I love it but it was tedious and time consuming to install.
Empty weight was 1403, CG was 7.1 inches (67 lbs on the tail). IO-540, 2 blade Trailblazer, full skylight. That weight is on small tires, and no back seat. That makes it the mid 1400’s with bigger tires and a back seat. I need 50 pounds of ballast with only front seat occupants.
It is exactly what I wanted when I ordered the kit. Like a lot of homebuilders, I always wanted to build an airplane. I even bought a set of plans when I was 15 or 16. I ended up flying for a living, and moved around so much I was never able to build one, until now.
Thanks to everyone on the forum for all the contributions. I knew what I was getting into before I bought the kit. Thanks to Jared for moderating a great forum, and Mark and Bob for the customer support.
I will put up some posts on my “off the ranch” stuff if anyone is interested.
Bearhawk 4-Place N3XH First Flight in Colorado
Source: 2024 Q4 Beartracks, Rod Smith
After a very long time coming, December 17th, 2024, was the day my Bearhawk finally took to the air. As a very rusty tailwheel pilot with just 6 hours of tailwheel time in the past few weeks, I wondered how it was going to handle and how I would react to any problems that might pop up. Fortunately, the flight went very well. The EAA flight test card #1 says to make your first flight without flaps, I chose to takeoff with 2 notches and land with 3 notches. That’s how Virgil Irwin had me taking off and landing in his beautiful Bearhawk 5 during a 2 hour checkout.
The flight went very well, and I was in awe of the performance. I found my plane to be light on the elevators, a little heavier on the ailerons. As a bonus it flies level with hands off the sticks. The only issue I had was way too much angle on my rudder tab and I was having to use an awful lot of pressure on the left rudder pedal to stay coordinated. So much so that after about 20 minutes my left leg went numb and I thought I better land while I could still move my leg. My first landing wasn’t pretty, didn’t get fully stalled and bounced it. I now have made 3 flights for a total of 2.7 hours. It gets better every flight.
My plane is the original 4-seater with the modified 4412 airfoil. It is scratch built, except I did buy the quick build wing kit from Avipro in 2004 for $9900. I have a modified parallel valve 300HP IO-540 and a 3 blade 83” MT prop. My panel is Garmin G3X with 2 10” screens and set up for GPS IFR. Some modifications I made are carbon fiber gull wing doors and Hoerner wingtips. I moved the trim wheel to the floor, just left of the flap handle and have a console covering the flap and trim wheel mechanisms.
I think I may have the unfortunate record for the longest build time of a completed Bearhawk. Life does get in the way at times. My first build log entry was June 1, 1999, a quarter century ago. That first flight made it all worth it. God willing, I will see many of you at Oshkosh this coming July.


Flight Testing Progress Report N907PM, plus Control Locks for the Flaps and Ailerons, Tail Lift
Source: 2024 Q3 Beartracks, Paul Minelga
Here’s an update of N907PM’s flights, up to 28.2 hours on the Hobbs. Well, there isn’t much to update! This may be shocking to some, but completely logical to me, so let me walk through the hours from first flight to present.
I already went over my first flight in the previous Beartracks article and YouTube video, so no surprises there. So what happened next? Extensive testing of the flight envelope? Figuring out the handling characteristics of my Bearhawk? Multiple stalls, turns, simulated engine failure, full-flap landings? Nope. None of that…well, almost none, but I will explain why and you can critique as you wish.
The first flight was certainly an exhilarating experience. It was the first date with a new machine, flying at the upper range of its engine and airframe performance envelope. The excitement of not knowing which sounds were normal and which sounds could be the beginnings of a catastrophic event was to be experienced, as only one can on a first flight! Well, 1.3 hours later proved the airframe and engine were up to the task of at least one safe takeoff, flight and landing. But the question remained: What’s next? I have a considerable amount of time and money invested in the engine and I want to break it in as best as possible. The EAA test flight checklist doesn’t allow for this scenario. Since the aircraft didn’t offer up any surprises and it is a proven design, my focus on the subsequent hours were focused on engine operating parameters and a proper break-in. In other words, I ran the engine hard. Running hard meant no air work, no slow flight, no series of stop and go landings, no shock cooling, all in the name of engine break-in.
At 5 hours I did my first oil change, and it was necessary! The oil looked like metallic graphite paint! I cut apart the oil filter and thankfully it didn’t yield any unwelcome surprises. Along with the oil, the oil filter just showed minute evidence of a LOT of new moving parts in a powerful internal combustion engine getting to know one another. I even pulled the oil screen in the sump. Fortunately, there weren’t any pieces with part numbers trapped in its mesh. Oil was still being consumed, or blown overboard, but I still don’t know where this engine’s “happy spot” is on the dipstick…every engine has one. So more flying is in order….a lot of flying…within gliding distance of my home airport, until about 10 hours. After that, I did a flight with the last 30ish minutes using a modified EAA test flight checklist by doing stalls and exploring trim changes with different flap settings. I also did a full-power go-around at altitude with three notches of flaps to check if I could overcome the sudden initial trim change. I did.
After that 10ish hours without an engine failure I figured it was time to spread my wings a bit and do a little cross country, at full power of course. I was flying in familiar territory. In my beautiful part of Alaska there are a BUNCH of airstrips available in case of an unfortunate event. Almost all are private, but I have yet to meet anyone that would not welcome a pilot in immediate need of a short, semi-flat surface. So my next 15 hours were spent doing cross country flights, at altitude, at close to full power. At 25.4 hours it was time for a another oil change and a good look over of the airframe. In addition to the oil change, I did a mini condition inspection as most of the important parts on the airframe and controls are hidden behind panels and can’t be seen on a preflight. I built a tail stand and calibrated my oil dipstick in the 3pt attitude and verified the factory stamped level attitude markings.
So what are my takeaways and what did I learn? First and foremost I always did a good preflight and a very thorough post-flight after every flight. On one post-flight I discovered the inlet fitting of the oil cooler started leaking. Everything stopped until it was fixed. I also maintained a meticulous log of the engine parameters. Even at the top end of the performance envelope, flying in circles can get pretty boring. Every flight I recorded the OAT, engine oil temperature, oil pressure, each cylinders EGT and CHT (Number 2 has always been my hottest), fuel flow, volts and amps. During my cross country flights I experimented with how minor trim settings affected level flight and always tried to keep my altitude within 50 feet of my target altitude. BTW, my BH can be trimmed to fly hands-off in smooth air, no heavy right wing as some have experienced. I feel very fortunate in that area. I also have a real-time CO detector in the cockpit and I recorded those readings as well. I never saw more than 1 PPM in level flight and 8 PPM maneuvering. I also took note of the differential between the level of the fuel tanks after refueling. I always flew with both tanks selected and never had more than 1 ½ gallons differential between the two at refueling.
One thing that took me off-guard a bit was making the transition from fabrication mode to maintenance mode. I built this thing, now I have to maintain it. It’s a completely different set of skills! I started a list of deferred maintenance items to “fix” during my next condition inspection. They are all minor, but should be resolved.
Now that I am satisfied that the engine is broken in and the aircraft doesn’t exhibit any control anomalies, I will start and complete the EAA flight test checklist. I feel it is very important to do the methodical testing and documentation of the aircraft. But, like I said before, this is a tried and true design and the first few hours didn’t exhibit any builder-induced surprises, so I was comfortable in getting the engine properly broken in before going any further. As an aside, I legally took up my first passenger the other day…my wife! The day was stunning. It was completely clear, light wind and the fall colors of the birch and aspen against the turquois blue of the Kenai River were amazing. Even Denali (formerly Mt. McKinley) was in full view in spite of it being over 150 miles away. “Don’t give in, don’t give up.” – Iwai Makoto

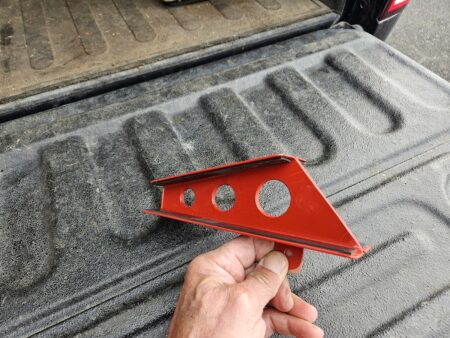
Control Locks:
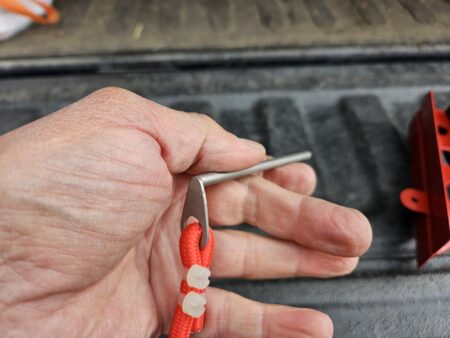
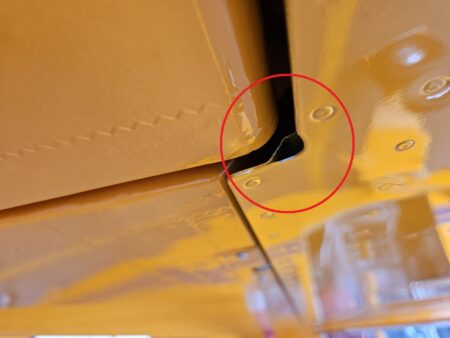
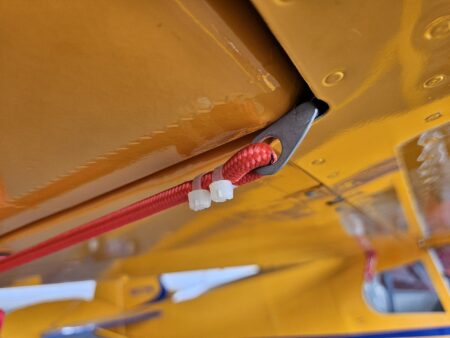
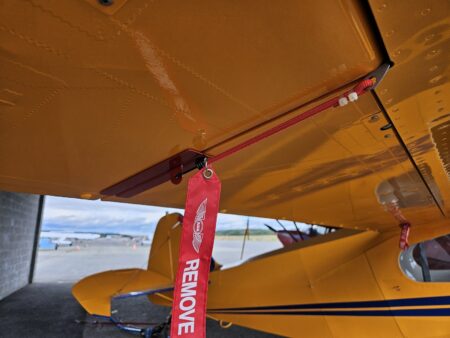
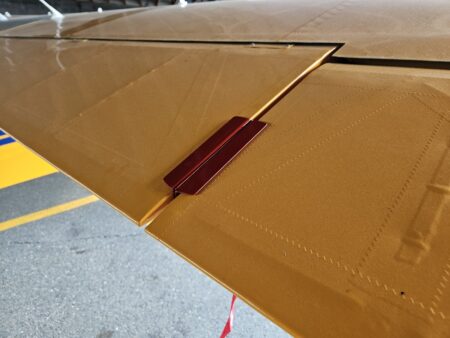
I want to share what I made for the 4-place BH. Yes, they look almost identical to the Atlee Dodge gust locks because that’s where I got the idea from. I would have bought them from Atlee, but I wasn’t sure if the profile angle of the Piper aileron/flap matched the angle of the BH control surfaces. Also, the bungees holding the Atlee locks in place wrap around the lift strut of the Piper. That isn’t an option for the BH as the lift strut is way out of alignment with the aileron/flap intersection. I looked at ways to attach a bungee and almost settled on drilling a hole in the bottom of the wing somewhere close to the edge and installing a small eye bolt. I spent a lot of time just thinking about options when saw a little hole in the wing that is created by a stiffener that is riveted to the trailing edge of the flap pocket. I tried out different diameters and lengths of rods and found one that slid in and out without any trouble.
I made the pins and the eyes welded to the end of the pins out of stainless steel so they wouldn’t rust. I made the locks themselves out of some scrap .060 5052 that I had in my now vacant shop and glued some neoprene strips on the surfaces that contact the fabric. A couple of red bungees, flagging and some zip ties later I have a set of gust locks!
I have a set of Air Gizmos gust locks that I was using for the flaps, but I had to still tie the stick back. Also, there were a couple of times I found the gust lock on the ground when it had worked itself loose. The Air Gizmo lock works great as long as the surfaces are close to parallel. So instead of buying another set for the elevator, I made these and am now using the ones I had for the flaps on the elevator. Now everything is tight and I don’t have to use the seat belt to tie the stick back.
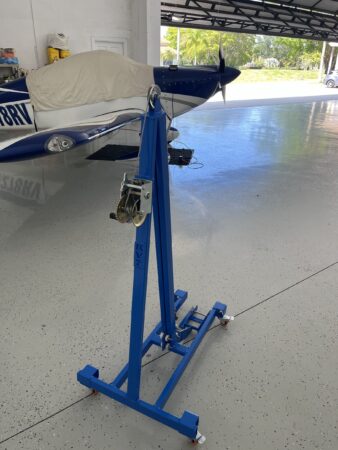
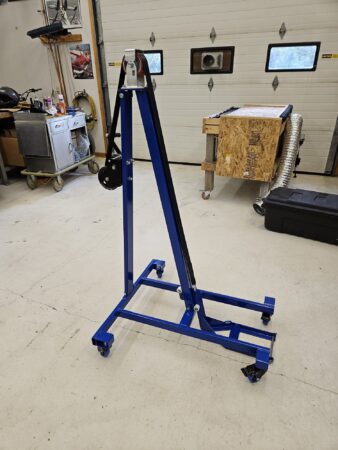
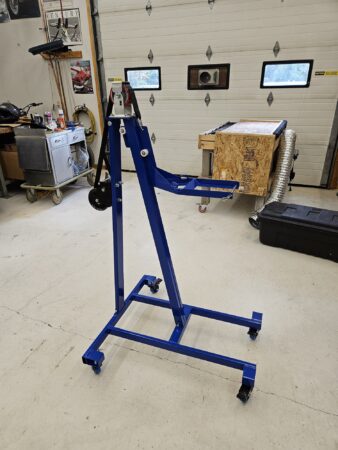
Tail Lift:
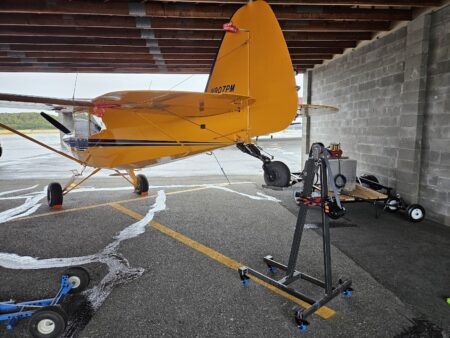
Bearhawk 4-Place N907PM First Flight
Source: 2024 Q2 Beartracks, Paul Minelga
Jared was nice enough to ask me to write an article about my first flight in the Bearhawk, and since then I have been thinking about what that actually meant for me…first flight in an aircraft that I had built. So, my take will be a bit different than what others have written.
I had a fascination with airplanes as long as I can remember, but my desire to build an airplane started in the early 70s while attending high school in Lacey, Washington. I was 17, worked at an Olympia airport FBO and was on the way to earning my Private Pilot Certificate. A friend took me to Tenino to meet the Sorrell family and I saw a Hyperbipe for the first time. Little did I know that it was the first one made and in my eyes it was really strange, almost scary-looking compared to the Cessna I had been flying. After watching a short demo flight, my friend took me over to meet another man on the same airstrip who was building a Stolp Starduster Too in his garage. All I remember was this guy in the middle of a really, really cool workshop with a tube fuselage under construction and surrounded by lots of aviation-related organized chaos. I was astonished that this guy was actually making an airplane…from plans…by himself! Then and there I decided that I wanted to, somehow, someday, do the same.
Fast forward to the mid 80s. I had left Army Aviation in Germany to start another career in the FAA as a center controller in Alaska. I had since married a wonderful German lady and had a son, and soon had another son. We were pretty poor at the time, and as a single income household on a trainee salary in Alaska, money was tight. I didn’t fly privately, but I dreamt of building a Van’s RV-6 and built R/C airplanes as time and budget permitted.
Jumping in time again to 2003, I was well-entrenched in the FAA. I had built my own home, my oldest son was in college having graduated high school in 2001 and son #2 was a junior. By that time I had realized an RV-6 wasn’t the right aircraft for Alaska and nothing else in the homebuilt world looked like what I was envisioning. A good friend of mine named Rob Taylor showed me a picture of a Bearhawk. I immediately said: “THAT’S IT!…ummm…what is it?” That Christmas 2003, Santa (with a little help from Rob) gifted me Bearhawk plans #708 and that’s when the journey started in earnest. Rob and I went to OSH 2005 and had a blast. That’s when I met Budd Davisson and Mark Goldberg for the first time at the Bearhawk booth. Also, I got my first ride in Mark’s (now Jared’s) N303AP and my first taste of what a Bearhawk was like. Not long after I ordered a set of “quickbuild” wings, all the tubing and flat stock to make the fuselage, and started building a shop to put it all in.
This is my first kitlog entry. Notice the OCD force was very strong:
Date: 3-14-2008
Number of Hours: 1.00
Brief Description: First Longeron
I started by laying out the bottom of the fuselage on the jig table. All went well except I found that Station C “pinched in” about 1/8th inch on either side when a line was drawn between Station B and D. Apparently, this should be a straight line. I triple-checked my measurements and found them to be correct. I polled the BH group about this and the answer I got was that it should be a straight line. It makes sense that way anyway. I’m trying to be too exact in my measurements it seems. I guess officially, this is the first day of construction although I never got the longeron bent the whole way. I’m sure when it’s all said and done that I’ll look back on this first log entry and just laugh!
This is my last kitlog entry after 16 years and 4269.2 hours, interspersed with weddings, memorial services, births, career changes, camping trips, and just living life:
Date: 4-26-2024
Number of Hours: 40.00
Brief Description: The end of my Kitlog
Well, this is it. The fairings and panels are all on and the project is complete. I put 40 hours of work on this entry because it spans the many days of the last two weeks that wasn’t logged, getting everything done in preparation for the DAR visit and reassembling everything afterwards. I taxied the airplane today and it’s ready for its first flight. That will happen when I get some refresher training. If you are reading this and building a project…keep at it. It’s not an easy thing to do. But if you do a little every day, it will eventually come together. Good luck!
I have to admit the first flight was a bit stressful. The tach had failed on runup, but it’s not required equipment. I had flown enough to judge RPM, but it did make me think twice and I almost taxied back. I lined up on the runway, but before I put the throttle in I paused a bit as per Ken Frahm’s (AKKen) suggestion. I went over everything in my mind again: I’m in an airplane that has never been in the air and I’ll be flying it at the waaaay upper end of its design speed envelope because the engine is brand new and needs to be run at 75% power or more to be broken in. Will the airplane fall apart? Probably not. I did the best I could and I know everything is right. Am I ready to land it if it make it that far? Yes. I can get it on the ground safely, it may not be elegant, but I’ll survive. A short prayer as the throttle went forward and the rest is, as we say, history. So it really wasn’t a first flight, but the culmination of a life ambition with the help and support of many good friends and family.
The Bearhawk performed very well and others before me have captured that in their first flight reports, so no need to rehash that. But here is a parting thought as I wrap this up. There are many nights I struggled in the shop making parts, remaking parts, correcting mistakes, making new mistakes, correcting those…on and on and on. There were times I just wanted to pack the whole thing up, drive it to a cliff overlooking Cook Inlet and dump it all in. Don’t give up. If you need to, take a short break, but don’t give up. Most times a good night’s sleep did the trick on helping solve a construction impasse.
If you want some inspiration, get this book and read it. It was gifted to me by my oldest son and it is a good read: The Propeller under the Bed: A Personal History of Homebuilt Aircraft by Eileen A. Bjorkman. On July 25, 2010, Arnold Ebneter flew across the country in a plane he designed and built himself, setting an aviation world record for aircraft of its class. He was eighty-two at the time and the flight represented the culmination of a dream he’d cultivated since his childhood in the 1930s.
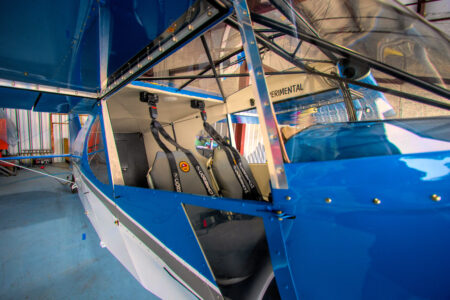
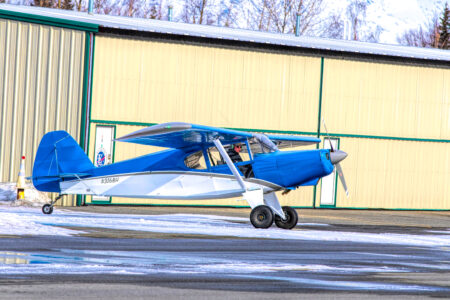
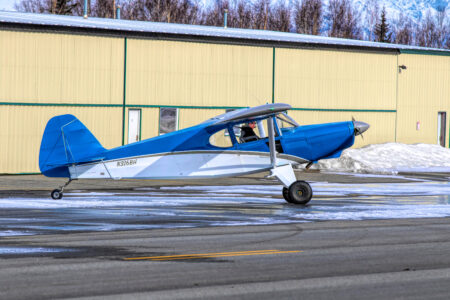
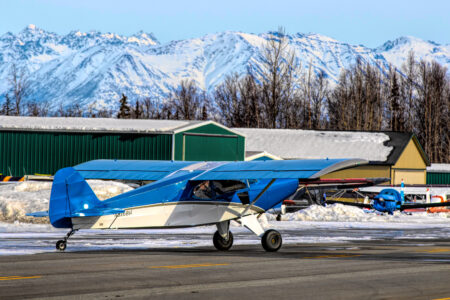
Bearhawk 4-Place N316BH First Flight
Source: 2024 Q1 Beartracks, Scott Hoover in Alaska
N316BH, serial number 1266, is a plans build 4-place original model with some B model upgrades. I purchased the plans and many of the materials from a local man in Alaska who decided to go another direction with his build. It was built with a fair number of parts purchased from Bearhawk Aircraft and the VR3 Engineering tubing kit. N316BH has the original wings and tailspring but I upgraded the horizontal stabilizer, the door formers, and I re-enforced and strengthened the aerodynamic gear shock-struts with an internal round tubing. A skylight was added and lowered to match the wing across the top. I also reinforced the frame and welded a float kit along with ski cable attachment points.
The interior is simple and light with painted fabric. I kept my panel simple as well. I went with the MGL Xtreme EFIS and EMS along with a panel mounted iPad mini and two AHRS units that provide ADSB and air data to the iPad. All said and done I was pleased with my empty weight and CG. With the Bob Barrows O-540 and a metal two blade 84″ Hartzell propeller installed the empty weight came in at 1420 lbs. The CG is just aft of the forward limit with a pilot in the seat and empty fuel tanks. This leaves the entire CG envelope available for cargo, fuel and passengers. Impressive design for sure! My initial impression after just a few flights is WOW!!! What an incredible airplane! Very few things in life can beat that first flight! This was my first build and my first flight in a Bearhawk. After a couple of engine runs per the Lycoming instructions and a couple of taxi tests I was ready for the big event! After one more detailed inspection and one final run up I lined up on runway 20R at the Birchwood airport in Chugiak Alaska. It was a perfect day: 28 degrees, clear skies and little to no surface wind. The pressure altitude was well below sea level so I suspected great performance. Once on the runway I pushed the power up to 1200 RPM and let the plane slowly accelerate while taking one more concentrated look at the EMS, satisfied, I pushed the throttle on the untethered engine up to full power for the first time. She roared to life! I was thrown back in my seat with far more pressure than I have ever felt before in a single engine piston aircraft, it was at that moment that the smile came on my face and lasted for the next hour. The plane literally leapt off the runway before I even got the throttle to it’s stop. To my relief the airplane felt perfectly rigged and I rocketed to 3000′ at my planned 100mph climb speed. The first flight was all about engine break in and basic controllability checks. Fortunately, there are no issues other than some avionics problems that I’m still working through.
My overall impression of the Bearhawk is that it is perfectly designed for mechanically inclined individuals to build, even from scratch, with little experience in building aircraft. The great majority of the airplane is constructed using very basic metal working skills. The project took me nearly 7 years to “complete” as a hobby with many distractions along the way.
The plane feels light and even sporty in the air. It is wonderfully powered with an 0-540 and stable at high and low speeds yet still extremely responsive to flight control inputs. I look forward to exploring the entire flight envelope as I work through my flight test profile.