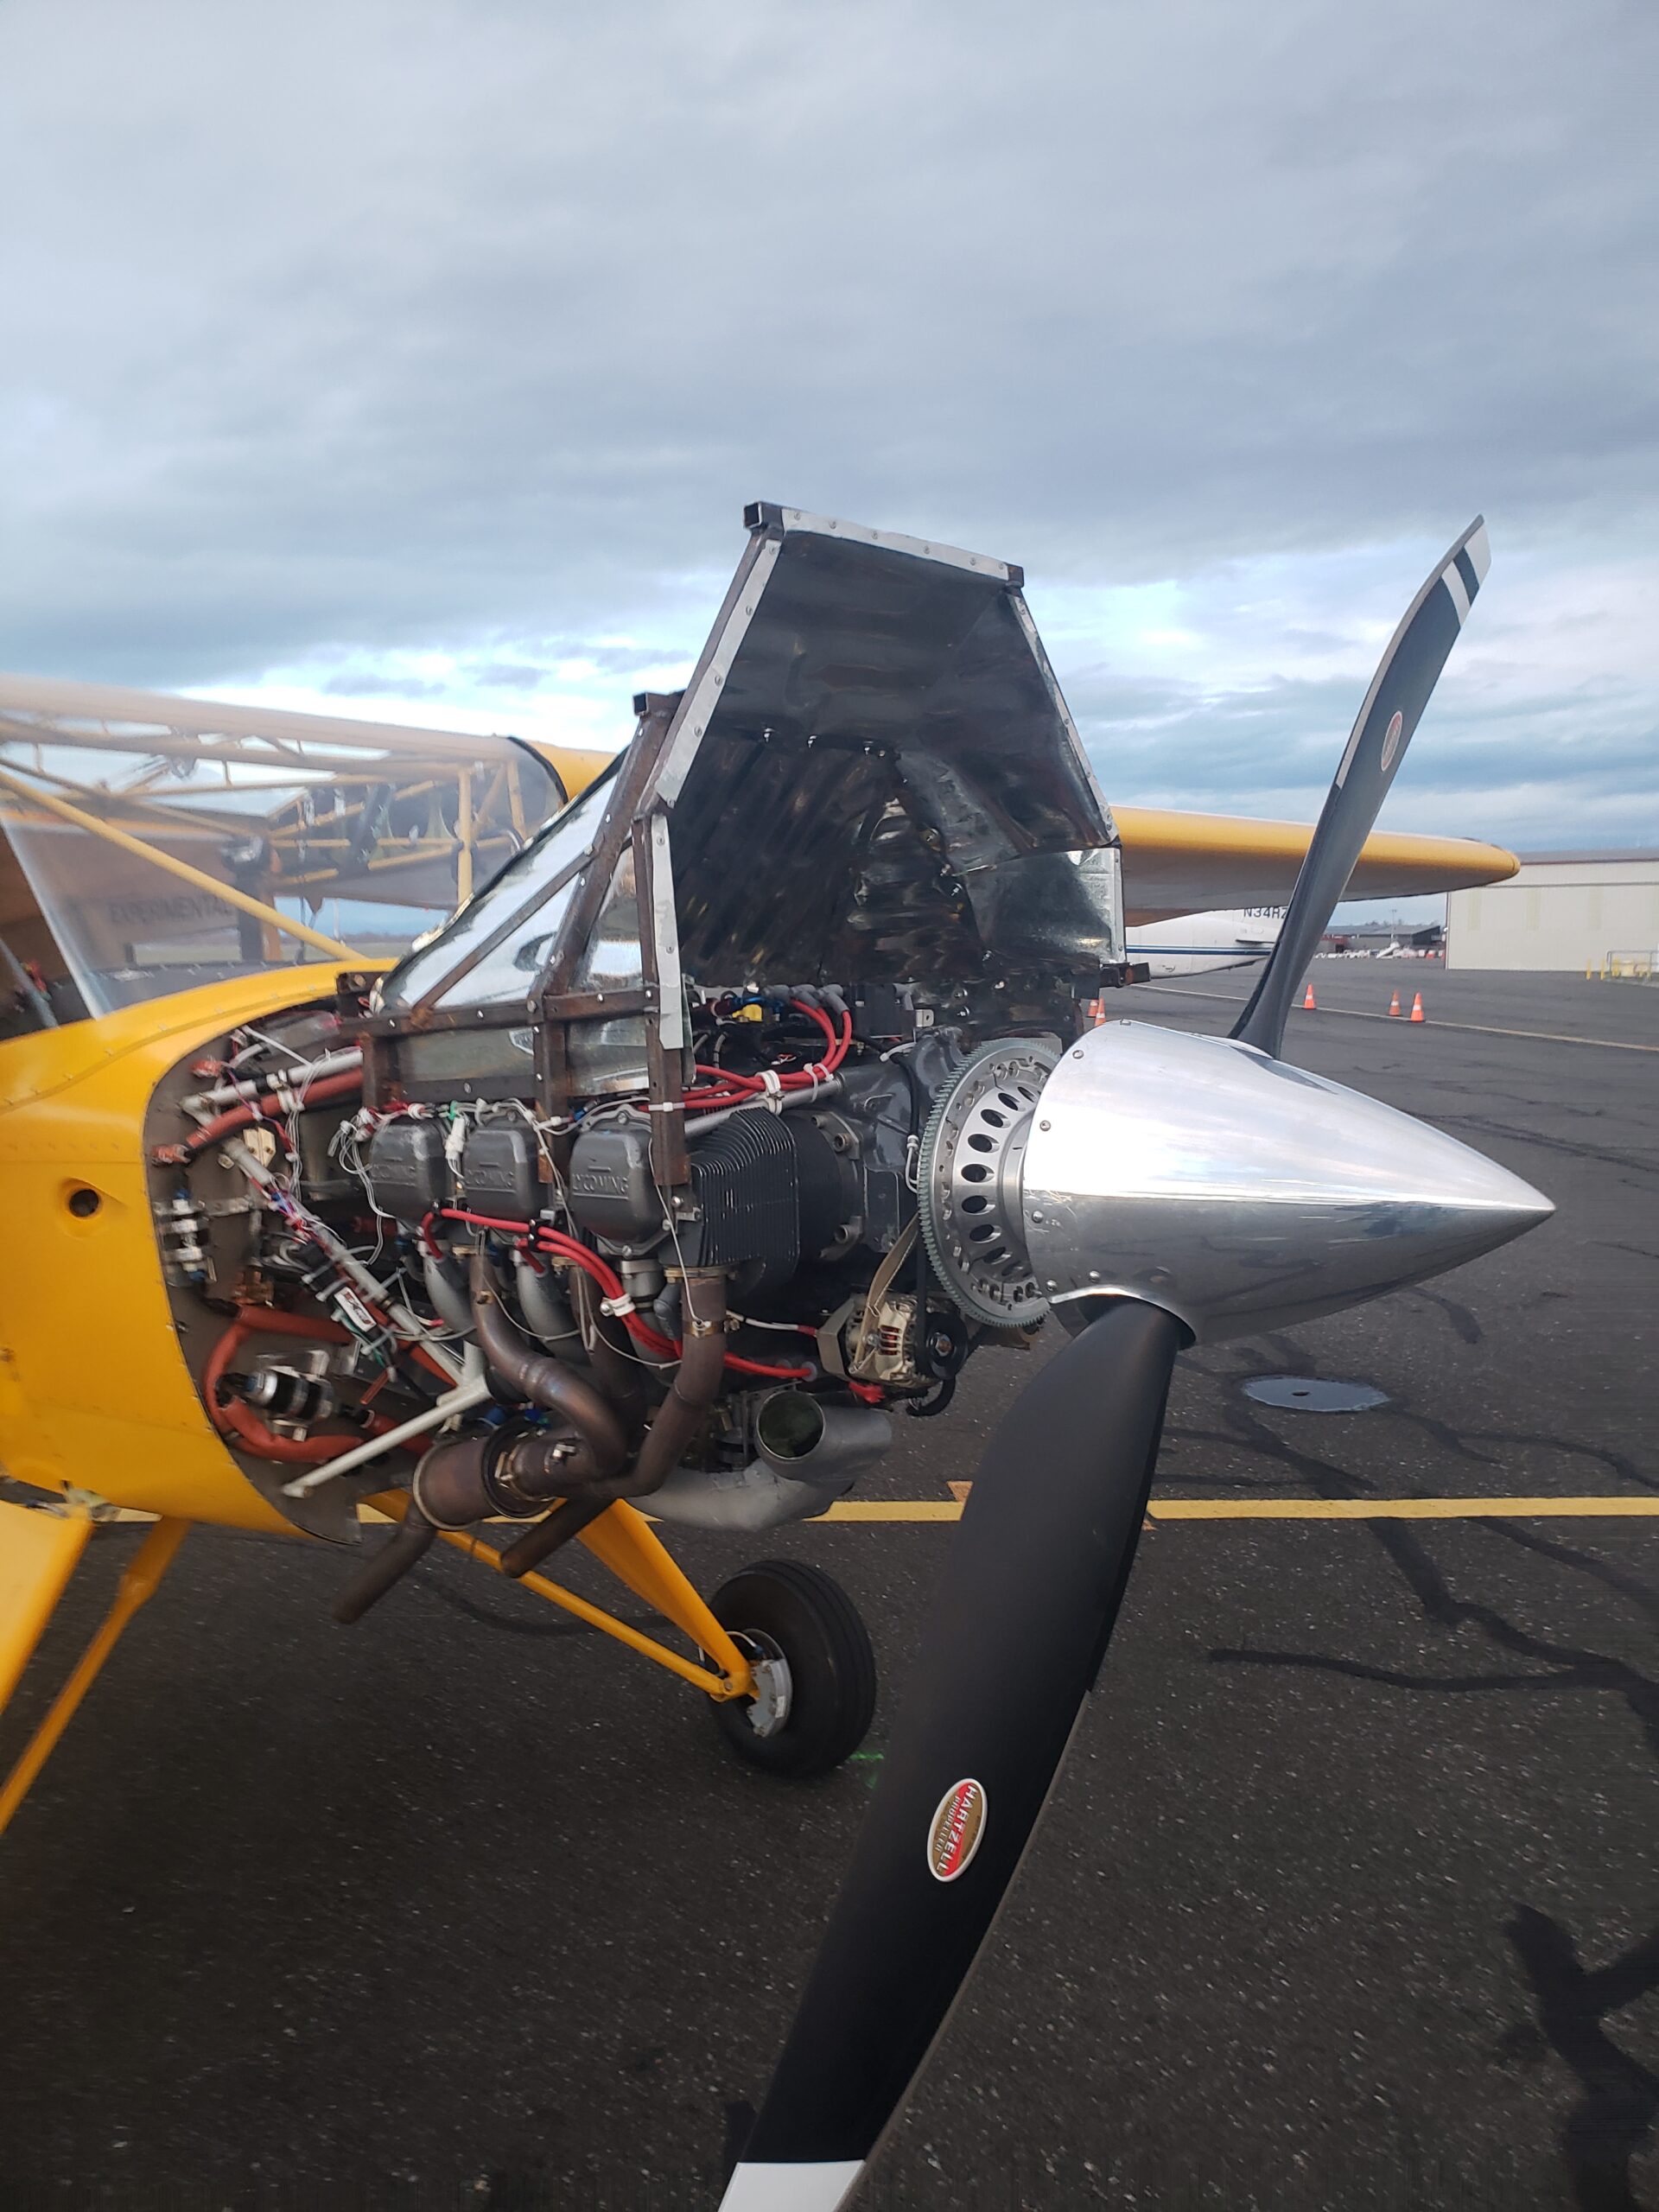
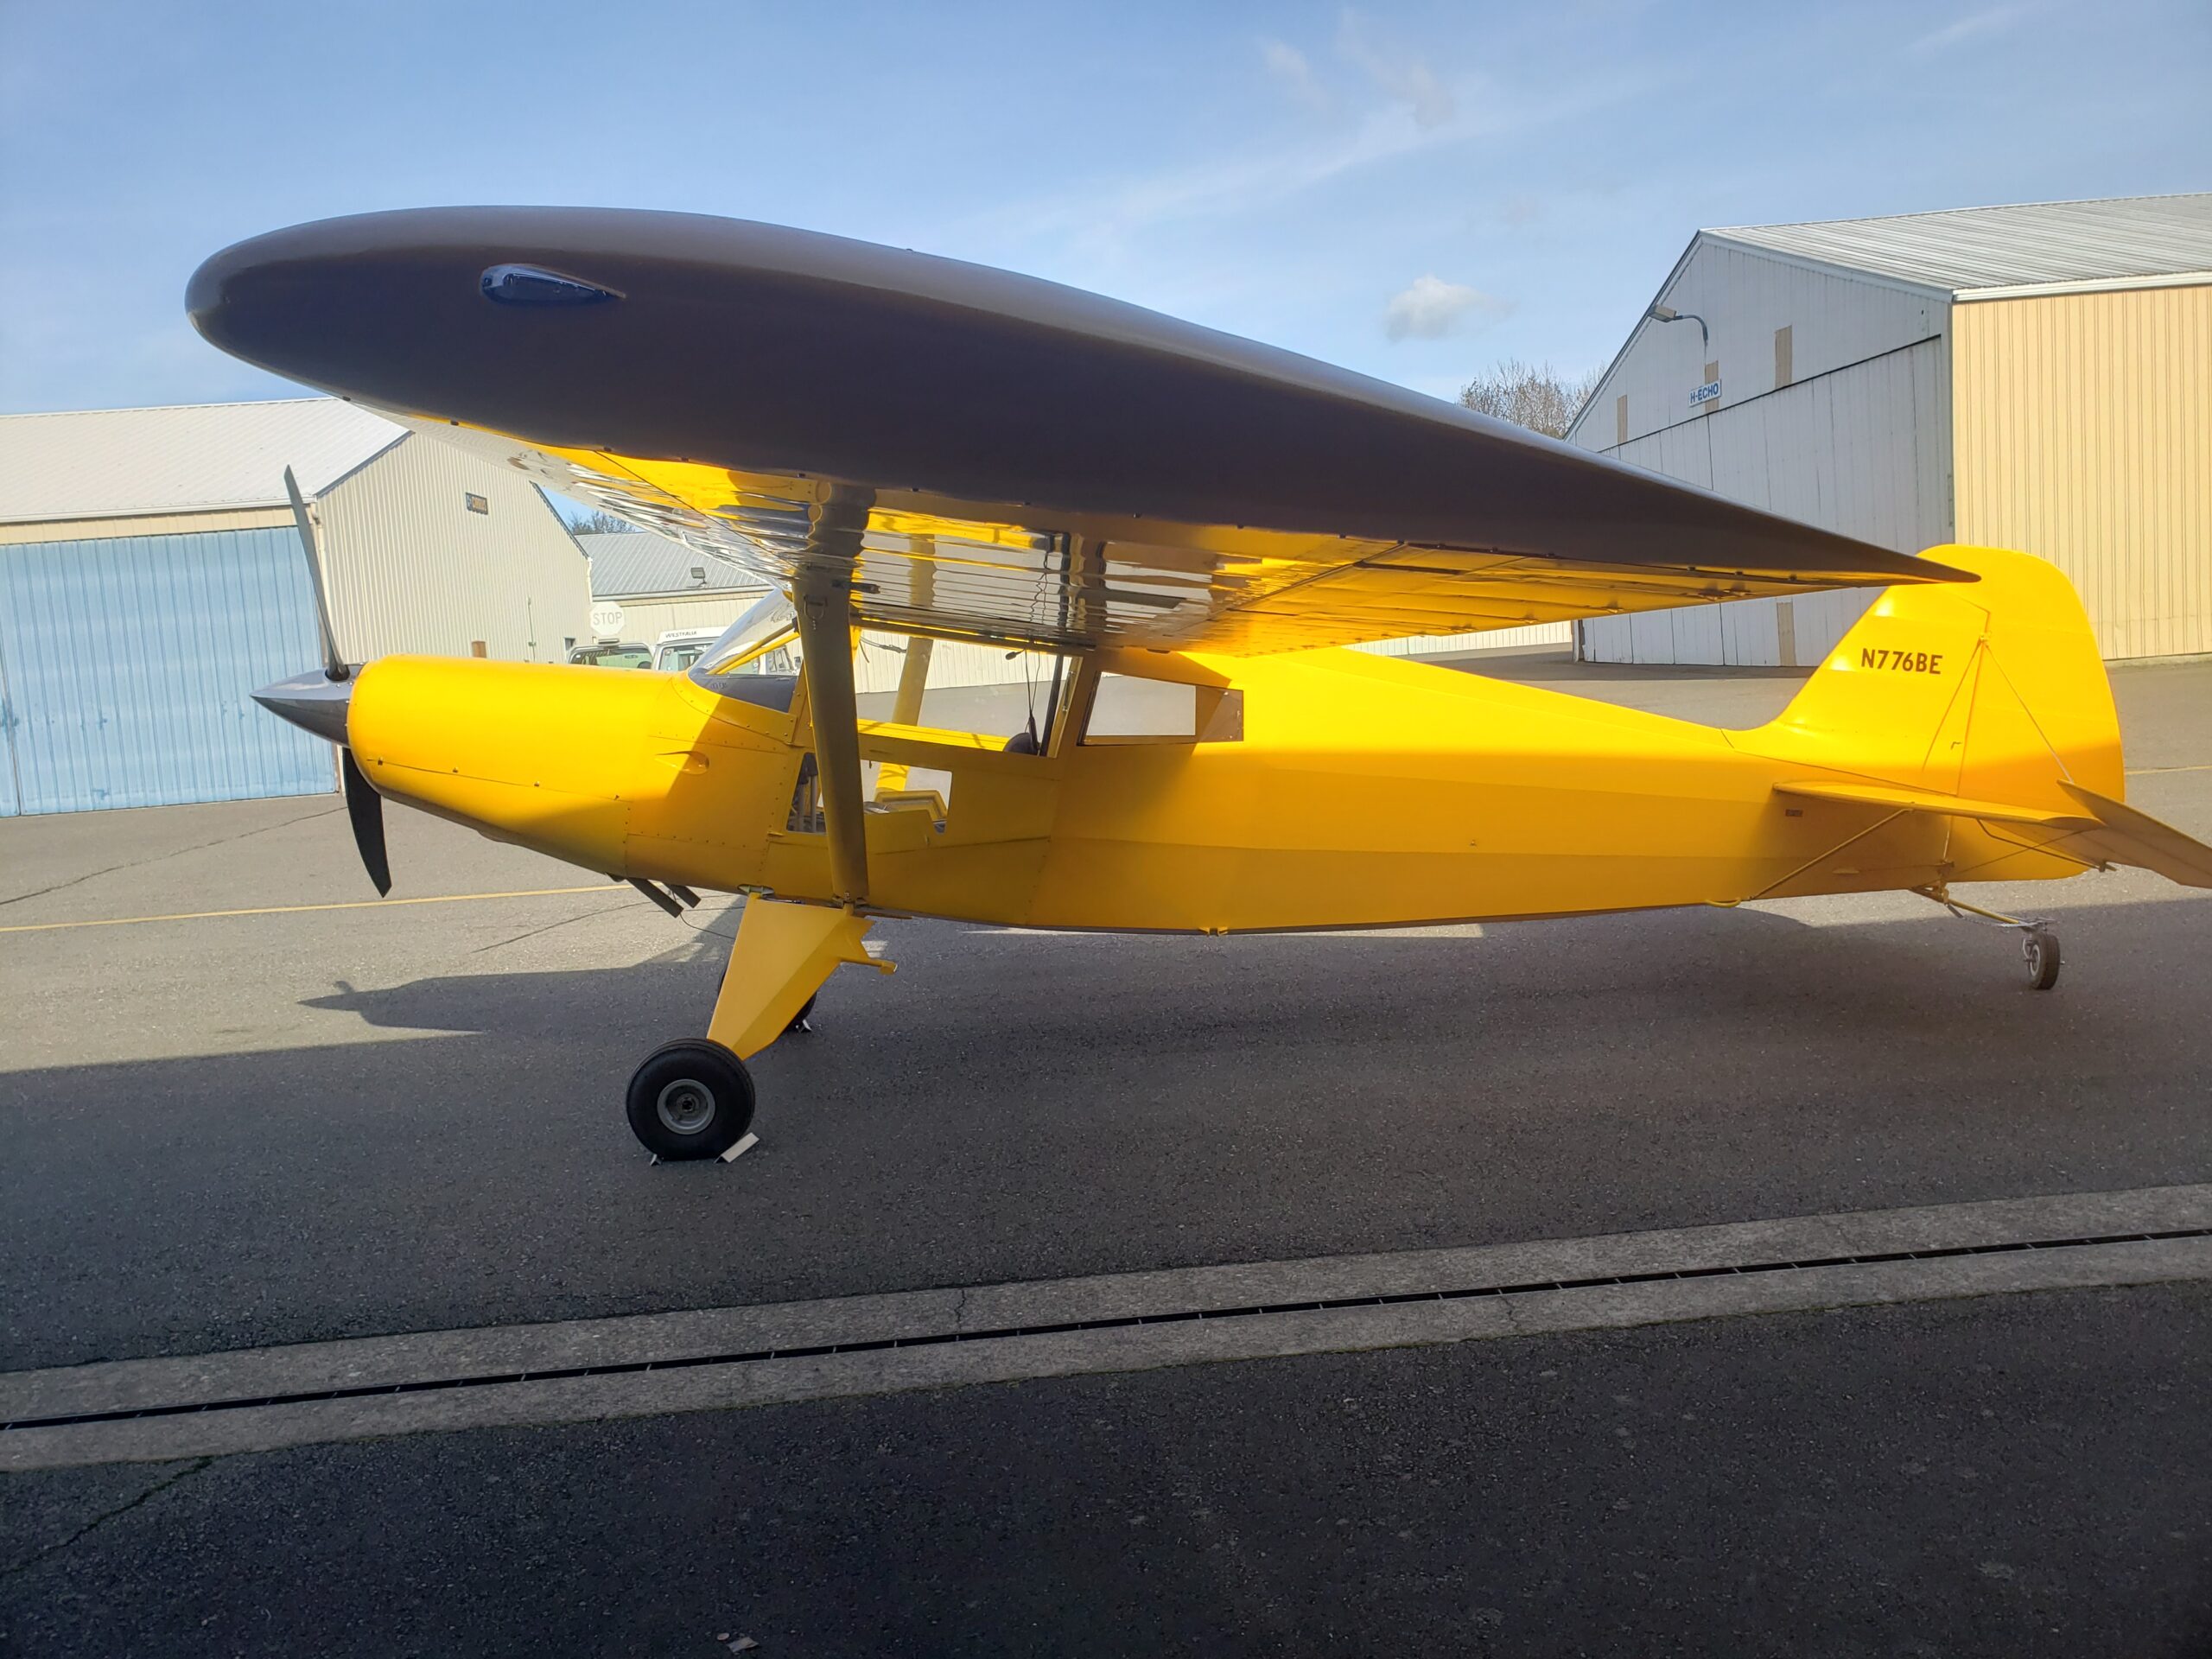
Bearhawk 4-Place N776BE First Flight in Washington

Source: 2024 Q4 Beartracks, John Reddick
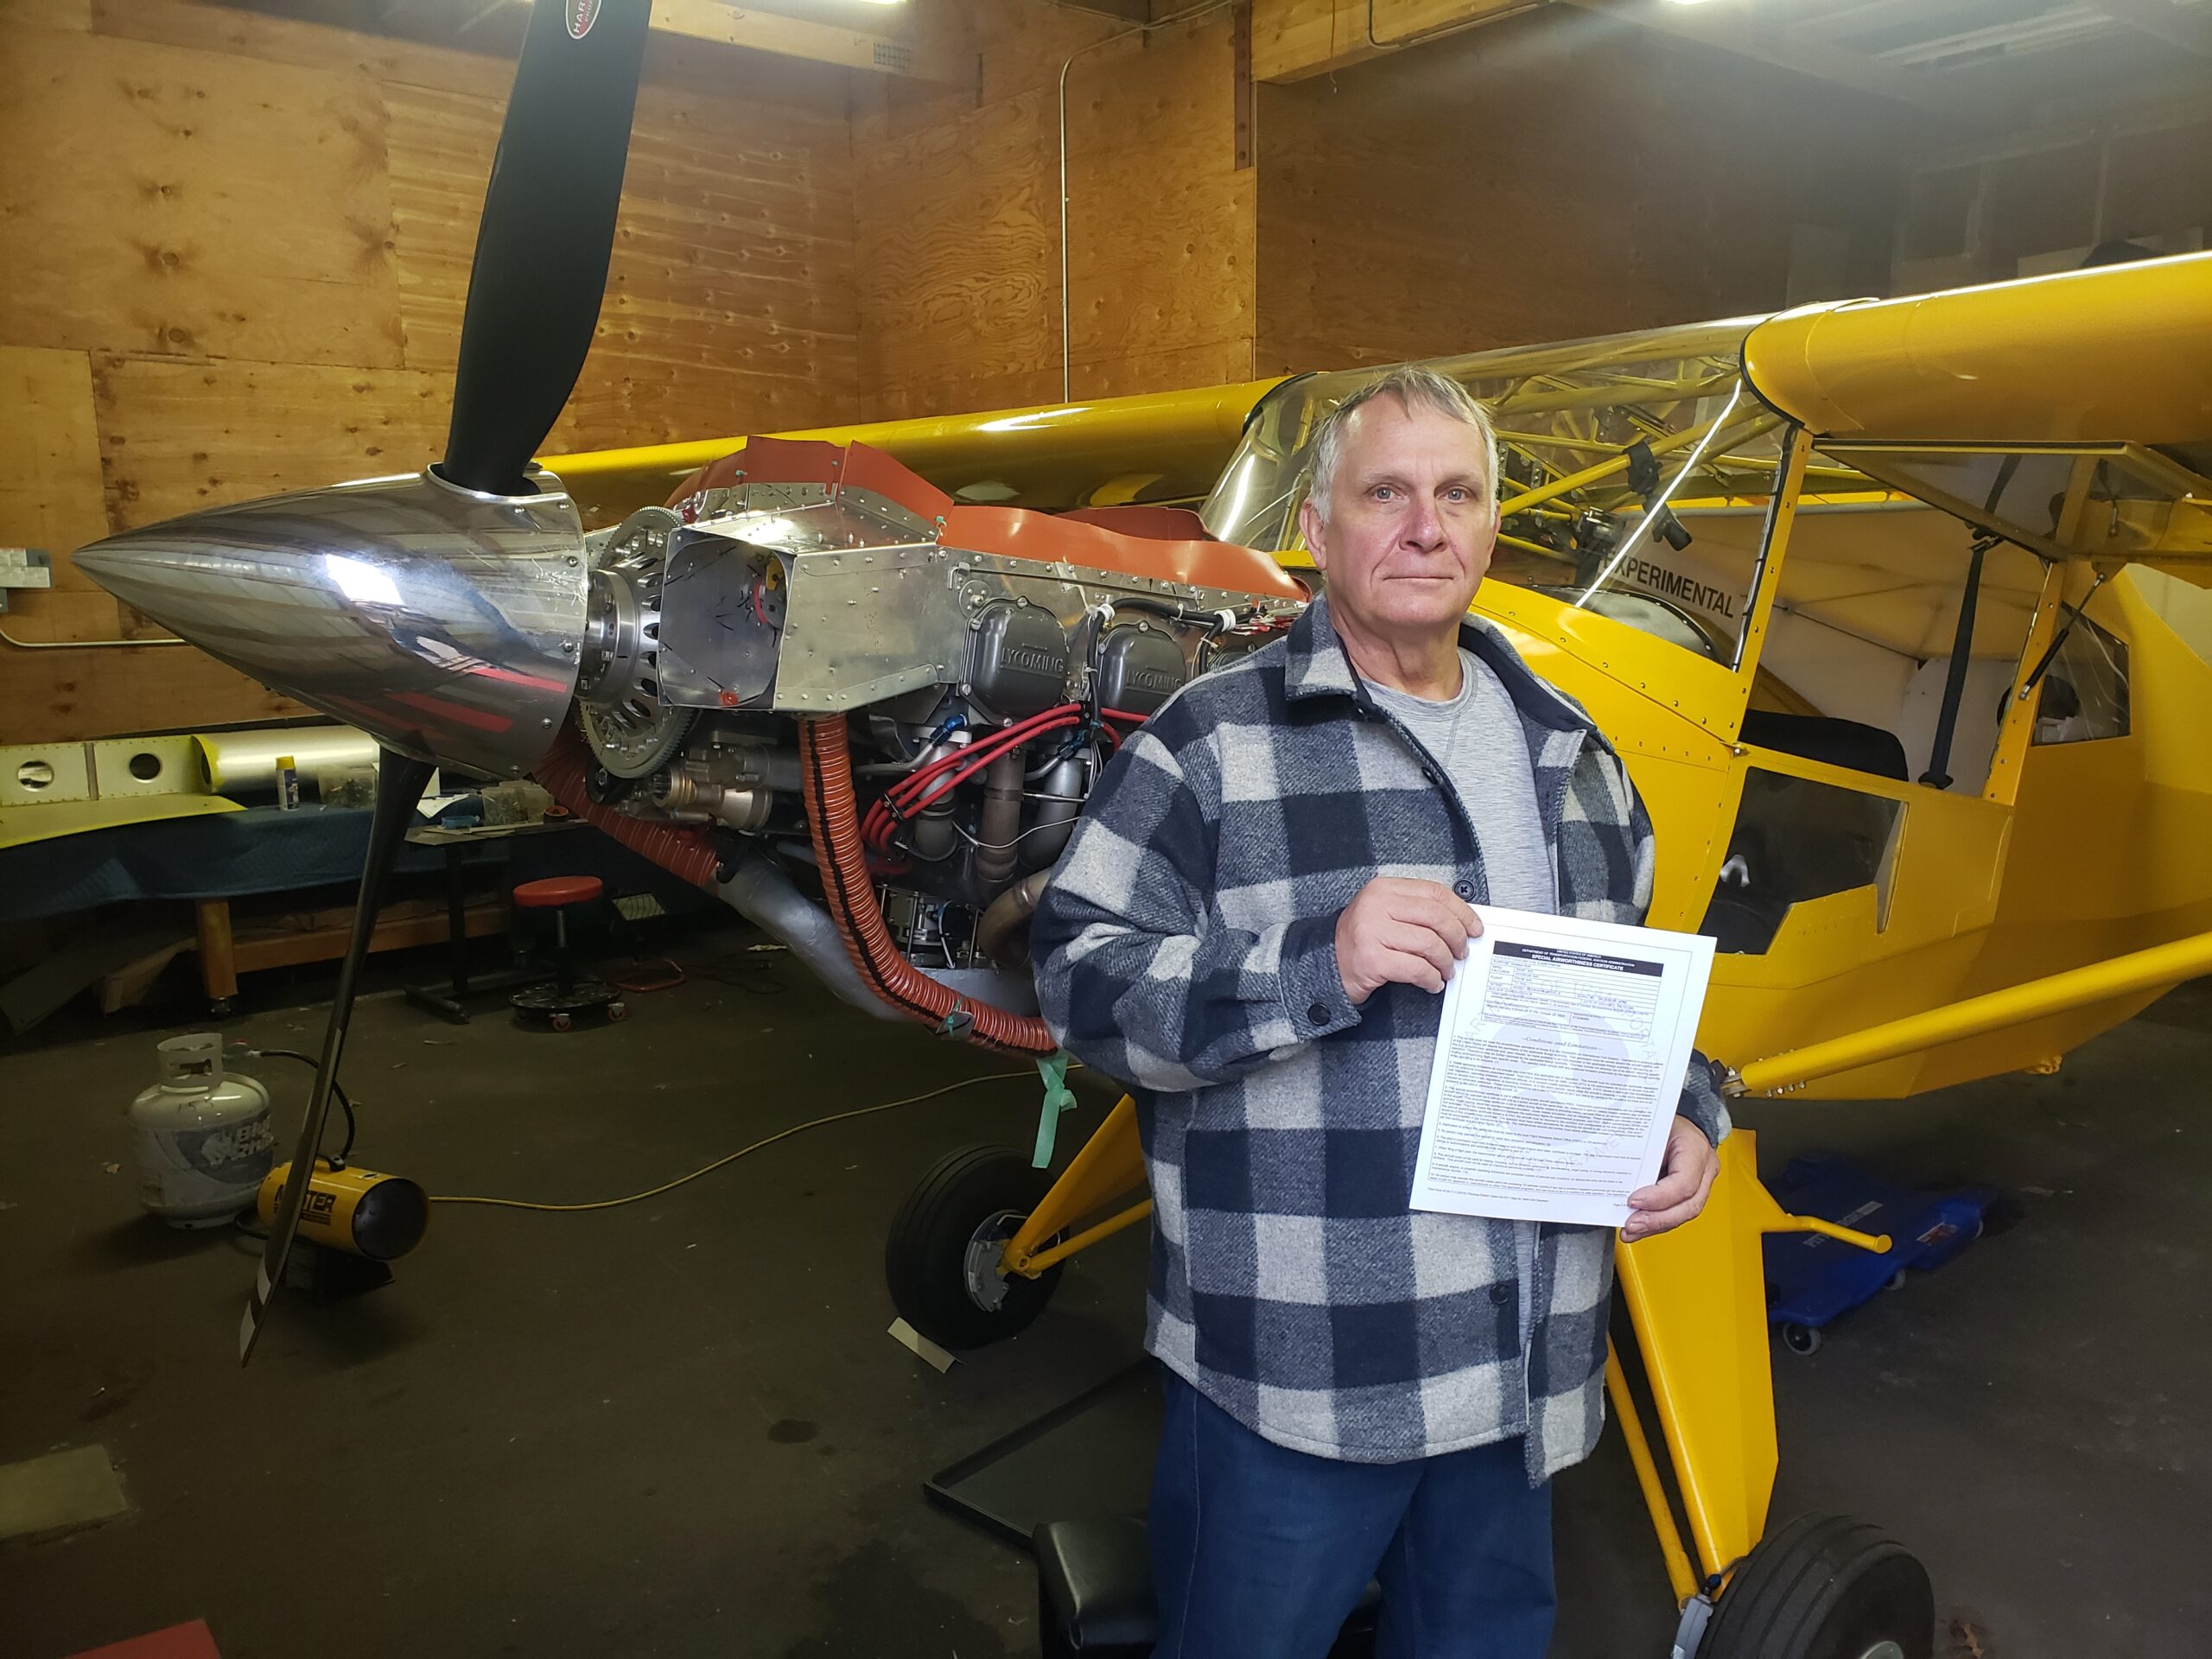
N776BE flew for the first time on Dec 6, 2024 after 6 1/2 years of on-and-off building. I actually only worked on it for 2 years and 4 months. I did numerous “off the ranch” things to the QB “B” model kit. All of that contributed to the extended build time. It was inspected by a DAR on October 30th, 2024.
I have about 5 hours flight time in 4 flights, most things working well. Sorting out a heavy left wing, and noise on the VHF com. The #6 cylinder gets hot pretty quick on climb out, despite it being 40-45 F outside. Other cylinders are fine in climb, and all are fine in cruise. Probably mislocated oil cooler flange (installer error). Other than that, going smoothly.
I think the two things that made the first flights much less stressful were 3.2 hours of transition training with Jared, and running the engine in on the ground for 2 hours (picture below). Both gave me a lot more confidence on the first flight.
My “off the ranch” mods were:
-Custom fold down instrument panel
-Composite tail fairing
-Electrical system
-SDS EFI/EI
-“Almost” 2 alternators
-“Almost” 2 batteries
The panel is a simple, single EFIS with a tablet, single com, and remote transponder. The EFI/EI turned a simple plane into a bit of a high school science project, wiring-wise. But I am most comfortable with EFI, and have done a huge amount of 12V wiring, including a business I had for 3 years. This may not be the best choice for someone who hates wiring.
I also used Oratex (which caused the composite tail fairing). If it lasts a long time I love it but it was tedious and time consuming to install.
Empty weight was 1403, CG was 7.1 inches (67 lbs on the tail). IO-540, 2 blade Trailblazer, full skylight. That weight is on small tires, and no back seat. That makes it the mid 1400’s with bigger tires and a back seat. I need 50 pounds of ballast with only front seat occupants.
It is exactly what I wanted when I ordered the kit. Like a lot of homebuilders, I always wanted to build an airplane. I even bought a set of plans when I was 15 or 16. I ended up flying for a living, and moved around so much I was never able to build one, until now.
Thanks to everyone on the forum for all the contributions. I knew what I was getting into before I bought the kit. Thanks to Jared for moderating a great forum, and Mark and Bob for the customer support.
I will put up some posts on my “off the ranch” stuff if anyone is interested.
EFII Experience in the Bearhawk Patrol

Source: 2018 Q2 Beartracks, Ed Meyer – Bearhawk Patrol N101EP (Co-owned with Paul Nowaske)
As promised on the Bearhawk Forum after a few requests, here is a write-up of our experience with the Electronic Fuel Injection and Ignition (EFII) system.
Why EFII
As a bit of background, I had a couple years of experience beginning 1969 where I worked in an FAA repair station overhauling Lycoming and Continental engines. My job was to overhaul accessories which included carburetors and magnetos. During this time I gained good understanding how they work and always thought that a carburetor in particular was a pretty crude way to get fuel into an engine. The one plus is that it is very simple. Later, in the ‘80s, automobiles transitioned almost exclusively to using electronic fuel injection and ignition and I observed that the reliability of our cars went up significantly without the frequent attention that the temperamental old systems required. We wanted something more modern for a new airplane.
The EFII system seemed to fill the bill. We opted for the dual system with many redundant components for reliability. We have two of most of the components in the system so that no single component failure will stop the engine. There are two crank position sensors, two MAP sensors, etc. driving two different ECUs. The ignition is driven by both systems much like dual mags where one set of plugs is fired by each. The injection is controlled by one system with a switch to change to the other if needed. This is always checked during run-up assure both are working properly.
Other considerations
The EFII system is 100% dependent on a steady supply of electricity for operation. Therefore we chose to install redundant electrical systems. We have the normal belt driven alternator plus a gear driven alternator on the vacuum pump pad. These each have an Earth-x battery. There is a main bus and an E-bus that each feed the redundant components of the EFII system. One of the optional components in the EFII system is a box called a Bus Manager that helps to insure power is always available. Given our dual electrical systems, the Bus Manager might not have been necessary but one feature included in it is automatic fuel pump switching if the main fails. I once had an engine failure in a low wing airplane which requires fuel pumping. After getting on the ground, luckily safely, and thinking about the events, I could not remember if the aux fuel pump had been turned on immediately. It was on after landing but I don’t know when it got turned on. Lots to think about when it got real quiet up front like where to land and such. The automatic switching appealed to me. This is checked at every engine start. When the system is first powered up, there is no fuel pressure so the Bus Manager switches to pump 2 automatically. Once the pressure comes up the selector switch can be set to number 2 then back to number 1, the main pump, it will stay on number one unless fuel pressure drops.
Installation
The EFII system has a good set of instructions for installation and we had little difficulty with following them. It required pulling the intake tubes from the engine and sending them in to have fittings welded on for the electronic injectors. (I understand the new System 32 EFII does not require this.) Also, the flywheel had to be sent to have a permanent magnet installed for the crankshaft position sensors to detect.
The EFII requires a fuel return line to be installed. We puzzled over this quite a bit to try and make this as simple as possible. Installation of a header tank was considered but rejected for a number of reasons. We finally decided to simply add a fuel fitting bung to each tank at about the center of the wing root rib lightening holes for easy access. A friend was a good aluminum TIG welder and did a first rate job on them. We opted for the duplex SPRL V4-4P fuel valve that includes left, right, both, and off settings for both the feed and return. Not knowing how much fuel returns, it seemed good to return it to the tank is comes from. I still do not know how much returns but I have since seen where some airplanes have return lines going to only one tank regardless of which is selected. This would be somewhat simpler than what we did but I would still want to know that the return volume is relatively small before I would opt for this.

We did have an issue installing the fuel valve. We had the lines all nicely run and hooked up and then during pressure testing it seemed the valve was not sealing as it should resulting in phone calls, emails, returning valve, etc. Turns out that we had installed it wrong! Somehow we had assumed the top section of the valve was the feed side and the bottom was the return. Not correct. After re-plumbing it was fine.
Our fuel system uses Bob’s design through the gascolator. Lines come from fore and aft of each tank to tee fittings inside the boot cowl then through the fuel selector valve to the gascolator. The EFII instructions state that a gascolator is “not required nor desired.” We chose to use it anyway for a couple reasons. It gives us a low point to sample the fuel for contaminants and it provides a screen ahead of the inline fuel filters that are supplied with the EFII system. One critique of inline fuel filters I have heard is that there is no way to tell if they are becoming plugged up. I think with the gascolator, if there were enough contaminants to be a problem they would show up there first.
After the gascolator, the fuel flows through the first inline filter then to the redundant fuel pumps which are under the floorboard near to the fuel valve. The pumps come mounted parallel in a manifold that has a single inlet and outlet. From there the fuel flows past the firewall to another large fine inline filter before going to the ‘rail’ which is hoses running to each injector in series. The picture below shows the secondary filter and fuel lines in-side fire sleeve running to #3 and #1 cylinders as well as the lower spark plug wires. From there a hose connects to the fuel pressure regulator which is mounted on the firewall. Then it returns to the fuel valve and finally back to the tank.

The ignition portion of the EFII installation is quite simple. The two coil packs need to be mounted and there were magneto cover plates provided that had mounting provisions for the coil packs. Crankshaft position sensors need to be installed near the flywheel on the front of the engine and the plug wires had to be made up to length but all the parts were provided. One of the advantages of the system is that it uses automotive spark plugs which are much less expensive than aviation plugs. Knowing we were going to use this system, we had Bob install cylinders set up for 14mm spark plugs when he built our engine. Even with the unshielded wires and plugs there is very little ignition noise in the radio. If I have the radio squelch open I can detect a small amount of noise that changes with the ignition checks during run-up.
Oxygen Sensor
One component that is separate from the EFII system but recommended is the installation of an O2 sensor and gauge for reading fuel/air mixture. In automobiles running unleaded fuel, the O2 sensor feeds back to the ECU so it can automatically adjust mixture for optimum. The EFII system does not use this feedback in order to maximize reliability since O2 sensors often fail, especially with leaded fuel. The sensor is mounted high in the exhaust only 3 or 4 inches from the cylinder head which is claimed to help it keep from fouling. So far so good on ours and I have heard of them going several hundred hours without problem. The mixture gauge, which gives a real time F/A ratio reading, is real nice to have especially when doing the initial setup of the system. In the picture at the right, the F/A mixture gauge is in the center above the EFII programmer with the mixture knob is to the right of it. The switch on the right is to select which ECU is controlling the injection with the 88 ECU normal. The key switch is left of the programmer.
Operation
The EFII system comes with a ‘programmer’ that provides the interface to adjust settings in the system. We opted to install the programmer in the instrument panel but it is not actually required during system operation. I have never changed any settings in flight and do not intend to. I have looked at some parameters occasionally but it is not easy to see in flight.
Before first engine runs, Robert Paisley, the man behind EFII, sent a set of values to update the default settings that were in the system. Robert spent 30 or 40 minutes on the phone with me describing what all the parameters are for and what settings I should change and what to be very careful of changing.
On first attempts at starting, it was somewhat slow to start. The system ECUs are identified and 71 and 88, which is a reference to the rotational reference of the crankshaft trigger sensors that drive them. It finally started by changing from 88, which is considered to main ECU, to 71 and adjusting the mixture knob richer. I later found that the selector switch was installed upside down, (amateur built you know) so it actually was on 88 when it started.

We ran it several times at various power settings looking at the mixture and adjusting until it was about right. This was done by setting the mixture knob until the mixture reading was about 12 to 1 then reading the percentage of knob adjustment on the programmer followed by changing mixture setting values for the various RPMs by an equivalent percentage and trying again to zero it in. This sounds like a lot of ground run time but it actually was not much.
I toyed with the idea of having someone with more recent experience than me make the first flight and there were volunteers willing. I opted to fly it myself mostly because of the EFII system being quite different and by now I un-derstood it better than anyone in the area. While flying I would carefully monitor mixture, adjust the mixture knob and then change settings back on the ground until it dialed in pretty well.
On early flights, the CHTs were a little high so we had to work on that. I think the biggest part of the fix was in-creasing the air outlet size at the bottom of the cowl and installing a lip. We also adjusted the baffles a little espe-cially right in front of #2 cylinder to allow more air to flow past the area that has very little cooling fins. One other change which seemed to help some was to change the timing a little at high power settings. This is also done from the programmer interface. I did not even open the cowling for this. It has settings that increase the timing up to 30 degrees before TDC above about 1500 RPMs. Additional settings retard it back a few degrees at high MAP. I in-creased these setting for a little more retard at high power. Especially for a new engine I would recommend that more retard is good at high power.
Normal Operations: Start-up begins with turn on of the fuel valve (the pump howls loudly if turned on before the fuel valve) followed by turning on the key (equivalent to master switch) which powers up the system. As previously mentioned fuel pump #2 comes on requiring the pump selector switch to be set to #2 then back to #1 which veri-fies the automatic switching function and verifies both pumps are operational. Once the EFIS boots up, I crack the throttle a bit and activate the starter switch. The starter can draw current from either battery or both and all this functionality came prewired with the Bus Manager. As it stands right now, when the engine is cold, I normally have to run the starter for a few seconds, pause a bit, and then activate the starter again and it fires right up. (I under-stand it is possible to update the firmware in order to be able to open the throttle a time or two the get the equiva-lent of an accelerator pump function providing a bit of prime.) If the engine has been run, even after several hours, it starts right away on the first try hot or cold. There are zero hot start issues.
Run-up includes an ignition check where power to each coil pack is turned off momentarily to ascertain that they are fully functional. There is no ‘mag’ drop when doing this. If anything there is a very slight increase in RPM. I suspect this might have something to do with flame propagation in the cylinders and the 1700 run-up RPMs. Also, momentarily switching from ECU 88 to ECU 71 during run-up verifies that ECU 71 system components all work properly. To shut down after flying: turn off the key. Just like a car. I normally turn off the fuel valve as well but having forgotten that a time or two created no issues other than some fuel migrating from one side to the other via the both setting of the fuel valve.
LOP Operation: With the EFII system it is easy to run well lean of peak. I am able to run it at about 16-17 to 1 and it still runs smooth. I can detect a slight power drop with it this lean but it stays smooth and CHTs drop about 20 degrees. According to Dynon, this is nearly 100 degrees LOP. I have thought about changing the settings for fuel flow to automatically lean like this at the RPMs I use for cruise which are generally anywhere from 2200 to 2400. I have been reluctant to do that because I am afraid that while increasing RPMs like starting takeoff, or going around, it might cause a stumble when going through these cruise RPMs. The benefit of this would be that the mix-ture knob could simply stay centered for all operations. Instead, for now at least, it is set to be equivalent to full rich when the knob is centered and when in cruise I can turn the knob to about the 10 o’clock position for LOP. This works easy and predictable. A good thing is that once set, it stays even when changing altitudes. A before landing checklist item is to reset the mixture knob back to center much like setting the mixture to rich for legacy systems.
Would I Recommend EFII? Yes. The engine runs very strong and smooth. I have no way of knowing how much power it is actually making but it feels strong and others have commented on the performance of the airplane. There is definitely a learning curve with the system. There is little doubt that it was somewhat more expensive than an old fashioned carburetor and magneto setup, especially with the addition of the second alternator and battery. Is it worth it? It was for us. I like it.
Robert Paisley adds: “Since Ed’s EFII installation, there has been a major update in the design of the EFII systems.
EFII is in the process of releasing all-new control electronics with many added features designed specifically for the needs of experimental aircraft. The updated EFII kit is called System32 – additional information can be found at www.flyefii.com.”

New Hot-Rod Bearhawk Patrol in Virginia

Source: 2014 Beartracks, Jared Yates
14q2oHatcher Ferguson and Don Aldridge have just completed their second Bearhawk Patrol, and it is a showcase of experience and ingenuity. The two built N22HD with performance in mind, and spared almost no expense. The fuselage is welded from a VR3 tubing kit, and the quick-build wings are from Bearhawk Aircraft. The engine started out as an ECI IO360, and now it flies as a fire-breathing 210HP example of “the best they could make it.”
Sky Dynamics of Moneta, Virginia modified the engine with a light-weight cold-air sump and induction system, lightweight flywheel, and 4-into-1 exhaust system. After the modifications Sky Dynamics ran the engine on their dyno to validate the performance gains. Two P-mags drive the electronic ignition system, and the fuel injection servo is from Don Rivera at Airflow Performance. Hatcher and Don Aldridge initially purchased a used Silverhawk fuel injection system on eBay, but the engine ran terribly with it. They took the servo down to Airflow Performance and found that it had been contaminated with water. Airflow Performance swapped out their servo for another, and now it runs beautifully. All of that power is turning an 80- inch carbon fiber Whirlwind prop, and Hatcher reports takeoff rolls consistently under 100 feet. Why did they install such a high performance engine? When I asked, the answer was along the lines of “to see if they could.”
Hatcher and Don know that the best way to further boost performance in an airplane with this type of hot-rod engine is to reduce weight. They considered weight savings in nearly every construction decision that they made. For example, they eliminated the skylight, rear seat throttle control and brakes, and the baggage door. They installed light-weight single puck brakes, used micro nutplates throughout, substituted #6 screws for #8 screws whenever possible, and minimized the size of welded tabs. The lightweight tailwheel assembly is Bob’s design, built by Eric at BHTailwheels.com. They redesigned the seats to reduce the width of the rear and increase the width of the front, and had a hot-rod shop shape the foam and sew the leather upholstery. The miniature Becker radio and transponder save a few pounds, as does the vacuum-pad alternator. The lithium battery saves approximately 15 pounds over a comparable Odyssey, but it still turns the engine over with plenty of gusto.14q2p
In some cases they added a little bit of weight to make the airplane more safe and functional. The LED lights and strobes give better inflight visibility to other airplanes, and allow for flights later into the evening when the flying is good. Hatcher says “they’re all LEDs, which hardly weigh or draw anything.” When that engine is running at full power and burning 17-18 gallons per hour, cooling is a concern. A cowl flap adds a little bit of weight but keeps temperatures normal. In the end, this airplane’s empty weight is 1168 pounds, 30 pounds lighter than their last.
A local expert helped fabricate a two-piece all fiberglass cowling. This doesn’t save any weight, but the new cowl is much easier to install and remove, and it has a more complex shape that reduces drag. The installed cowl is the third one made from the female mold. The first was two heavy, and they reduced the thickness of each of the next two. Hatcher speculates that they could save a few pounds by using carbon fiber instead of fiberglass, and fortunately they can use the same mold with carbon fiber to test that theory in the future.
What’s not to love about such an advanced flying machine? The paint, according to Don and Hatcher. Everything was going well as they applied the Polyfiber covering system to the powder-coated airframe. After they started painting top coats with the same Imron paint that they used on their blue Patrol, DuPont discontinued the product and they had to switch to the new “XL Pro.” The new product didn’t match the old product to their satisfaction, so they had to repaint several parts, at an estimated expense of 10-15 pounds. Hatcher says that he’s not satisfied with the way the paint turned out, but I’ve yet to meet an amateur airplane painter who will tell you he is. If the two fly it to Oshkosh next month as planned, I suspect that they won’t receive any complaints about it, especially if it is parked anywhere near mine!
The big question is, how does it fly? The specifics are still pending as they refine the calibration of their instruments. Hatcher reports that it handles just like their last Patrol, but has a much shorter takeoff, steeper climb, and faster cruise. They have only taken it on a few short trips, so they don’t have good cruise performance data yet. Hatcher says for local flights he uses about 13” MAP, 2300 RPM, and gets 100-110 miles per hour at 5.9 gallons per hour. If he runs the engine hard in level flight, his cruise speed begins to approach the realm of VNE, which is the main reason that their Patrol is a little bit slower than their RV10. Bob Barrows has flown the airplane and says that he likes the way it performs. Like most experimental airplanes, this new Patrol still has a few tweaks in the works. The static RPM is only around 2600, and Hatcher would like to gradually adjust it up to 2700. He would also like to fit a set of his giant wheel pants (for 6-8.50 tires) and build some fairings for the shock struts. I asked if they had kept track of how much they had spent on the project, and Don said “Yes, but we don’t discuss that!” with a laugh. Both are quite pleased with the way the airplane turned out, and I’m looking forward to seeing it in person!

Engine Choices Part V- Fuel Metering and Ignition

Source: 2002-Q4 Beartracks, Mike Meador and Bob Barrows
Sometimes it is difficult to put into words (particularly written words) that which you know. To transfer knowledge that has taken many years to acquire in a few short paragraphs is not a skill that I have mastered very well. I marvel at other writers’ ability to take a difficult subject and make it understandable to me. It would be easy to give yourself a list of part numbers and say “Here you go! Assemble it according to the manual and you should be OK.” Stuff made today is almost idiot-proof, but, I am an example that they are making better idiots every day. I thought that this series of articles would serve to show you how easy it is to put together your own engine. Instead it has served to be a list of generalizations that can only steer you in the right direction to a destination- mainly the perfect Bearhawk engine.

In this final installment, let’s discuss fuel delivery systems and various ways to light your fire.

As you already know, the Bearhawk will operate via gravity flow for a carburetor, so no fuel pump is needed. If a fuel injection (FI) system is desired you will need not one pump, but two: the mechanical pump attached to the engine, and an electrical boost pump for backup. FI systems are more expensive, and as a result of needed fuel pumps, weigh more than a carburetor. The main advantage of FI over carburetor (for the Bearhawk application) is the difficulty in developing intake, or carb ice. FI is expensive, and can run as much as $1000 more than a comparable carburetor, and that does not include the extra fuel pumps!

There is a middle ground between the two systems called a pressure carburetor. It requires a fuel pump but has a lot of the advantages of FI system that are not really needed on a Bearhawk. The ability to fly inverted is not something that I think you will need to be doing very much of anyway.

The ideal Bearhawk engine will take advantage of the “free” gravity flow and use a carburetor. The limitation of carb ice is something that you should have been trained to deal with in your flying lessons. There are devices that can warn you when ice is building up, or you can keep your manifold pressure gauge (if so equipped) in your instrument scan. A slow drop in manifold pressure during cruise indicates a building restriction due to possible carb ice. Most carburetors are shop rebuildable, where as the FI system needs very specialized tools and training to work on. Finally, the carburetor is the most cost-effective way to deliver the fuel/air mixture to the cylinders. We are in the business of keeping it simple, and carburetors do just that.

The final systems to consider are the ignition systems. Up until recently you really only had the choice as to what brand of magneto you wanted to install. There are now several different types of electronic and mechanical systems that you can choose from. There is a reason that the magneto has reigned supreme for nearly 100 years- it works. Any electronic ignition system (EIS) that you choose must have a built-in redundancy to prevent engine failure. The main disadvantage of the magneto is that once you have set your timing it is set for good regardless of power setting. With the exception of startup (due to impulse coupling) you are locked into the advance you set the mag at. This is where the EIS really prove their worth- variable timing. Another advantage of the EIS is a much hotter spark that results in an improved flame front and better fuel burn. Currently Unison Industries (Slick) is considered to have the most advanced EIS on the market.

The Slick system is actually two magnetos with a piggy-backed electronic ignition built in. In effect you have four ignition sources- sounds like a lot of sparks. The Slick system is certified and is available to home builders. There are at least two other non-certified EIS available. So far the results have been generally good, and that is promising. Most of the engines that we ship out of our shop that have an EIS also have one old-fashioned magneto for backup.

Another system that looks intriguing uses miniature catalytic converters to light off the fuel/air mixture; it has no moving parts. I’ll take a wait and see approach- in other words, you go first.

That about wraps up your Bearhawk engine. As you can see you have a bewildering number of choices. So I would like to present you with what I consider to be the perfect Bearhawk engine. The following listing has been worked up with the Bearhawk in mind:

  • Lycoming O-360 set up to burn auto fuel
  • Narrow Deck
  • Angle Valve Cylinders
  • Conical Mount
  • Rear Entry Oil Sump (with adapter)
  • Constant-Speed Prop Setup (need governor drive)
  • Rebuilt Bendix Magnetos
  • Rebuilt Carburetor
  • Maybe a Vac. Drive for a Mini Alternator
  • Aluminum-Steel Gear One Piece Oil Pump

This is nearly the exact engine on the prototype Bearhawk. It is relatively inexpensive to build and a brute of an engine. The angle-valve head keeps things cool during those long climb outs and the large valves let it breathe a lot easier.